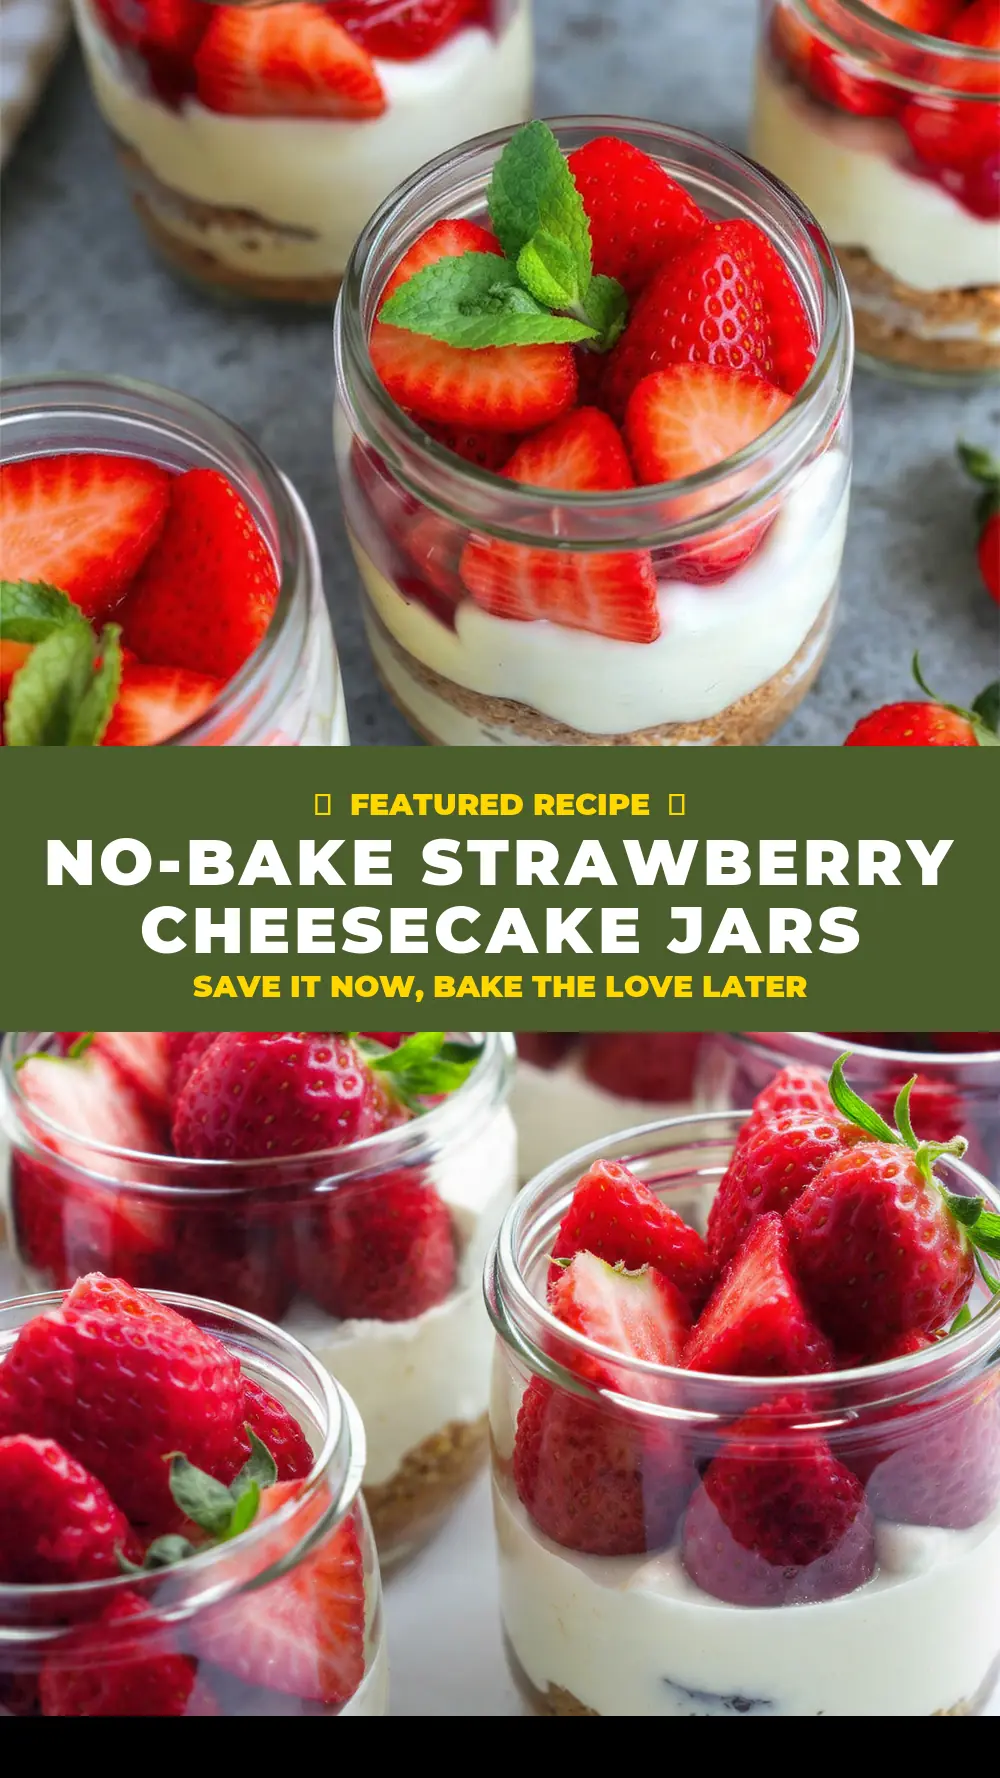
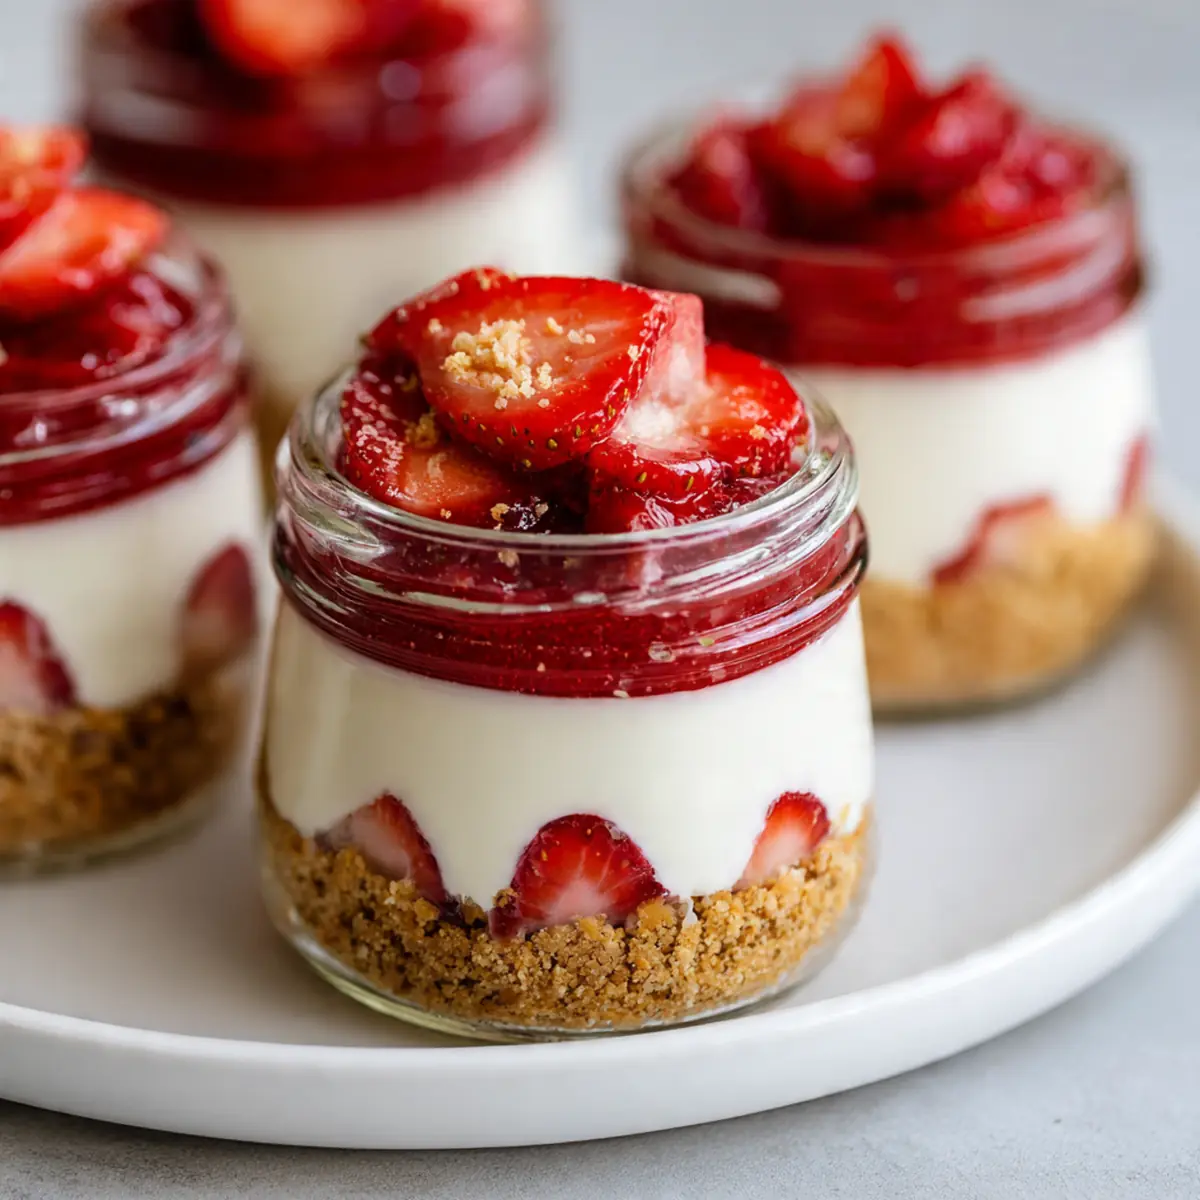
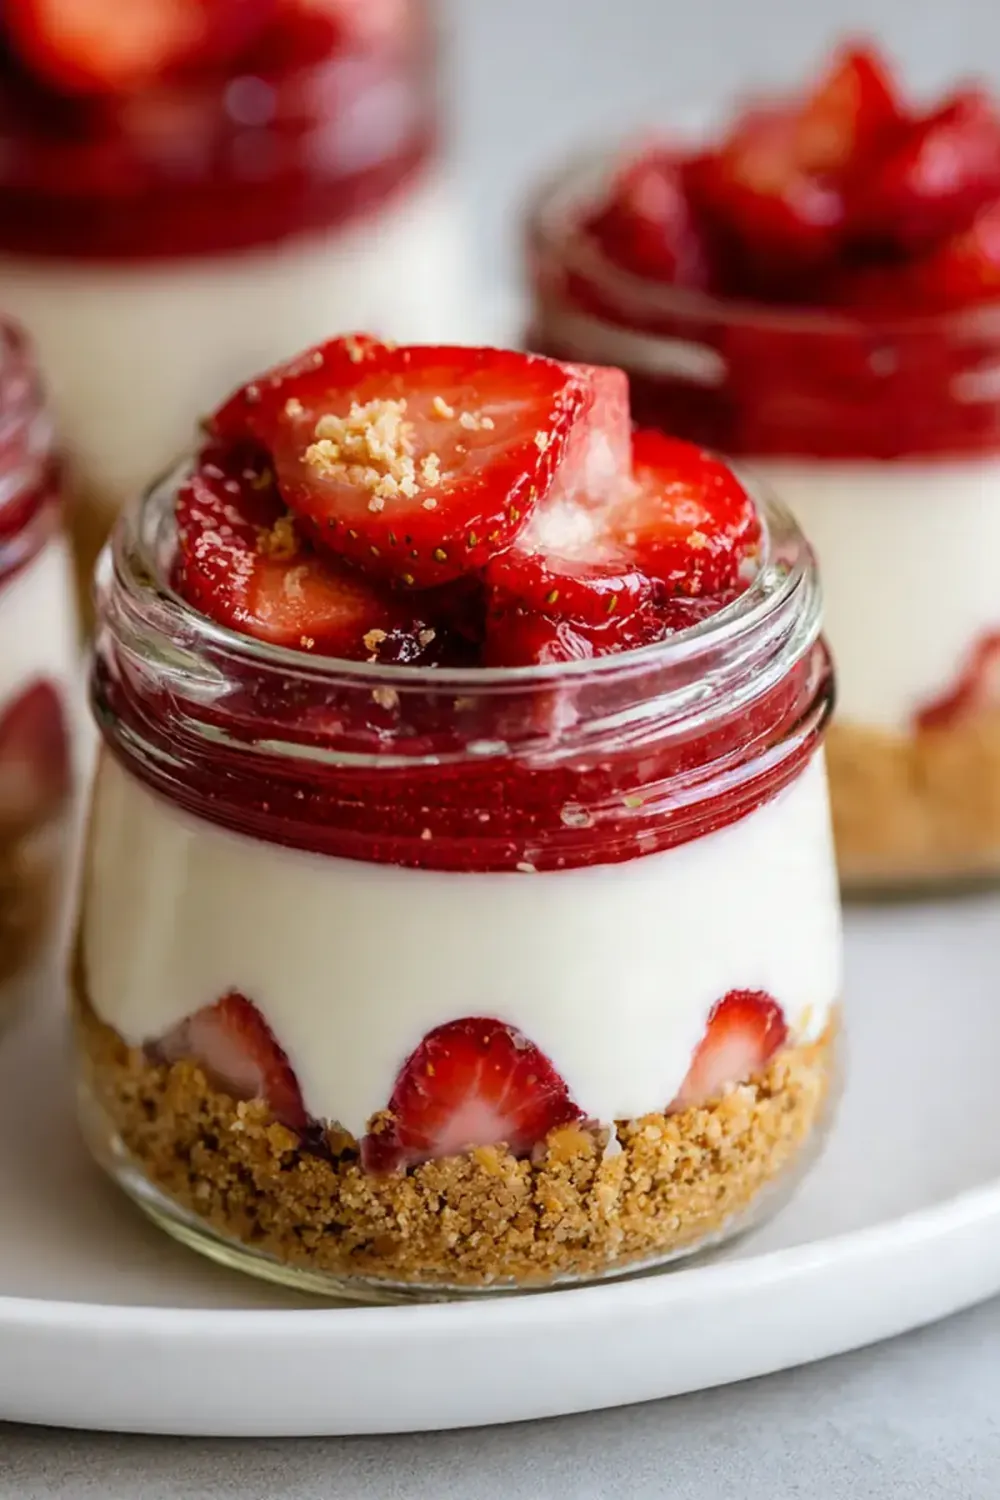
No-Bake Strawberry Cheesecake Jars
Welcome to my kitchen, lovely readers! Today, we’re diving into a truly delightful dessert that’s as refreshing as it is charming: No-Bake Strawberry Cheesecake Jars. These individual portions are a dream for entertaining or simply treating yourself to something special without the fuss of baking.
I remember the first time I whipped up a batch of these beauties. It was a scorching summer’s day, and the thought of turning on the oven was just unbearable. I had a punnet of ripe, ruby-red strawberries sitting on the counter, begging to be transformed into something spectacular. That afternoon, through a bit of experimentation and a lot of hungry taste-testers (my kids absolutely devour this every time I make it!), these No-Bake Strawberry Cheesecake Jars were born. They quickly became a staple in our household, a testament to how simple yet utterly satisfying a dessert can be when fresh ingredients are allowed to shine.
What I adore most about this recipe is its sheer versatility and the sheer joy it brings. There’s something so appealing about a dessert served in a jar – it feels a little bit whimsical, perfectly portioned, and wonderfully portable. This recipe is an absolute lifesaver for last-minute gatherings or when you just fancy a sweet treat that doesn’t require hours of preparation, offering a quick yet impressive option similar to the viral sensation of Cheesy Baked Feta Eggs (Viral Breakfast). With layers of crunchy biscuit base, creamy, tangy cheesecake filling, and vibrant strawberry topping, each spoonful is a little burst of summer sunshine. Let’s get cracking!
Recipe Overview
- Prep Time: 30 minutes
- Chill Time: 2-3 hours
- Total Time: 2 hours 30 minutes – 3 hours 30 minutes
- Servings: 6-8 jars
- Difficulty: Easy
Why You’ll Love This No-Bake Strawberry Cheesecake Jars
- Effortless Elegance: Achieve a sophisticated dessert presentation with minimal fuss, perfect for any occasion.
- No Oven Required: Keep your kitchen cool, especially during warmer months, as this recipe requires absolutely no baking.
- Customisable Portions: Served in individual jars, these cheesecakes are perfectly portioned and easy to transport for picnics or lunchboxes.
- Fresh & Fruity Flavour: The vibrant strawberry topping perfectly complements the rich, creamy cheesecake, offering a delightful balance of sweet and tangy.
- Make-Ahead Marvel: Prepare these jars a day in advance, allowing the flavours to meld beautifully and saving you time on the day of serving.
Ingredients You’ll Need
- 250g digestive biscuits
- 100g unsalted butter, melted
- 500g full-fat cream cheese, softened
- 150g icing sugar (powdered sugar), sifted
- 1 teaspoon vanilla bean paste (or alcohol-free vanilla extract)
- 300ml double cream (heavy cream)
- 400g fresh strawberries, hulled and sliced
- 50g caster sugar
- 1 tablespoon lemon juice, freshly squeezed
- A few fresh mint leaves, for garnish (optional)
Tip: Always ensure your cream cheese is at room temperature before you start. This makes it much easier to beat into a smooth, lump-free mixture, ensuring a silky-smooth cheesecake filling.
How to Make No-Bake Strawberry Cheesecake Jars
- Prepare the Biscuit Base: Place the digestive biscuits into a large zip-lock bag and crush them thoroughly with a rolling pin until fine crumbs are formed. You’ll hear a satisfying crunching sound as they break down. Alternatively, pulse them in a food processor until they resemble fine sand. Melt the butter gently in a small saucepan or microwave until it’s a shimmering, golden liquid. Pour the melted butter over the biscuit crumbs and mix well until every crumb is coated and the mixture looks like wet sand.
- Layer the Base: Divide the buttery biscuit mixture evenly among 6-8 small jars (about 200ml capacity each). Use the back of a spoon or a small pestle to press the crumbs down firmly into an even layer at the bottom of each jar. This ensures a stable, crunchy base. Once pressed, you should see a compact, golden-brown layer. Pop the jars into the fridge to chill while you prepare the filling.
- Whip the Cream Cheese Mixture: In a large mixing bowl, beat the softened cream cheese with the sifted icing sugar and vanilla bean paste using an electric mixer on medium speed. Continue beating for 2-3 minutes until the mixture is light, fluffy, and a pale, uniform cream colour, with no lumps visible. Scrape down the sides of the bowl to ensure everything is well incorporated.
- Fold in the Double Cream: In a separate bowl, whip the double cream until it forms soft peaks. You’ll notice the cream becoming visibly thicker and aerated, holding its shape gently. Carefully fold the whipped cream into the cream cheese mixture using a spatula. Use a gentle, lifting motion to combine them, preserving the airiness of the whipped cream. The mixture should become even lighter in colour and have a wonderfully smooth, cloud-like texture.
- Fill the Jars: Spoon or pipe the cheesecake filling into the chilled jars, on top of the biscuit base. Fill them nearly to the top, leaving about 2-3 cm for the strawberry topping. Smooth the top gently with the back of a spoon. The filling should look creamy white and perfectly smooth. Return the filled jars to the fridge to chill for at least 2 hours, or until the filling is firm to the touch and holds its shape when gently pressed.
- Prepare the Strawberry Topping: While the cheesecakes are chilling, prepare your topping. In a small saucepan, combine the sliced strawberries, caster sugar, and lemon juice. Cook over a medium heat, stirring occasionally, for about 5-7 minutes. The strawberries will soften and release their juices, creating a vibrant, glossy, ruby-red sauce, and you’ll smell their sweet, summery aroma filling your kitchen. You can leave some strawberry chunks for texture or mash them slightly with a fork for a smoother consistency. Let the topping cool completely.
- Assemble and Serve: Once the cheesecake filling is firm and the strawberry topping is cool, spoon a generous amount of the strawberry mixture over the top of each cheesecake jar. The bright red of the strawberries will pop beautifully against the creamy white filling. Garnish with a fresh mint leaf if desired. Serve immediately or keep chilled until ready to enjoy.
Tips From My Kitchen
- Room Temperature Cream Cheese is Key: This is perhaps the most crucial tip for a smooth cheesecake. If your cream cheese is cold, it will be lumpy and difficult to incorporate fully with the sugar and vanilla, resulting in a textured, rather than silky, filling. Take it out of the fridge at least an hour before you plan to start, or for a quicker method, unwrap it and place it in a bowl of warm (not hot) water for 10-15 minutes. This ensures a consistently creamy and lump-free cheesecake.
- Don’t Over-Whip the Double Cream: When whipping the double cream, stop as soon as it forms soft peaks. If you over-whip it to stiff peaks, it will be harder to fold into the cream cheese mixture without deflating the air, which can lead to a denser cheesecake. The goal is light and airy, so pay close attention to the texture as you’re whipping.
- Gentle Folding Technique: When combining the whipped cream with the cream cheese mixture, use a spatula and a gentle folding motion. Cut down through the middle of the mixture, scoop up from the bottom, and fold it over the top. Rotate the bowl as you go. This technique preserves the air incorporated into the whipped cream, which is vital for the light, fluffy texture of a no-bake cheesecake. Vigorous mixing will knock out the air and result in a heavier filling.
- Chill Time is Non-Negotiable: While it’s tempting to dive in early, the chilling time is essential for the cheesecake to set properly. The fats in the cream cheese and double cream need time to firm up in the cold. A minimum of 2-3 hours is recommended, but overnight is even better for the firmest set and best flavour development. If you try to serve it too early, you might end up with a runny, disappointing mess.
- Adjust Strawberry Sweetness to Taste: The sweetness of strawberries can vary greatly depending on their ripeness and the season. Taste your strawberries before making the topping. If they are particularly tart, you might want to add a little more caster sugar to the saucepan. Conversely, if they are very sweet, you might reduce the sugar slightly. This allows you to tailor the topping perfectly to your preference and the fruit’s natural flavour.
Common Mistakes to Avoid
- Not Chilling the Base Sufficiently: If your biscuit base isn’t chilled, it won’t be firm enough and can crumble and mix into the cheesecake filling when you add it. Ensure the jars with the pressed biscuit base spend at least 15-20 minutes in the fridge to set properly before adding the cream cheese layer.
- Over-mixing the Cream Cheese Filling: Once the cream cheese, icing sugar, and vanilla are combined, and especially after the whipped cream is folded in, avoid over-mixing. Too much agitation can break down the structure of the cream cheese and deflate the whipped cream, leading to a thinner, less stable filling that won’t set as well.
- Skipping the Rest Time: The rest time (chilling) is crucial for a no-bake cheesecake. It allows the fats in the cream and cream cheese to solidify, giving the cheesecake its characteristic firm, yet creamy, texture. Skipping this or shortening it significantly will result in a soft, runny dessert that lacks the desired consistency.
Delicious Variations to Try
- Lemon & Raspberry Zest: For a zesty twist, add the finely grated zest of one lemon to the cream cheese mixture, and swap the strawberries for fresh raspberries. The tartness of the raspberries with the lemon zest creates a wonderfully refreshing combination.
- Chocolatey Crunch: Replace the digestive biscuits with chocolate sandwich biscuits (like Oreos) for the base. For the topping, drizzle with a rich chocolate sauce instead of fruit, or add some chocolate shavings.
- Tropical Mango & Coconut: For an exotic flavour, use a base of crushed ginger biscuits. Mix a tablespoon of desiccated coconut into the cream cheese filling, and top with a purée of fresh mango, perhaps with a tiny hint of lime.
What to Serve With No-Bake Strawberry Cheesecake Jars
- A cup of freshly brewed English breakfast tea or a fragrant Earl Grey.
- A light, refreshing sparkling water with a slice of lemon.
- Alongside a summer fruit platter for an extra burst of freshness.
- These jars are delightful on their own, but a tiny sprig of fresh mint or a scattering of toasted flaked almonds can elevate them further.
Frequently Asked Questions
No-Bake Strawberry Cheesecake Jars
Ingredients
Method
-
Prepare the Biscuit Base: Place the digestive biscuits into a large zip-lock bag and crush them thoroughly with a rolling pin until fine crumbs are formed. You’ll hear a satisfying crunching sound as they break down. Alternatively, pulse them in a food processor until they resemble fine sand. Melt the butter gently in a small saucepan or microwave until it’s a shimmering, golden liquid. Pour the melted butter over the biscuit crumbs and mix well until every crumb is coated and the mixture looks like wet sand.
-
Layer the Base: Divide the buttery biscuit mixture evenly among 6-8 small jars (about 200ml capacity each). Use the back of a spoon or a small pestle to press the crumbs down firmly into an even layer at the bottom of each jar. This ensures a stable, crunchy base. Once pressed, you should see a compact, golden-brown layer. Pop the jars into the fridge to chill while you prepare the filling.
-
Whip the Cream Cheese Mixture: In a large mixing bowl, beat the softened cream cheese with the sifted icing sugar and vanilla bean paste using an electric mixer on medium speed. Continue beating for 2-3 minutes until the mixture is light, fluffy, and a pale, uniform cream colour, with no lumps visible. Scrape down the sides of the bowl to ensure everything is well incorporated.
-
Fold in the Double Cream: In a separate bowl, whip the double cream until it forms soft peaks. You’ll notice the cream becoming visibly thicker and aerated, holding its shape gently. Carefully fold the whipped cream into the cream cheese mixture using a spatula. Use a gentle, lifting motion to combine them, preserving the airiness of the whipped cream. The mixture should become even lighter in colour and have a wonderfully smooth, cloud-like texture.
-
Fill the Jars: Spoon or pipe the cheesecake filling into the chilled jars, on top of the biscuit base. Fill them nearly to the top, leaving about 2-3 cm for the strawberry topping. Smooth the top gently with the back of a spoon. The filling should look creamy white and perfectly smooth. Return the filled jars to the fridge to chill for at least 2 hours, or until the filling is firm to the touch and holds its shape when gently pressed.
-
Prepare the Strawberry Topping: While the cheesecakes are chilling, prepare your topping. In a small saucepan, combine the sliced strawberries, caster sugar, and lemon juice. Cook over a medium heat, stirring occasionally, for about 5-7 minutes. The strawberries will soften and release their juices, creating a vibrant, glossy, ruby-red sauce, and you’ll smell their sweet, summery aroma filling your kitchen. You can leave some strawberry chunks for texture or mash them slightly with a fork for a smoother consistency. Let the topping cool completely.
-
Assemble and Serve: Once the cheesecake filling is firm and the strawberry topping is cool, spoon a generous amount of the strawberry mixture over the top of each cheesecake jar. The bright red of the strawberries will pop beautifully against the creamy white filling. Garnish with a fresh mint leaf if desired. Serve immediately or keep chilled until ready to enjoy.
Notes
And there you have it, lovely bakers and dessert enthusiasts! My No-Bake Strawberry Cheesecake Jars, a testament to simple ingredients coming together to create something truly magical. I stumbled upon this combination by accident, and it’s been a hit ever since, proving that sometimes the best recipes are the ones that save you time without compromising on flavour. I hope you enjoy making and, more importantly, devouring these delightful treats as much as my family and I do. Don’t forget to let me know in the comments below how your jars turned out and if you tried any delicious variations!