Waffles Recipe Fluffy Homemade Breakfast
There’s something uniquely comforting about the aroma of freshly cooked waffles wafting through the house on a weekend morning. It signals a slow start, a pause from the usual rush, and the promise of something truly delicious. For years, my own attempts at homemade waffles were… average. They were often a bit dense, a bit chewy, and never quite had that incredible crisp-on-the-outside, fluffy-on-the-inside texture I was chasing. This waffles recipe is the culmination of all that trial and error. I’ve been making this for over 5 years, and it never disappoints.
What sets this recipe apart is a simple, yet crucial, technique: separating the eggs. By whisking the egg whites to stiff peaks and folding them into the batter, we create a structure that is unbelievably light and airy. The waffles puff up beautifully in the iron, developing deep pockets that are just begging to be filled with melting butter and pools of maple syrup. The batter itself has a rich, slightly buttery flavour, scented with a good measure of vanilla extract.
This is the breakfast recipe we turn to for lazy Sunday mornings, special birthday breakfasts, or even those fun ‘breakfast-for-dinner’ nights. It’s a recipe that always gets compliments and feels like a genuine treat, yet it comes together with surprising ease.
Recipe Overview
This recipe produces classic Belgian-style waffles that are wonderfully light and crisp. The key is aerating the batter by folding in stiffly beaten egg whites. After testing many recipes, I found this step is non-negotiable if you want that signature fluffy interior. The flavour is rich and vanilla-forward, a perfect canvas for all your favourite toppings.
- Prep Time: 15 minutes
- Cook Time: 15 minutes
- Total Time: 30 minutes
- Servings: 4 people (makes approx. 8 waffles)
- Difficulty: Medium
Why You’ll Love This Waffles Recipe
- Incredible Texture: The combination of the whipped egg whites and baking powder creates a waffle that is genuinely crisp on the outside while remaining tender and cloud-like within.
- Ready in about 30 minutes: From getting the bowls out of the cupboard to sliding the first hot waffle onto a plate, the whole process is satisfyingly efficient.
- A Versatile Base: This batter is a fantastic starting point. You can add mini chocolate chips, a handful of fresh blueberries, or a dash of citrus zest to customise it to your liking.
- Works beautifully for a special brunch: It’s the kind of breakfast that feels special enough for guests or a celebratory morning without requiring hours in the kitchen.
- Family Tested: My kids absolutely adore these waffles. It’s the one breakfast recipe they request for their birthdays, and they love helping to whisk the ingredients.

Ingredients You’ll Need
We’re using simple pantry staples here, but the quality of each one matters. I find that using proper unsalted butter gives a much cleaner, richer flavour than margarine or baking spreads. For the vanilla, a good quality extract like Nielsen-Massey makes a noticeable difference.
- 250g plain flour
- 2 tablespoons caster sugar
- 2 teaspoons baking powder
- ½ teaspoon salt
- 2 large free-range eggs, separated
- 450ml whole milk
- 115g unsalted butter, melted and cooled slightly
- 1 teaspoon vanilla extract
Marcus’s Tip: Don’t be tempted to use skimmed or semi-skimmed milk. The fat content in whole milk is essential for creating a tender crumb and a richer, more satisfying flavour in your waffles.
How to Make This Waffles Recipe
The process is straightforward, with the most important part being the gentle folding of the egg whites. Take your time with that step, and you’ll be rewarded with the best waffles you’ve ever made at home.
- Preheat and Prepare: Turn on your waffle iron to preheat according to the manufacturer’s instructions. In a large mixing bowl, whisk together the plain flour, caster sugar, baking powder, and salt. Creating a well in the centre can make the next step a little easier.
- Mix the Wet Ingredients: In a separate medium-sized bowl, whisk the two egg yolks until they are pale and slightly frothy. Whisk in the whole milk, the slightly cooled melted butter, and the vanilla extract until everything is well combined.
- Combine Wet and Dry: Pour the wet mixture into the well of the dry ingredients. Whisk everything together until it is *just* combined. I find that it’s crucial not to overmix here; a few small lumps in the batter are perfectly fine and actually desirable. Set the batter aside for a moment.
- Whip the Egg Whites: In a clean, dry bowl (I prefer metal or glass), use an electric hand mixer or a stand mixer to whisk the two egg whites. Start on a low speed and gradually increase to high. Continue whisking for 3-4 minutes, or until stiff peaks form. This means when you lift the beaters out, the peak of egg white holds its shape without flopping over.
- Fold in the Whites: Take about one-third of the whipped egg whites and gently fold them into the batter using a spatula. This lightens the batter, making it easier to incorporate the rest. Add the remaining egg whites and fold gently until just combined. You want to see some streaks of white remaining – be careful not to deflate all that lovely air you just created.
- Cook the Waffles: Lightly grease your preheated waffle iron if required. Ladle the recommended amount of batter onto the iron (check your manual, but it’s usually around 120-180ml per waffle). Close the lid and cook for 4-6 minutes, or until the waffle is a deep golden brown and crisp. The steam will have mostly stopped coming out of the sides.
- Keep Warm and Serve: Carefully remove the cooked waffle and place it on a wire rack set inside a baking sheet in a low oven (around 100°C) to keep warm and crisp while you cook the remaining batter. Serve hot with your favourite toppings.
Tips From My Kitchen
- Waffle Iron Temperature is Key: A properly hot iron is essential for a crisp exterior. The batter should sizzle as soon as it hits the surface. If your iron has a temperature setting, aim for a medium-high heat.
- The Secret is Folding, Not Stirring: I learned that the difference between dense waffles and light ones is all in this technique. When you fold, you use a spatula to cut down through the middle of the batter, scrape along the bottom, and bring it up and over the top. This gently incorporates the egg whites without knocking out the air. For a great visual guide on this technique, you can check out many resources like Serious Eats.
- Make-Ahead Batter: You can prepare the batter (up to the point before folding in the egg whites) the night before. Cover and refrigerate the mixed wet and dry components separately. In the morning, let the wet mix come to room temperature for 20 minutes, combine, then whip and fold in your egg whites just before cooking.
- Storing and Reheating: Leftover waffles can be stored in an airtight container in the fridge for 2-3 days. The absolute best way to reheat them is in a toaster or under a grill; they become wonderfully crisp again, far better than in a microwave which can make them soft.
Common Mistakes to Avoid
- Overmixing the Batter: When you combine the wet and dry ingredients, mixing too vigorously develops the gluten in the flour. This is great for bread, but it results in tough, chewy waffles. Mix only until you no longer see dry streaks of flour.
- Under-whipping the Egg Whites: If your egg whites are only at the ‘soft peak’ stage (where the peaks flop over), they won’t have enough structure to lift the batter. Make sure they are stiff and glossy before you start folding.
- Skipping the Cooled Butter: Adding hot, freshly melted butter to the egg yolk mixture can scramble the eggs. Let it cool for a few minutes on the counter until it’s just warm to the touch before whisking it in.
Delicious Variations to Try
While the classic recipe is fantastic on its own, it’s also fun to mix things up. Here are a few variations we enjoy at home.
- Buttermilk Waffles: For a tangy flavour, replace the whole milk with an equal amount of buttermilk. The acidity also reacts with the baking powder to give the waffles an extra lift.
- Chocolate Chip & Orange Waffles: Fold 100g of dark chocolate chips and the finely grated zest of one orange into the final batter. The combination is divine.
- Savoury Herb & Cheese Waffles: Omit the sugar and vanilla. Add 80g of grated mature cheddar, 1 tablespoon of finely chopped chives, and a pinch of black pepper to the batter. These are excellent served with a fried egg and bacon, and feel like a more substantial meal, similar to my Creamy Chicken and Rice.
What to Serve With This Waffles Recipe
The beauty of waffles is their versatility. They can be a simple breakfast or a truly decadent dessert.
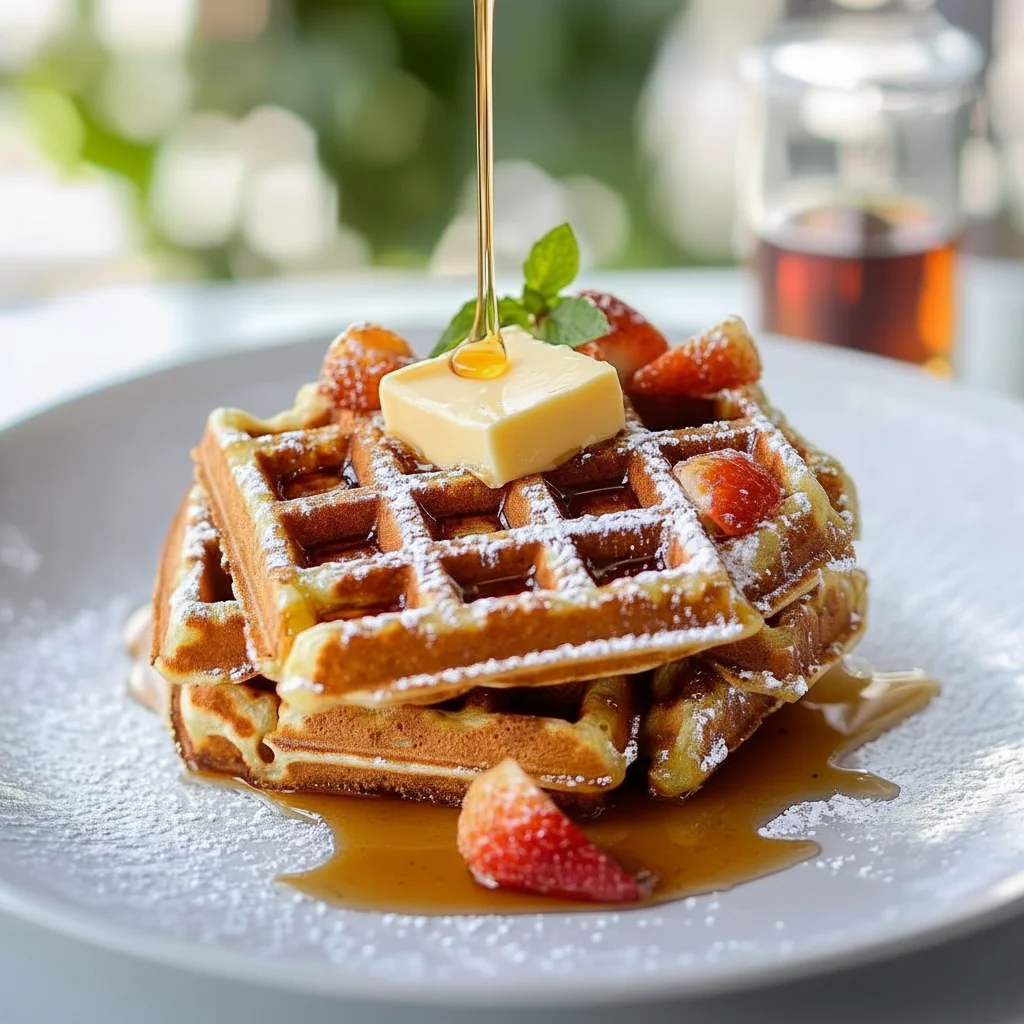
- The Classic Trio: You simply cannot beat a pat of good salted butter melting into the wells, a generous pour of pure maple syrup, and a handful of fresh berries like raspberries or blueberries.
- Dessert Style: For a real treat, serve a warm waffle with a scoop of quality vanilla bean ice cream, a drizzle of hot fudge sauce, and a dollop of whipped cream. It’s a fun alternative to something like my Giant Skillet Cookie.
- Weekend Brunch Spread: Serve alongside crispy bacon, scrambled eggs, and a fresh fruit salad for a complete and satisfying brunch menu.
Frequently Asked Questions
Waffles Recipe
Ingredients
Method
- Preheat and Prepare: Turn on your waffle iron to preheat according to the manufacturer's instructions. In a large mixing bowl, whisk together the plain flour, caster sugar, baking powder, and salt. Creating a well in the centre can make the next step a little easier.
- Mix the Wet Ingredients: In a separate medium-sized bowl, whisk the two egg yolks until they are pale and slightly frothy. Whisk in the whole milk, the slightly cooled melted butter, and the vanilla extract until everything is well combined.
- Combine Wet and Dry: Pour the wet mixture into the well of the dry ingredients. Whisk everything together until it is *just* combined. I find that it's crucial not to overmix here; a few small lumps in the batter are perfectly fine and actually desirable. Set the batter aside for a moment.
- Whip the Egg Whites: In a clean, dry bowl (I prefer metal or glass), use an electric hand mixer or a stand mixer to whisk the two egg whites. Start on a low speed and gradually increase to high. Continue whisking for 3-4 minutes, or until stiff peaks form. This means when you lift the beaters out, the peak of egg white holds its shape without flopping over.
- Fold in the Whites: Take about one-third of the whipped egg whites and gently fold them into the batter using a spatula. This lightens the batter, making it easier to incorporate the rest. Add the remaining egg whites and fold gently until just combined. You want to see some streaks of white remaining – be careful not to deflate all that lovely air you just created.
- Cook the Waffles: Lightly grease your preheated waffle iron if required. Ladle the recommended amount of batter onto the iron (check your manual, but it's usually around 120-180ml per waffle). Close the lid and cook for 4-6 minutes, or until the waffle is a deep golden brown and crisp. The steam will have mostly stopped coming out of the sides.
- Keep Warm and Serve: Carefully remove the cooked waffle and place it on a wire rack set inside a baking sheet in a low oven (around 100°C) to keep warm and crisp while you cook the remaining batter. Serve hot with your favourite toppings.
Notes
I hope this waffles recipe brings as much joy and deliciousness to your kitchen as it does to mine. It’s a truly rewarding breakfast to master, and the results are well worth the tiny bit of extra effort. I’d love to hear how you get on with it and what your favourite toppings are, so please feel free to leave a comment below! Happy cooking, Marcus.