How to Build a Charcuterie Board for Beginners
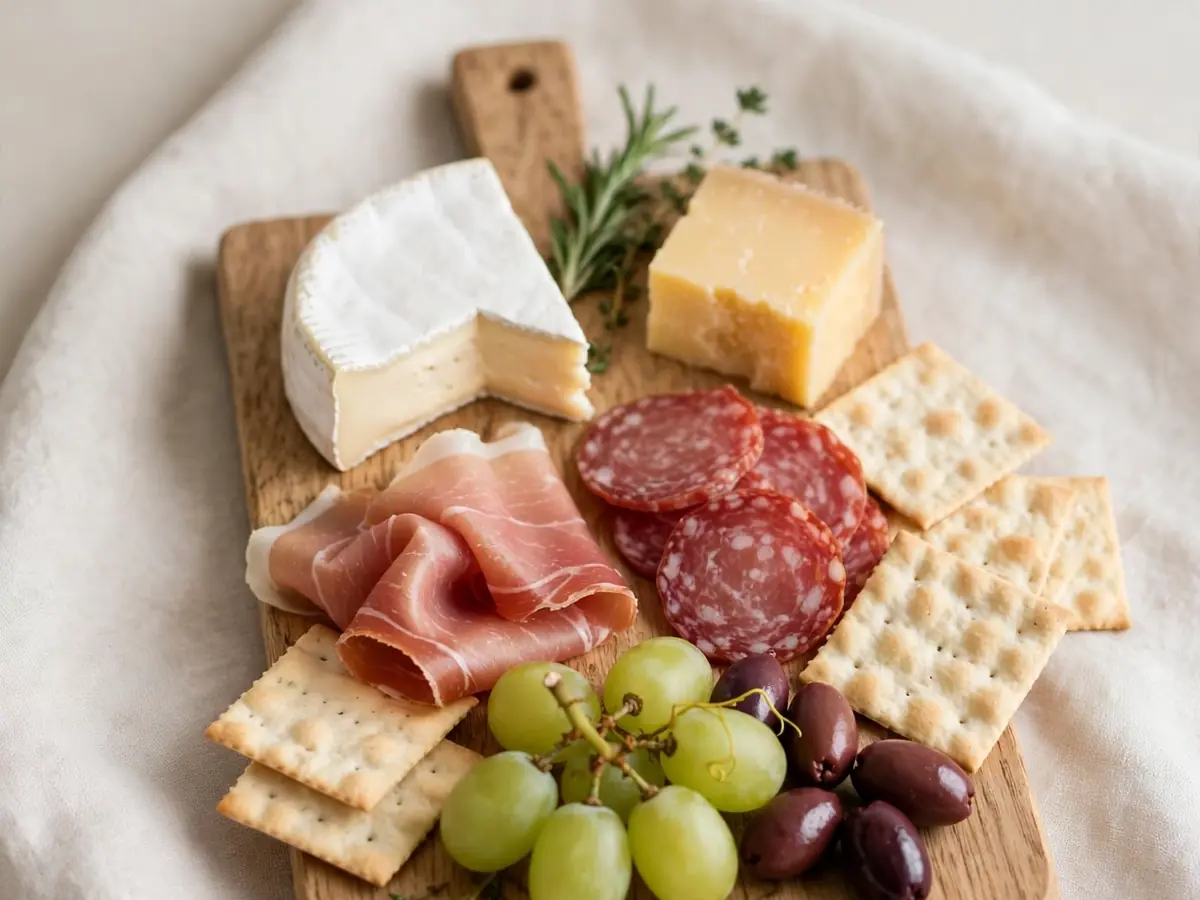
A charcuterie board looks impressive, but it is really just thoughtful shopping and arranging. You don’t need culinary training, a specialty shop, or a hundred ingredients. You need a board, a plan, and about 45 minutes of hands-on time. This beginner’s guide walks you through exactly what to buy, how much to buy, and how to arrange it so the finished board looks generous and balanced rather than crowded or sparse.
One quick note on terms: strictly speaking, “charcuterie” refers to prepared meats such as cured sausage, ham, and pâté. In everyday use, the word has stretched to mean a shared grazing board with meat, cheese, crackers, fruit, and extras. This guide uses the everyday meaning, with a meat-and-cheese core and plenty of supporting players.
What You Need Before You Shop
Gather your equipment first so you know your limits. A large wooden cutting board, a slate tile, or a rimmed baking sheet all work. For a board serving 6 to 8 people as an appetizer, aim for roughly 18 by 12 inches (45 by 30 cm) of usable surface. If your board is smaller, use two boards or set out small bowls and ramekins around it for the overflow.
Useful equipment:
- 1 large board or platter (about 18 x 12 inches / 45 x 30 cm)
- 3 to 5 small bowls or ramekins (2 to 4 ounces / 60 to 120 ml each) for olives, nuts, mustard, and jam
- A small cheese knife and a small spreader
- Paper towels for blotting wet ingredients
- Parchment paper (optional, for lining and easier cleanup)
How Much Food to Buy: Beginner Quantities
Overbuying is the most common beginner mistake. The following quantities make a generous board for 6 to 8 people as an appetizer, or 4 people as a light meal with bread. Scale up or down proportionally.
Meat (about 10 to 12 ounces / 280 to 340 g total)
- 3 ounces (85 g) prosciutto or another thin-sliced dry-cured ham
- 3 ounces (85 g) salami, sliced thin
- 2 ounces (55 g) coppa or capicola
- 2 ounces (55 g) cured chorizo, sliced
Choose 3 to 4 types. Two is fine for a very small board; more than 4 becomes clutter for a beginner.
Cheese (about 12 to 14 ounces / 340 to 400 g total)
- 4 ounces (115 g) soft cheese, such as a small wedge of brie or a log of fresh goat cheese
- 4 ounces (115 g) semi-firm cheese, such as cheddar, gouda, or manchego
- 3 ounces (85 g) hard aged cheese, such as aged parmesan or aged gouda
- 2 ounces (55 g) blue cheese (optional; skip if your crowd dislikes it)
A reliable beginner formula is one soft, one semi-firm, and one hard cheese, in different shapes: a wedge, a block, and a round or log.
Crackers and Bread
- 4 to 6 ounces (115 to 170 g) of crackers, about 30 to 40 pieces, in 2 varieties (one neutral water cracker, one seeded or flavored)
- 1 small baguette (about 10 ounces / 280 g), sliced into 1/2-inch (1.25 cm) rounds, or 8 to 10 slices of rustic bread
Fruit, Vegetables, and Pickles
- 1 cup (about 150 g) grapes, separated into small clusters
- 1 medium apple or pear, cored and sliced (toss slices in 1 teaspoon lemon juice to slow browning)
- 1/2 cup (about 70 g) dried fruit, such as apricots, figs, or cranberries
- 1/2 cup (about 75 g) cornichons or small pickles
- 1/2 cup (about 70 g) olives, drained
- 1/2 cup (about 60 g) cherry tomatoes or thin-sliced cucumber (optional)
Extras and Spreads
- 2 tablespoons (30 g) whole-grain mustard
- 2 tablespoons (40 g) honey or fig jam
- 1/3 cup (about 45 g) mixed nuts
- 2 ounces (55 g) dark chocolate, broken into pieces (optional)
Step-by-Step: Building the Board
Prep time is about 25 minutes, plus 20 minutes of arranging. Total: about 45 minutes. No cooking is required, though you may toast bread.
- Set the foundation. Place your board on a stable surface. If using parchment, line it now. Set out your small bowls where you want them; they act as anchors. Put mustard in one, honey or jam in another, olives in a third, and nuts in a fourth. Space them unevenly rather than in a perfect row.
- Place the cheeses. Put the largest piece down first, such as the wedge of semi-firm cheese, then the soft cheese, then the hard cheese. Leave 1 to 2 inches (2.5 to 5 cm) between them so you can fill the gaps later. Cut a few slices from each block and fan them next to the whole piece so guests know where to start.
- Add the meats. Fold prosciutto or ham into loose ribbons rather than flat stacks; this creates height and makes it easy to grab a piece. Fan salami and chorizo slices in overlapping arcs or roll them into small cones. Tuck the meat in the spaces between cheeses.
- Fill with fruit. Tuck grape clusters into two or three gaps. Fan apple or pear slices near a soft cheese. Scatter dried fruit in small clusters rather than one piece at a time.
- Add crackers and bread. Fan crackers in a curve along one edge, overlapping like fallen dominoes. Stand baguette slices upright in a row or stack them near a cheese. Keep crackers away from juicy items like tomatoes so they stay crisp.
- Fill the remaining gaps. Add pickles, olives (if not in a bowl), cherry tomatoes, and chocolate. The board should look full but not overflowing; every item should be reachable without moving three others.
- Finish and rest. Add the small cheese knife and spreader. Let soft cheeses sit at room temperature for 20 to 30 minutes before serving for the best texture. Serve immediately after that.
Arranging Rules That Make It Look Professional
- Work in odd numbers. Three cheeses, three meat types, and three fruit options look more natural than two or four of everything.
- Vary height and shape. Folded meat, stacked crackers, and bowls create peaks; flat slices create valleys. A board with only flat items looks dull.
- Separate wet and dry. Keep juicy pickles and tomatoes in bowls or away from crackers.
- Leave breathing room. Gaps are not failures; they make the food look intentional and easy to pick up.
- Cut one of everything. Slicing a few pieces of each cheese and meat signals that the board is ready to eat.
Practical Substitutions
Almost everything on a charcuterie board is flexible. Use these swaps when shopping or working with what you have:
- No prosciutto? Use thinly sliced smoked ham, jamón, or even good deli roast beef.
- No salami? Sliced turkey breast, soppressata, or pepperoni work.
- No brie? Camembert, cream cheese (in a bowl), or a small wheel of soft goat cheese.
- No manchego? Aged cheddar, gruyère, or comté.
- No fresh figs? Dried figs, dates, or apricots.
- No cornichons? Small dill pickles, sliced into rounds, or pickled green beans.
- No honey? Fig jam, apricot preserves, or a drizzle of balsamic glaze.
- Gluten-free? Replace crackers and baguette with gluten-free crackers, rice cakes, or sliced vegetables such as cucumber rounds and endive leaves.
Storage and Make-Ahead Guidance
A charcuterie board is best assembled close to serving time, but you can prep most components a day ahead.
- Up to 24 hours ahead: Slice cheeses and meats, wash and dry fruit, drain olives and pickles, and portion nuts and spreads into bowls. Store each separately in airtight containers in the refrigerator.
- Up to 2 hours ahead: Arrange the full board, then cover loosely with plastic wrap and refrigerate. Remove 20 to 30 minutes before serving so soft cheeses lose their chill.
- Leftovers: Refrigerate within 2 hours of serving. Keep meats and cheeses in separate airtight containers for up to 3 days. Discard any perishable items that sat out longer than 2 hours.
- Not recommended: Freezing assembled boards or leftover soft cheeses; textures suffer badly.
- Crackers and bread: Store at room temperature in a sealed bag or tin for up to 3 days.
Beginner Tips to Avoid Common Mistakes
- Buy less than you think you need. A board that looks slightly underfilled can be topped up; a crowded one cannot be fixed.
- Slice meats thin. Thick slices feel heavy and are harder to eat with crackers.
- Take cheese out of the fridge early. Cold brie tastes like nothing.
- Use a board with a slight rim if serving juicy items, or use bowls.
- Skip strongly flavored items if you’re unsure of your guests’ tastes; blue cheese and very spicy chorizo can dominate.
- If you want a sweet finish, a small dessert such as lemon crumb bars served alongside works nicely, and for brunch-style gatherings, sheet pan pancakes pair well with a smaller meat-and-cheese board. More ideas are in the Cuisinebite blog.
Frequently Asked Questions
How far in advance can I build a charcuterie board?
Assemble the full board up to 2 hours before serving, cover loosely, and refrigerate. Remove it 20 to 30 minutes before guests arrive so soft cheeses soften. For anything earlier, prep components separately up to 24 hours ahead and arrange at the last minute.
How much meat and cheese do I need per person?
Plan on about 1.5 ounces (40 g) of meat and 1.5 to 2 ounces (40 to 55 g) of cheese per person for an appetizer board. For a board that serves as a light meal, increase to 3 ounces (85 g) of each per person and add more bread.
Can I make a charcuterie board without a wooden board?
Yes. A rimmed baking sheet lined with parchment, a large platter, a slate tile, or even a clean cutting board all work. What matters is a flat surface large enough to spread items out without crowding.
What should I do with leftovers?
Refrigerate meats and cheeses separately in airtight containers within 2 hours of serving and use them within 3 days. Leftover crackers and bread keep at room temperature for up to 3 days. Discard soft cheeses or cut fruit that sat out longer than 2 hours.
Is a charcuterie board safe for guests with dietary restrictions?
It can be, with care. Keep gluten-free crackers in a separate bowl, label items containing nuts, and avoid cross-contact by giving each cheese its own knife. If you’re unsure about a guest’s allergies, ask in advance rather than guessing.