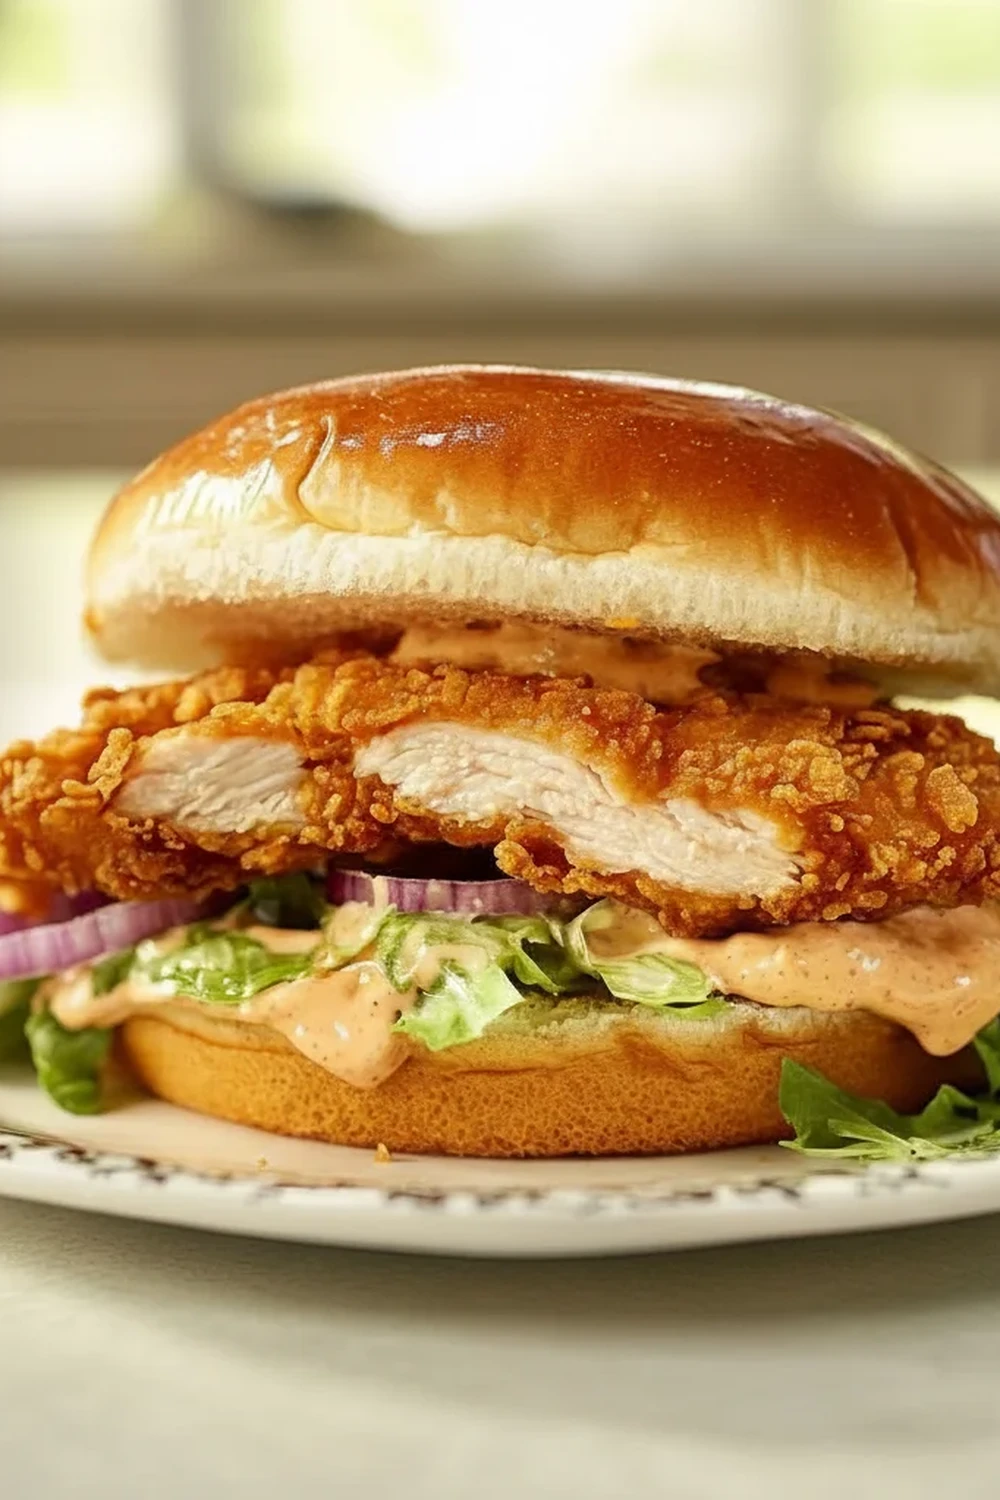
Crispy Chicken Sandwich Recipe Fried Burger Style
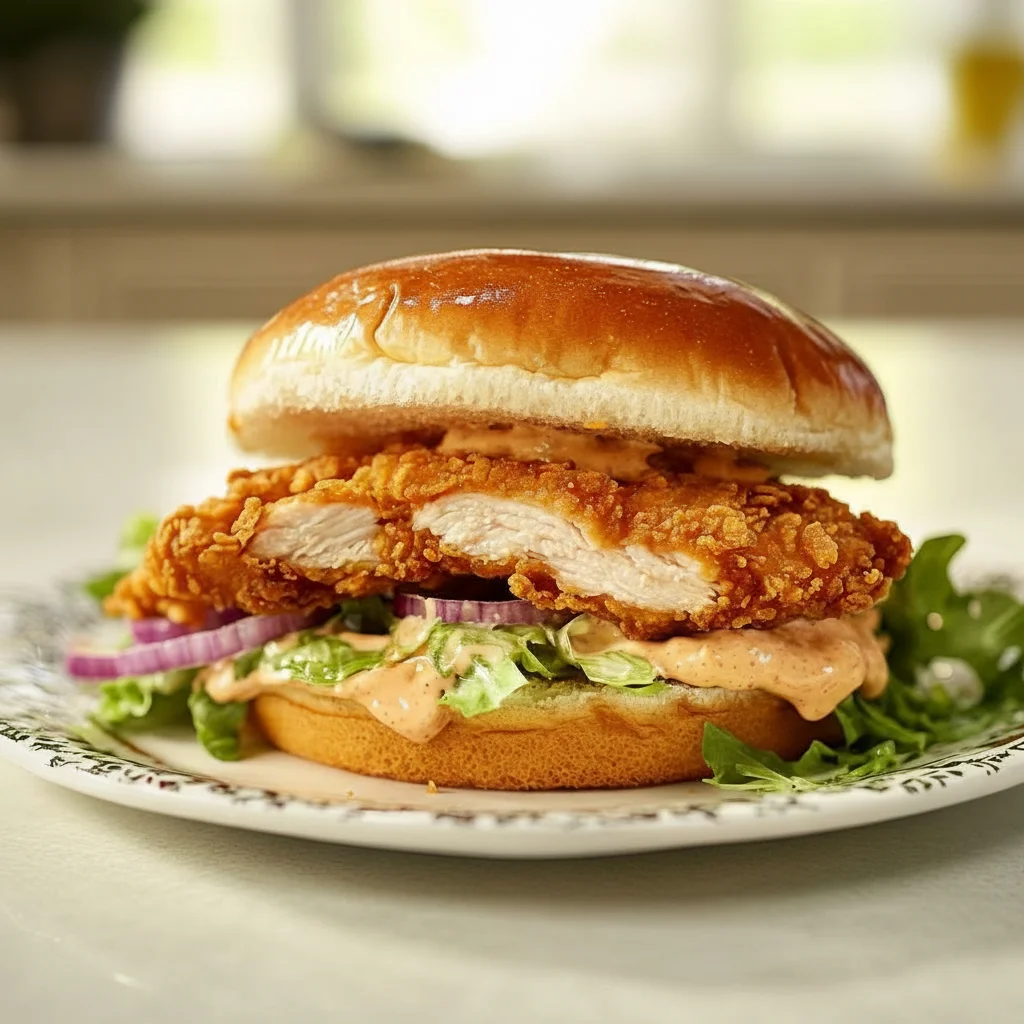
There are some meals that just hit the spot, and a truly magnificent crispy chicken sandwich is high on that list. I’m not talking about a sad, floppy bit of chicken in a soggy bun. I mean a sandwich with a properly crunchy, craggy, flavourful coating that shatters when you bite into it, revealing chicken that is unbelievably juicy and tender. This is that sandwich. This is my go-to recipe when I need something that feels like a treat but is genuinely straightforward to pull together at home.
What sets this crispy chicken sandwich recipe apart is the attention to detail at each stage. We start with a buttermilk brine, a non-negotiable step that tenderises the chicken and infuses it with a subtle tang. Then comes the coating – a carefully seasoned flour mixture that we’ll use for a double-dredge, creating all those nooks and crannies that become ultra-crisp during frying. Finally, it’s all brought together in a soft, toasted brioche bun with a zesty, smoky mayonnaise and some crisp lettuce and sharp pickles to cut through the richness.
This is the kind of recipe that works beautifully for a Saturday night in, a casual get-together with friends, or anytime you want to create a meal that gets a genuine “wow” reaction. Everyone seems to love this, from teenagers to grandparents, because it delivers on that simple promise of a truly fantastic fried chicken experience.
Recipe Overview
This recipe focuses on creating the ultimate textural contrast: a super crispy, well-seasoned crust and incredibly moist chicken within. The process involves a simple buttermilk brine, a double dredge in seasoned flour, and a shallow fry to golden perfection. I’ve tested various flour combinations, and this simple mix of plain flour and cornflour gives the most reliable and shattering crunch without becoming too heavy.
- Prep Time: 20 minutes (plus 1 hour brining)
- Cook Time: 15 minutes
- Total Time: 1 hour 35 minutes
- Servings: 4 people
- Difficulty: Medium
Why You’ll Love This Crispy Chicken Sandwich Recipe
- Incredible Texture: The double-dredging technique creates an audibly crunchy crust that stays crisp, while the buttermilk brine guarantees the chicken breast remains succulent and juicy.
- Comes Together in Under an Hour: Aside from the hands-off brining time, the active preparation and cooking take around 35 minutes, making it ideal for a special weeknight dinner.
- A Flexible Foundation: You can easily adjust the spice level in the coating or the sauce. Add more cayenne for a fiery kick or swap the mayonnaise for a ranch-style dressing. It’s a great base to make your own. For a different but equally satisfying weekend meal, check out my Smashed Burgers Recipe With Crispy Edges.
- Ideal for Casual Entertaining: It’s a substantial, satisfying meal that always gets compliments when friends are over for a relaxed dinner. It feels more special than ordering a takeaway.
- Family Tested and Approved: My kids request this one constantly. The flavour isn’t overwhelmingly spicy (unless you want it to be!), so it’s a hit with a wide range of palates.
Ingredients You’ll Need
The quality of your ingredients will really shine through here. I always opt for good quality, free-range chicken breasts and fresh brioche buns from a local bakery if I can. For the paprika, using a smoked variety like La Chinata makes a huge difference to the flavour of the coating.
- For the Chicken:
- 4 skinless, boneless chicken breasts (around 150-170g each)
- 300ml buttermilk
- 1 tsp salt
- 1 litre vegetable or rapeseed oil, for frying
- For the Flour Coating:
- 250g plain flour
- 50g cornflour
- 2 tsp smoked paprika
- 2 tsp garlic powder
- 1 tsp onion powder
- 1 tsp cayenne pepper (or to taste)
- 1 tsp black pepper, freshly ground
- 2 tsp fine sea salt
- For the Smoky Mayonnaise:
- 150g good quality mayonnaise
- 1 tbsp sriracha or other hot sauce
- 1 tsp smoked paprika
- 1 tsp lime juice
- To Assemble:
- 4 brioche buns
- 1 head of Little Gem lettuce, leaves separated
- 1 large dill pickle, thinly sliced
Marcus’s Tip: If you can’t find buttermilk, you can make a substitute by adding 1 tablespoon of lemon juice or white vinegar to 300ml of whole milk. Let it sit for 5-10 minutes until it curdles slightly. It works almost as well as the real thing.
How to Make This Crispy Chicken Sandwich Recipe
The key to success is being organised. Get your brining, dredging, and sauce stations set up before you even think about heating the oil. This makes the whole process smooth and mess-free.
- Prepare and Brine the Chicken: Place each chicken breast between two sheets of baking parchment and use a rolling pin or meat mallet to gently pound them to a uniform thickness of about 2cm. This ensures they cook evenly. Place the chicken in a bowl, pour over the buttermilk and 1 tsp of salt. Stir to combine, ensuring the chicken is fully submerged. Cover and refrigerate for at least 1 hour, or up to 4 hours.
- Mix the Coating and Sauce: While the chicken brines, prepare your other components. In a wide, shallow dish, whisk together the plain flour, cornflour, smoked paprika, garlic powder, onion powder, cayenne pepper, black pepper, and 2 tsp salt. In a separate small bowl, mix all the ingredients for the smoky mayonnaise. Cover and set aside.
- Heat the Oil: Pour the oil into a large, heavy-bottomed saucepan or Dutch oven until it is about 3-4 cm deep. Heat over a medium-high heat until it reaches 175°C (350°F). A food thermometer is highly recommended here for accuracy. If you don’t have one, a cube of bread should turn golden brown in about 30 seconds.
- Dredge the Chicken: Set up your dredging station. Take one piece of chicken out of the buttermilk, allowing excess to drip off, but don’t wipe it dry. Press it firmly into the flour mixture, ensuring it’s coated all over. Dip it back into the buttermilk for a second, then press it back into the flour mixture for a final, thick coating. I find that using one hand for the wet buttermilk and the other for the dry flour mixture helps prevent your fingers from getting caked in batter. Place the coated chicken on a wire rack. Repeat with the remaining chicken.
- Fry the Chicken: Carefully place two pieces of chicken into the hot oil, ensuring not to overcrowd the pan. Fry for 4-6 minutes per side, turning once, until the coating is a deep golden brown and the chicken is cooked through. The internal temperature should be 74°C (165°F).
- Rest the Chicken: Once cooked, remove the chicken from the oil using tongs and place it on a clean wire rack to drain. Sprinkle immediately with a tiny pinch of extra salt. Let it rest for a few minutes while you fry the remaining two pieces.
- Toast the Buns: While the second batch of chicken is frying, split your brioche buns. You can either toast them in a dry pan until lightly golden or briefly place them under a hot grill.
- Assemble Your Sandwich: Spread a generous layer of the smoky mayonnaise on the top and bottom halves of each toasted bun. Place a piece of crispy fried chicken on the bottom bun, top with a few leaves of crisp lettuce and several slices of pickle. Place the top bun on and serve immediately.
Tips From My Kitchen
- Temperature Control is Crucial: The single biggest factor for crispy, not greasy, fried chicken is maintaining the oil temperature. An inexpensive digital food thermometer is your best friend. If the oil is too cool, the crust will absorb it and become soggy. If it’s too hot, the outside will burn before the inside is cooked.
- The Secret Step is the Double Dredge: I learned that the first dredge creates a base layer for the wet buttermilk to cling to, and the second dredge is what builds that craggy, ultra-crunchy crust. Don’t skip dipping it back into the buttermilk.
- Make-Ahead Components: You can make the smoky mayonnaise up to 3 days in advance and store it in an airtight container in the fridge. The flour coating mixture can also be combined and stored in an airtight container for weeks. This makes assembly much faster.
- Storage: Fried chicken is always best eaten fresh. However, if you have leftovers, store the chicken in an airtight container in the fridge for up to 2 days. Reheat in an oven at 200°C (180°C fan) for 10-15 minutes to restore some of the crispiness. Microwaving is not recommended as it will make the coating soft.
Common Mistakes to Avoid
- Overcrowding the Pan: It’s tempting to try and cook all the chicken at once, but this is a mistake. Adding too much chicken at once will dramatically lower the oil’s temperature, resulting in greasy, pale chicken. Cook in batches of two for the best results.
- Frying at the Wrong Temperature: Guessing the oil temperature is a recipe for disappointment. Aim for a steady 175°C (350°F). A thermometer will give you the control you need for a perfect outcome every time.
- Skipping the Rest Time: Letting the chicken rest on a wire rack for a few minutes after frying is vital. It allows the juices inside to redistribute, ensuring a tender bite. It also lets excess oil drip away, keeping the crust perfectly crisp. If you loved this, you should try our reader-favourite Creamy Chicken And Rice Recipe One Pot Meal next!
What to Serve With This Crispy Chicken Sandwich Recipe
While this sandwich is a magnificent meal on its own, a few well-chosen sides can elevate it further. We like to keep it classic and complementary.
- Proper Chips: A pile of salty, fluffy-on-the-inside, crispy-on-the-outside chips is the natural partner. A simple sprinkle of sea salt is all they need.
- Coleslaw: A creamy, tangy coleslaw provides a wonderful cool and crunchy contrast to the hot chicken. A vinegar-based slaw also works beautifully.
- A Crisp Lager or IPA: The light bitterness and carbonation of a good lager or a hoppy IPA cut through the richness of the fried chicken wonderfully. For a non-alcoholic option, a sharp, fizzy lemonade is fantastic.
Frequently Asked Questions
Crispy Chicken Sandwich
Ingredients
Method
- Prepare and Brine the Chicken: Place each chicken breast between two sheets of baking parchment and use a rolling pin or meat mallet to gently pound them to a uniform thickness of about 2cm. This ensures they cook evenly. Place the chicken in a bowl, pour over the buttermilk and 1 tsp of salt. Stir to combine, ensuring the chicken is fully submerged. Cover and refrigerate for at least 1 hour, or up to 4 hours.
- Mix the Coating and Sauce: While the chicken brines, prepare your other components. In a wide, shallow dish, whisk together the plain flour, cornflour, smoked paprika, garlic powder, onion powder, cayenne pepper, black pepper, and 2 tsp salt. In a separate small bowl, mix all the ingredients for the smoky mayonnaise. Cover and set aside.
- Heat the Oil: Pour the oil into a large, heavy-bottomed saucepan or Dutch oven until it is about 3-4 cm deep. Heat over a medium-high heat until it reaches 175°C (350°F). A food thermometer is highly recommended here for accuracy. If you don't have one, a cube of bread should turn golden brown in about 30 seconds.
- Dredge the Chicken: Set up your dredging station. Take one piece of chicken out of the buttermilk, allowing excess to drip off, but don't wipe it dry. Press it firmly into the flour mixture, ensuring it's coated all over. Dip it back into the buttermilk for a second, then press it back into the flour mixture for a final, thick coating. I find that using one hand for the wet buttermilk and the other for the dry flour mixture helps prevent your fingers from getting caked in batter. Place the coated chicken on a wire rack. Repeat with the remaining chicken.
- Fry the Chicken: Carefully place two pieces of chicken into the hot oil, ensuring not to overcrowd the pan. Fry for 4-6 minutes per side, turning once, until the coating is a deep golden brown and the chicken is cooked through. The internal temperature should be 74°C (165°F).
- Rest the Chicken: Once cooked, remove the chicken from the oil using tongs and place it on a clean wire rack to drain. Sprinkle immediately with a tiny pinch of extra salt. Let it rest for a few minutes while you fry the remaining two pieces.
- Toast the Buns: While the second batch of chicken is frying, split your brioche buns. You can either toast them in a dry pan until lightly golden or briefly place them under a hot grill.
- Assemble Your Sandwich: Spread a generous layer of the smoky mayonnaise on the top and bottom halves of each toasted bun. Place a piece of crispy fried chicken on the bottom bun, top with a few leaves of crisp lettuce and several slices of pickle. Place the top bun on and serve immediately.
Notes
There you have it – everything you need to create a truly top-tier crispy chicken sandwich at home. It takes a little more effort than just grilling a piece of chicken, but the results are so worth it. That first bite, with the crunch of the coating, the soft bun, and the juicy chicken, is a moment of pure satisfaction. I hope you enjoy making this as much as we enjoy eating it in our house. Let me know how yours turns out in the comments below!