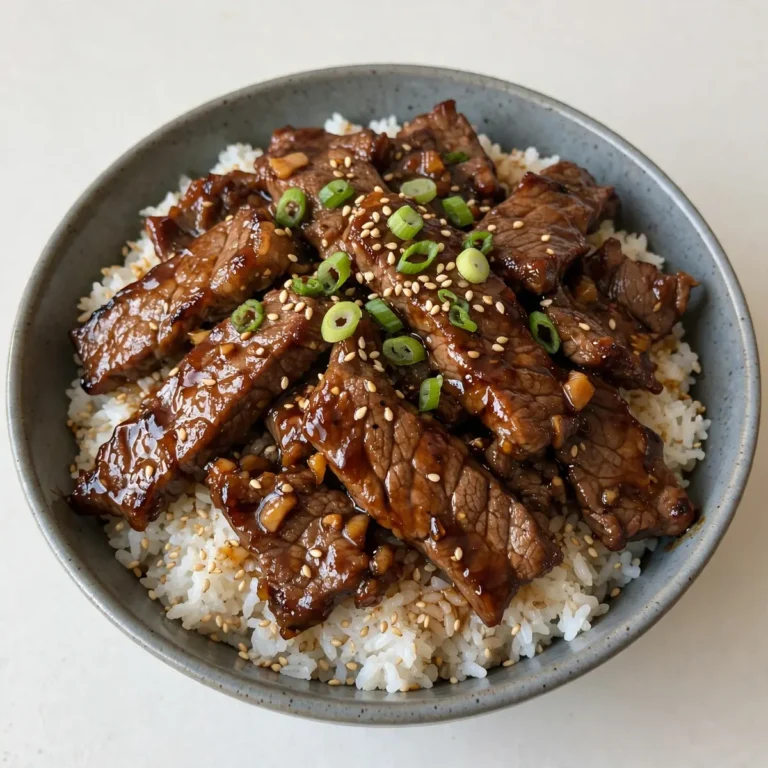
Easy Salmon Sushi Bake (Worth The Hype!)

I remember the first time I saw a sushi bake video online. I was skeptical, to be honest. But after testing this recipe five times, I finally got it just right, and now I completely understand the hype. This Easy Salmon Sushi Bake is a deconstructed, warm, and utterly satisfying casserole that brings all the flavours of a salmon roll to your dinner table without any tricky rolling.
Recipe Overview
- Prep Time: 20 minutes
- Cook Time: 25 minutes
- Total Time: 45 minutes
- Servings: 6-8
- Difficulty: Easy
Why You’ll Love This Easy Salmon Sushi Bake (Worth the Hype!)
- No Sushi Rolling Required: All the taste of a salmon roll, baked in a dish and served with nori sheets for scooping. It’s a brilliant way to enjoy sushi flavours without the fuss.
- Generously Portioned: This recipe makes enough to feed a hungry family or to have delicious leftovers for lunch the next day. It’s wonderfully satisfying.
- Customisable to Your Taste: You can easily adjust the spice level, swap the protein, or add your favourite toppings like avocado or cucumber.
- Perfect for Entertaining: This is my go-to recipe when I need something quick but impressive. It looks stunning when brought to the table, and everyone loves scooping it up themselves.
- Deep, Savoury Flavour: The combination of seasoned sushi rice, creamy salmon, and a tangy, spicy mayo topping is simply irresistible. Every bite is a little taste of umami heaven.

Ingredients You’ll Need
- 500g sushi rice (or short-grain white rice)
- 650ml water
- 80ml rice vinegar
- 2 tablespoons caster sugar
- 1 teaspoon fine sea salt
- 600g fresh skinless salmon fillet
- 1 tablespoon sesame oil
- 1 tablespoon light soy sauce
- 1 teaspoon grated fresh ginger
- 200g full-fat cream cheese, softened
- 120ml Japanese mayonnaise (like Kewpie)
- 1.5 tablespoons sriracha chilli sauce (adjust to taste)
- 4 spring onions, finely sliced
- Handful of fresh chives, chopped
- 1 sheet of nori (seaweed), crumbled or cut into strips, plus extra sheets for serving
- Optional: 1 ripe avocado, sliced, and cucumber, julienned, for serving
Tip: Using Japanese mayonnaise is a game-changer for this recipe. Its creamier texture and slight umami flavour are far superior to standard mayonnaise for this dish. If you can’t find it, use a good-quality full-fat mayonnaise and add a tiny pinch of MSG.
How to Make Easy Salmon Sushi Bake (Worth the Hype!)
- Prepare the Sushi Rice: Rinse the sushi rice in a fine-mesh sieve under cold running water until the water runs clear. This removes excess starch and prevents gummy rice. Add the rice and water to a saucepan. Bring to a boil over high heat, then reduce the heat to low, cover, and simmer for 18 minutes. The rice will be tender and you’ll see small steam holes on the surface. Remove from the heat and let it stand, covered, for 10 minutes. In a small bowl, whisk together the rice vinegar, sugar, and salt until dissolved. While the rice is still hot, gently fold in the vinegar mixture with a wooden spoon or spatula using a slicing motion to avoid mashing the grains. The rice will look glossy and smell beautifully tangy.
- Cook the Salmon: While the rice cooks, preheat your oven to 200°C (400°F). Place the salmon fillet on a small baking tray lined with foil. Drizzle with the sesame oil and soy sauce, and sprinkle over the grated ginger. Bake for 12-15 minutes, or until the salmon is just cooked through and flakes easily with a fork. The fish will turn from a translucent deep orange to a lovely opaque pale pink. Let it cool slightly, then flake it into large chunks, discarding any skin if present. You should see beautiful, moist flakes.
- Make the Creamy Salmon Mixture: In a mixing bowl, combine the softened cream cheese, 4 tablespoons of the Japanese mayonnaise, and 1 tablespoon of sriracha. Stir until smooth and well combined. The mixture will be a pale, creamy coral colour. Gently fold in the flaked salmon and half of the sliced spring onions. The salmon should be evenly coated in the creamy, slightly spicy sauce.
- Assemble the Bake: Lightly grease your 9×13 inch baking dish. Press the seasoned sushi rice into the dish in an even, firm layer. Use the back of a spoon or damp fingers to pack it down well. This creates a solid base. Spread the creamy salmon mixture evenly over the top of the rice.
- Add the Topping and Bake: In a small bowl, mix the remaining 2 tablespoons of Japanese mayonnaise with the remaining 0.5 tablespoon of sriracha. Drizzle this spicy mayo in a zigzag pattern over the salmon layer. Sprinkle the crumbled nori strips and the remaining spring onions over the top. Bake for 15-20 minutes, until the edges are bubbling and the top is lightly golden. The kitchen will fill with a wonderful, savoury, toasty aroma.
- Rest and Serve: Let the bake cool in the dish for 5-10 minutes. This rest time is crucial; it allows the layers to set slightly, making it much easier to serve. While it rests, prepare your serving platter with sheets of nori (cut into quarters or halves), avocado slices, and cucumber sticks. Spoon a generous portion of the warm bake onto a nori sheet, add your toppings, and enjoy immediately. The contrast of the warm, creamy bake with the cool, crisp vegetables and the salty nori is pure magic.
Tips From My Kitchen
- Rinse the Rice Thoroughly: This is the single most important step for perfect sushi rice. Rinsing until the water runs clear removes the surface starch, which is what causes the rice to become sticky and congealed. If you skip this, you’ll end up with a dense, glue-like base rather than the distinct, slightly chewy grains we’re aiming for.
- Don’t Overcook the Salmon: Salmon that’s baked until dry will result in a less luxurious bake. We want the salmon to be just cooked through so it remains moist and flaky. As it bakes again in the casserole, it will cook a little more, so err on the side of slightly underdone when you first bake it. The flesh should just start to separate when pressed.
- Pack the Rice Firmly: The rice layer is the foundation of your sushi bake. If it’s too loose, it will fall apart when you try to scoop it up with the nori. Use the back of a spoon or, better yet, dampen your hands with a little water and press the rice down into a very firm, even layer in the dish. This ensures every portion holds its shape beautifully.
- Use Room Temperature Cream Cheese: This is a small detail that makes a big difference. Cold cream cheese will be lumpy and difficult to blend into the mayonnaise and sriracha, resulting in a streaky, uneven sauce. Let it sit out for 30 minutes before you start cooking. It will blend into a perfectly smooth, velvety mixture.
- Let It Rest Before Serving: I cannot stress this enough. The bake will be incredibly hot and loose straight out of the oven. If you try to serve it immediately, you’ll get a soupy mess. Allowing it to rest for 5-10 minutes lets the residual heat finish setting the layers. The result is a neat, scoopable bake that holds its shape perfectly on the nori.
Equipment You’ll Need
- 9×13 inch baking dish
- Aluminium foil
- Mixing bowls (small and large)
- Sharp knife
- Fine-mesh sieve
- Saucepan with lid
- Wooden spoon or silicone spatula
- Small baking tray
Common Mistakes to Avoid
- Overcrowding the pan: This isn’t about the pan being too full, but about pressing the rice too thinly. If the rice layer is too shallow, it won’t provide enough substance to balance the rich topping. Aim for a rice layer that is at least 2cm thick to give the bake a proper foundation.
- Wrong temperature: Baking at too high a temperature will dry out the salmon and burn the topping before the centre is heated through. A moderate 200°C (400°F) is the sweet spot. It allows the bake to heat evenly and the topping to turn a lovely golden colour without scorching.
- Skipping the rest time: This is the most common mistake that leads to a disappointing texture. The rest time is not a suggestion; it’s a critical step. It allows the starches in the rice to relax slightly and the creamy topping to firm up. Skipping it will result in a runny, difficult-to-serve dish that lacks structural integrity.
Delicious Variations to Try
- Spicy Version: For those who love heat, add an extra tablespoon of sriracha to the creamy salmon mixture and another teaspoon to the topping. You can also fold in some finely chopped fresh red chilli or a drizzle of chilli oil before serving for an extra kick.
- Vegetarian/Vegan Option: This works beautifully as a plant-based dish. Replace the salmon with 400g of firm tofu, crumbled, or a can of young jackfruit, shredded and pan-fried with soy sauce and ginger. Use a high-quality vegan cream cheese and vegan mayonnaise to replicate the creamy texture. The result is just as delicious and satisfying.
- Different Protein: While salmon is the star here, you can easily substitute it with other proteins. Try using cooked, flaked crab meat (or imitation crab), cooked and shredded chicken, or even a tin of flaked tuna in spring water. For a different flavour profile, try a spicy version with cooked ground chicken or turkey seasoned with soy and ginger, similar to the filling you might find in our Spicy Chicken Tacos.
What to Serve With Easy Salmon Sushi Bake (Worth the Hype!)
- Extra nori sheets for scooping
- Sliced avocado and julienned cucumber
- A side of pickled ginger and wasabi
- A simple Garlic Butter Shrimp Scampi Pasta would be a lovely, light starter if you’re making a feast.
- A light, crisp salad with a ginger-soya dressing
Frequently Asked Questions
Easy Salmon Sushi Bake (Worth the Hype!)
Ingredients
Method
- Prepare the Sushi Rice: Rinse the sushi rice in a fine-mesh sieve under cold running water until the water runs clear. This removes excess starch and prevents gummy rice. Add the rice and water to a saucepan. Bring to a boil over high heat, then reduce the heat to low, cover, and simmer for 18 minutes. The rice will be tender and you’ll see small steam holes on the surface. Remove from the heat and let it stand, covered, for 10 minutes. In a small bowl, whisk together the rice vinegar, sugar, and salt until dissolved. While the rice is still hot, gently fold in the vinegar mixture with a wooden spoon or spatula using a slicing motion to avoid mashing the grains. The rice will look glossy and smell beautifully tangy.
- Cook the Salmon: While the rice cooks, preheat your oven to 200°C (400°F). Place the salmon fillet on a small baking tray lined with foil. Drizzle with the sesame oil and soy sauce, and sprinkle over the grated ginger. Bake for 12-15 minutes, or until the salmon is just cooked through and flakes easily with a fork. The fish will turn from a translucent deep orange to a lovely opaque pale pink. Let it cool slightly, then flake it into large chunks, discarding any skin if present. You should see beautiful, moist flakes.
- Make the Creamy Salmon Mixture: In a mixing bowl, combine the softened cream cheese, 4 tablespoons of the Japanese mayonnaise, and 1 tablespoon of sriracha. Stir until smooth and well combined. The mixture will be a pale, creamy coral colour. Gently fold in the flaked salmon and half of the sliced spring onions. The salmon should be evenly coated in the creamy, slightly spicy sauce.
- Assemble the Bake: Lightly grease your 9x13 inch baking dish. Press the seasoned sushi rice into the dish in an even, firm layer. Use the back of a spoon or damp fingers to pack it down well. This creates a solid base. Spread the creamy salmon mixture evenly over the top of the rice.
- Add the Topping and Bake: In a small bowl, mix the remaining 2 tablespoons of Japanese mayonnaise with the remaining 0.5 tablespoon of sriracha. Drizzle this spicy mayo in a zigzag pattern over the salmon layer. Sprinkle the crumbled nori strips and the remaining spring onions over the top. Bake for 15-20 minutes, until the edges are bubbling and the top is lightly golden. The kitchen will fill with a wonderful, savoury, toasty aroma.
- Rest and Serve: Let the bake cool in the dish for 5-10 minutes. This rest time is crucial; it allows the layers to set slightly, making it much easier to serve. While it rests, prepare your serving platter with sheets of nori (cut into quarters or halves), avocado slices, and cucumber sticks. Spoon a generous portion of the warm bake onto a nori sheet, add your toppings, and enjoy immediately. The contrast of the warm, creamy bake with the cool, crisp vegetables and the salty nori is pure magic.
Notes
This Easy Salmon Sushi Bake has genuinely earned its place in my regular dinner rotation. It’s one of those wonderful recipes that feels a bit special but is surprisingly straightforward to put together. I love how it brings everyone to the table, building their own little nori wraps. If you give it a try, please let me know how you get on in the comments below—I’d love to hear about your favourite variations and toppings!