Chicken Cordon Bleu
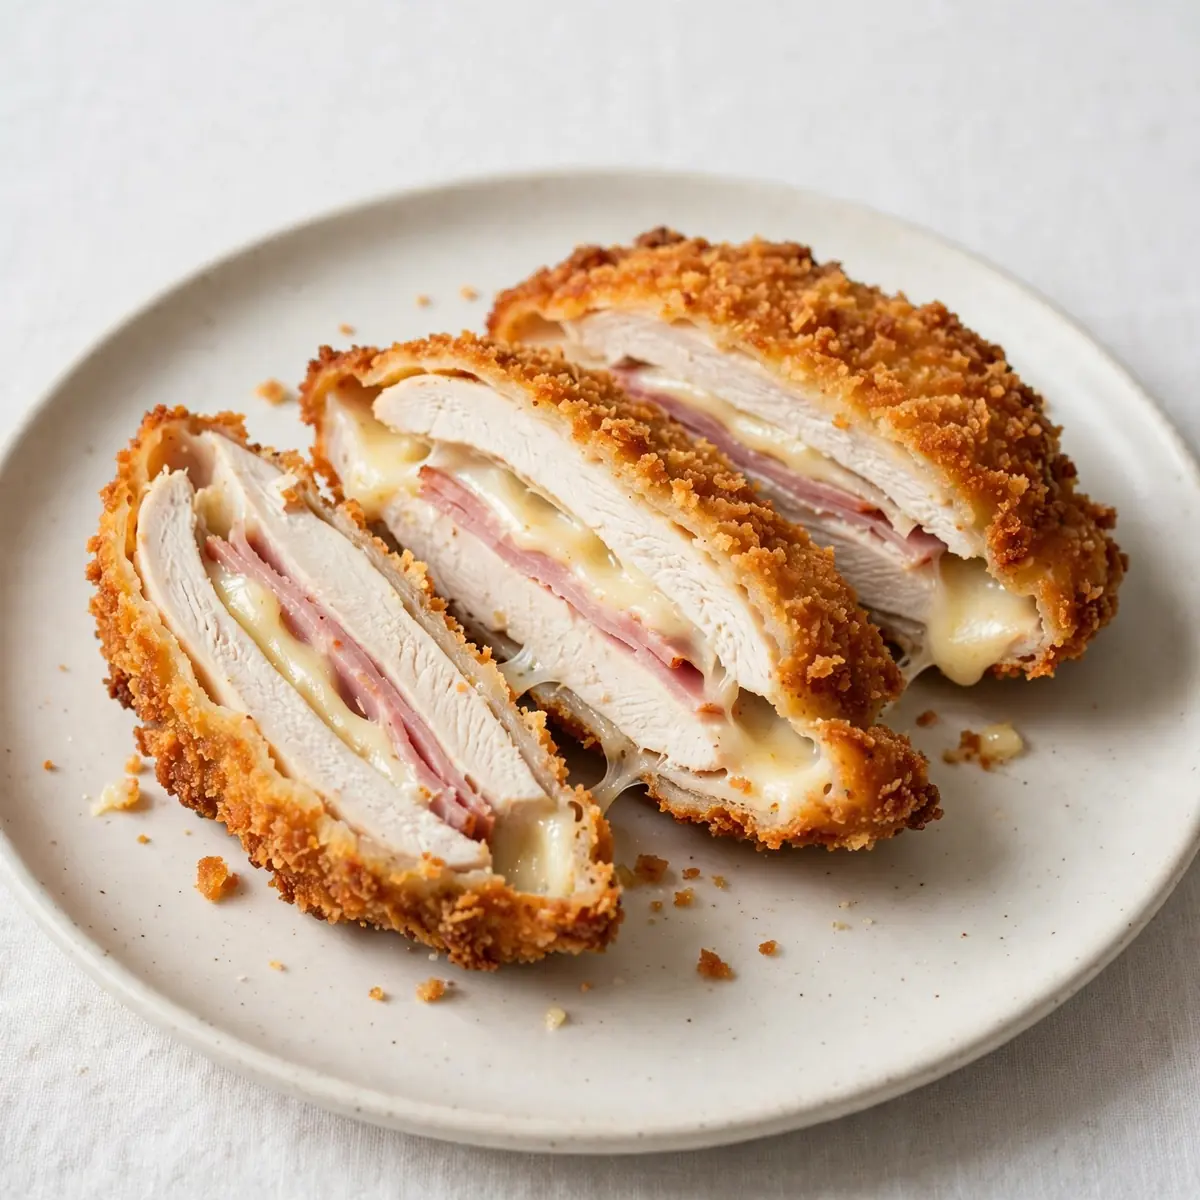
When my three children were younger, I practically lived in the kitchen, but these days, I need meals that come together fast without a mountain of washing up. This Chicken Cordon Bleu recipe has been my secret weapon for years—it delivers that golden, cheesy, indulgent feel of a fancy dinner but fits neatly into a busy weeknight schedule.
Recipe Overview
- Prep Time: 15 minutes
- Cook Time: 20 minutes
- Total Time: 35 minutes
- Servings: 4
- Difficulty: Easy
Why You’ll Love This Chicken Cordon Bleu
- Ready in under 40 minutes: From fridge to table in the time it takes to steam some broccoli or boil pasta, this dish is a lifesaver on hectic evenings.
- One-pan cooking for effortless cleanup: We use a single ovenproof skillet, which means fewer dishes to wash and more time to relax after dinner.
- Make-ahead friendly for busy schedules: You can assemble these rolls the night before or even in the morning, then simply bake them when you get home.
- Uses simple, everyday ingredients: No hunting for obscure items—everything here is likely already in your fridge or cupboard, saving you an extra shop.
- Naturally low in carbs without trying: The crispy coating comes from breadcrumbs and a simple egg wash, skipping heavy batters or flour dredges that add unnecessary calories.
Ingredients You’ll Need
- 4 boneless, skinless chicken breasts (about 150g each)
- 4 slices of turkey ham (or thinly sliced cooked chicken breast)
- 4 slices of Swiss cheese (or Emmental, about 30g each)
- 60g plain breadcrumbs (panko work brilliantly for extra crunch)
- 2 large eggs
- 30g grated Parmesan cheese
- 1 teaspoon garlic powder
- 1 teaspoon dried thyme
- ½ teaspoon smoked paprika
- Salt and freshly ground black pepper, to taste
- 2 tablespoons olive oil
- 1 tablespoon butter
- Fresh parsley, chopped, for garnish (optional)
Tip: If you cannot find turkey ham, thinly sliced roast chicken or even turkey breast from the deli counter works perfectly here. The key is to have a savoury, thin protein layer that melts into the cheese as it bakes.
How to Make Chicken Cordon Bleu
- Prepare the chicken: Place a chicken breast between two sheets of cling film. Using a rolling pin or the flat side of a meat mallet, gently pound it to an even thickness of about 1cm. You should feel the fibres loosen under the pressure, and the breast should look uniformly flat and slightly larger than its original size. Repeat with the remaining breasts.
- Layer the filling: Lay one flattened chicken breast on a clean work surface. Place one slice of turkey ham on top, followed by one slice of Swiss cheese. The cheese should sit in the centre so it doesn’t ooze out during cooking. Season lightly with salt and pepper.
- Roll and secure: Starting from the short end, roll the chicken tightly around the filling, tucking in the sides as you go. You should see a neat, compact cylinder form with no gaps. Secure the roll with two or three toothpicks pushed through the seam. The chicken should feel firm and closed.
- Set up the coating station: In a shallow bowl, whisk the eggs until they are uniform in colour and slightly frothy—this creates a smooth coating. In a separate shallow bowl, combine the breadcrumbs, Parmesan, garlic powder, thyme, paprika, and a pinch of salt and pepper. Mix with a fork until the Parmesan is evenly distributed among the breadcrumbs.
- Coat the rolls: Dip each chicken roll first into the egg wash, turning to coat completely. Let any excess drip off for a second or two. Then roll it in the breadcrumb mixture, pressing gently so the crumbs stick. The coating should look dry and textured, with no wet patches visible. Place the coated rolls on a plate.
- Sear for colour: Heat the olive oil and butter in a large ovenproof skillet over a medium-high flame. When the butter stops foaming and the oil shimmers, carefully place the chicken rolls in the pan, seam-side down. Cook for 2-3 minutes without moving them—you’ll hear a steady sizzle. When the underside is deep golden brown and crispy to the touch, turn them to brown the other sides. This should take another 4-5 minutes total, rotating as needed.
- Finish in the oven: Preheat your oven to 200°C (180°C fan). Transfer the skillet to the oven and bake for 12-15 minutes. The chicken is ready when the internal temperature reaches 74°C on a meat thermometer and the coating feels firm and crunchy when pressed. The cheese may have melted slightly at the ends.
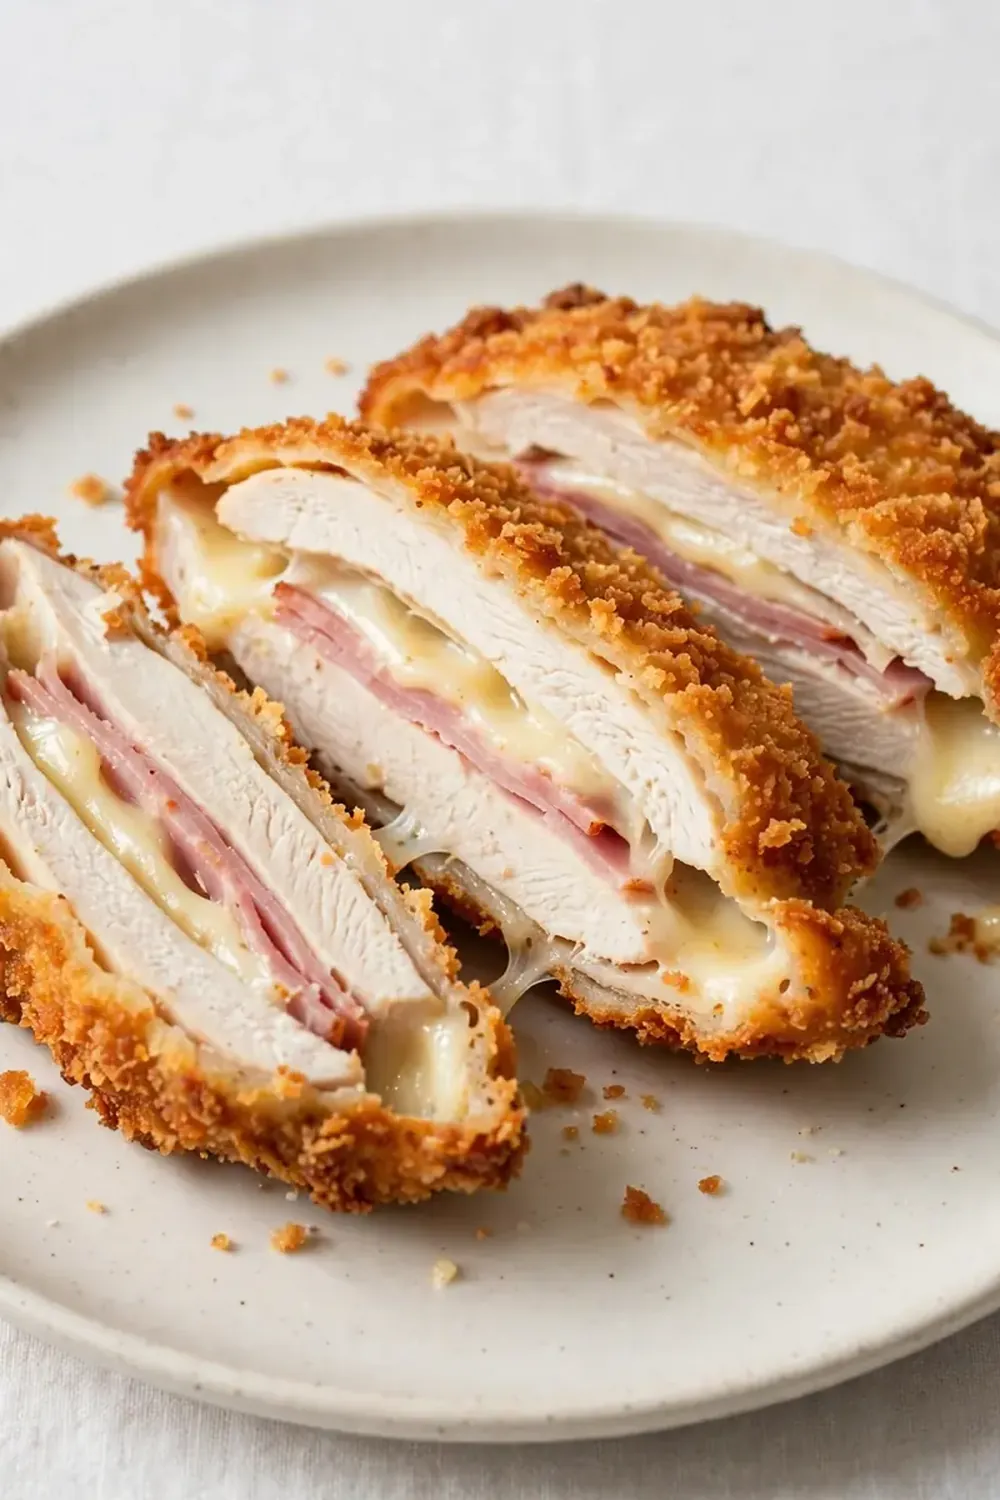
- Rest and serve: Remove the skillet from the oven and let the chicken rest for 5 minutes. This allows the juices to redistribute and the cheese to set slightly. Remove the toothpicks carefully, then slice each roll into medallions about 2cm thick. The cross-section should reveal a neat spiral of meat, ham, and melted cheese. Garnish with fresh parsley if desired.
Tips From My Kitchen
- Pound the chicken evenly to avoid uneven cooking: If one part of the breast is thicker than another, it will cook at a different rate. The thin end will dry out while the thick end remains undercooked. By pounding to a uniform 1cm thickness, you guarantee that every piece cooks in the same time, resulting in juicy meat throughout.
- Use toothpicks to hold the shape—don’t skip this: Without toothpicks, the roll will unravel during the searing stage, and the cheese will leak into the pan. The toothpicks act as temporary stitches that keep everything tightly bound. Just remember to remove them before serving—I always count them out so I know none are missing.
- Chill the assembled rolls for 10 minutes before coating: If you have a spare moment, pop the rolled (but not yet coated) chicken into the fridge for 10 minutes. This firms up the butter and cheese slightly, making the rolls easier to handle and less likely to fall apart when you dip them in the egg wash. I do this while I’m preparing the breadcrumb mixture.
- Don’t overcrowd the pan during searing: The chicken needs direct contact with the hot pan to develop that golden crust. If you crowd the skillet, the temperature drops, and the chicken steams instead of sears. Cook in batches if necessary—it adds only a few minutes but makes a huge difference to the texture and colour.
- Use a meat thermometer for guaranteed doneness: Chicken breast is notoriously easy to overcook, leaving it dry and stringy. A meat thermometer takes the guesswork out of the equation. Insert it into the thickest part of the roll; when it reads 74°C, the chicken is perfectly cooked and still juicy. I keep mine in the drawer next to the oven for this very reason.
- Make it ahead for an even faster dinner: Assemble and coat the rolls up to a day in advance. Place them on a baking sheet lined with parchment, cover loosely with cling film, and refrigerate. When you’re ready to eat, simply sear and bake as directed—no extra prep time needed. This is brilliant when you know you have a late meeting or school pickup.
Common Mistakes to Avoid
- Overcrowding the pan: When you place too many rolls in the skillet at once, the temperature plummets. Instead of a crisp, golden sear, you get a pale, soggy exterior. Cook in two batches if needed, and let the pan reheat between batches for 30 seconds.
- Wrong temperature: Searing over a medium-high heat is essential—too low, and the coating absorbs oil and becomes greasy; too high, and the breadcrumbs burn before the chicken cooks through. Keep the flame at a steady medium-high and listen for that consistent sizzle.
- Skipping the rest time: Cutting into the chicken immediately after it comes out of the oven causes all the juices to run out onto the cutting board, leaving the meat dry. That five-minute rest allows the juices to redistribute evenly throughout the roll, so every bite stays moist and tender.
Delicious Variations to Try
- Spicy Version: Add ½ teaspoon of cayenne pepper to the breadcrumb mixture and a thin layer of sliced jalapeños inside the roll alongside the cheese. The heat cuts through the richness beautifully and adds a welcome kick. I make this version when my husband wants something with a bit of fire.
- Vegetarian/Vegan Option: Swap the chicken for large, flat pieces of firm tofu or seitan that have been pressed and marinated in vegetable stock and soy sauce for 30 minutes. Use vegan cheese slices and a flax egg (1 tablespoon ground flaxseed mixed with 3 tablespoons water) for the coating. The cooking time remains roughly the same, though you may need to add 2-3 minutes in the oven.
- Different Protein: Thin turkey breast cutlets work wonderfully here, as they are naturally lean and cook quickly. You can also use veal escalopes for a more delicate flavour. Adjust the cooking time slightly—turkey may need an extra minute or two, while veal will cook in the same time as chicken.
What to Serve With Chicken Cordon Bleu
- Steamed green beans tossed with a little butter and lemon zest
- A simple mixed salad with a light vinaigrette to cut through the richness
- Mashed potatoes with country gravy for a truly comforting plate
- Roasted cherry tomatoes and courgette for a low-carb, colourful side
- Creamy garlic Parmesan pasta if you want to turn this into an indulgent feast
Still hungry for ideas? You might also love Cheesy Chicken Cordon Bleu Sandwich Delicious Easy, Chicken Cordon Bleu Casserole from our sister kitchens.
Frequently Asked Questions
Chicken Cordon Bleu
Ingredients
Method
- Prepare the chicken: Place a chicken breast between two sheets of cling film. Using a rolling pin or the flat side of a meat mallet, gently pound it to an even thickness of about 1cm. You should feel the fibres loosen under the pressure, and the breast should look uniformly flat and slightly larger than its original size. Repeat with the remaining breasts.
- Layer the filling: Lay one flattened chicken breast on a clean work surface. Place one slice of turkey ham on top, followed by one slice of Swiss cheese. The cheese should sit in the centre so it doesn't ooze out during cooking. Season lightly with salt and pepper.
- Roll and secure: Starting from the short end, roll the chicken tightly around the filling, tucking in the sides as you go. You should see a neat, compact cylinder form with no gaps. Secure the roll with two or three toothpicks pushed through the seam. The chicken should feel firm and closed.
- Set up the coating station: In a shallow bowl, whisk the eggs until they are uniform in colour and slightly frothy—this creates a smooth coating. In a separate shallow bowl, combine the breadcrumbs, Parmesan, garlic powder, thyme, paprika, and a pinch of salt and pepper. Mix with a fork until the Parmesan is evenly distributed among the breadcrumbs.
- Coat the rolls: Dip each chicken roll first into the egg wash, turning to coat completely. Let any excess drip off for a second or two. Then roll it in the breadcrumb mixture, pressing gently so the crumbs stick. The coating should look dry and textured, with no wet patches visible. Place the coated rolls on a plate.
- Sear for colour: Heat the olive oil and butter in a large ovenproof skillet over a medium-high flame. When the butter stops foaming and the oil shimmers, carefully place the chicken rolls in the pan, seam-side down. Cook for 2-3 minutes without moving them—you'll hear a steady sizzle. When the underside is deep golden brown and crispy to the touch, turn them to brown the other sides. This should take another 4-5 minutes total, rotating as needed.
- Finish in the oven: Preheat your oven to 200°C (180°C fan). Transfer the skillet to the oven and bake for 12-15 minutes. The chicken is ready when the internal temperature reaches 74°C on a meat thermometer and the coating feels firm and crunchy when pressed. The cheese may have melted slightly at the ends.
- Rest and serve: Remove the skillet from the oven and let the chicken rest for 5 minutes. This allows the juices to redistribute and the cheese to set slightly. Remove the toothpicks carefully, then slice each roll into medallions about 2cm thick. The cross-section should reveal a neat spiral of meat, ham, and melted cheese. Garnish with fresh parsley if desired.
Notes
This Chicken Cordon Bleu has genuinely changed how I approach busy weeknights. I make this at least once a week—it’s become a family favourite that everyone looks forward to, and friends always ask me for this recipe after trying it at dinner parties. I would love to hear how it works for you: drop a comment below and let me know if you tried the spicy version or served it with something unexpected. Happy cooking!