Smoked Brisket Burnt Ends
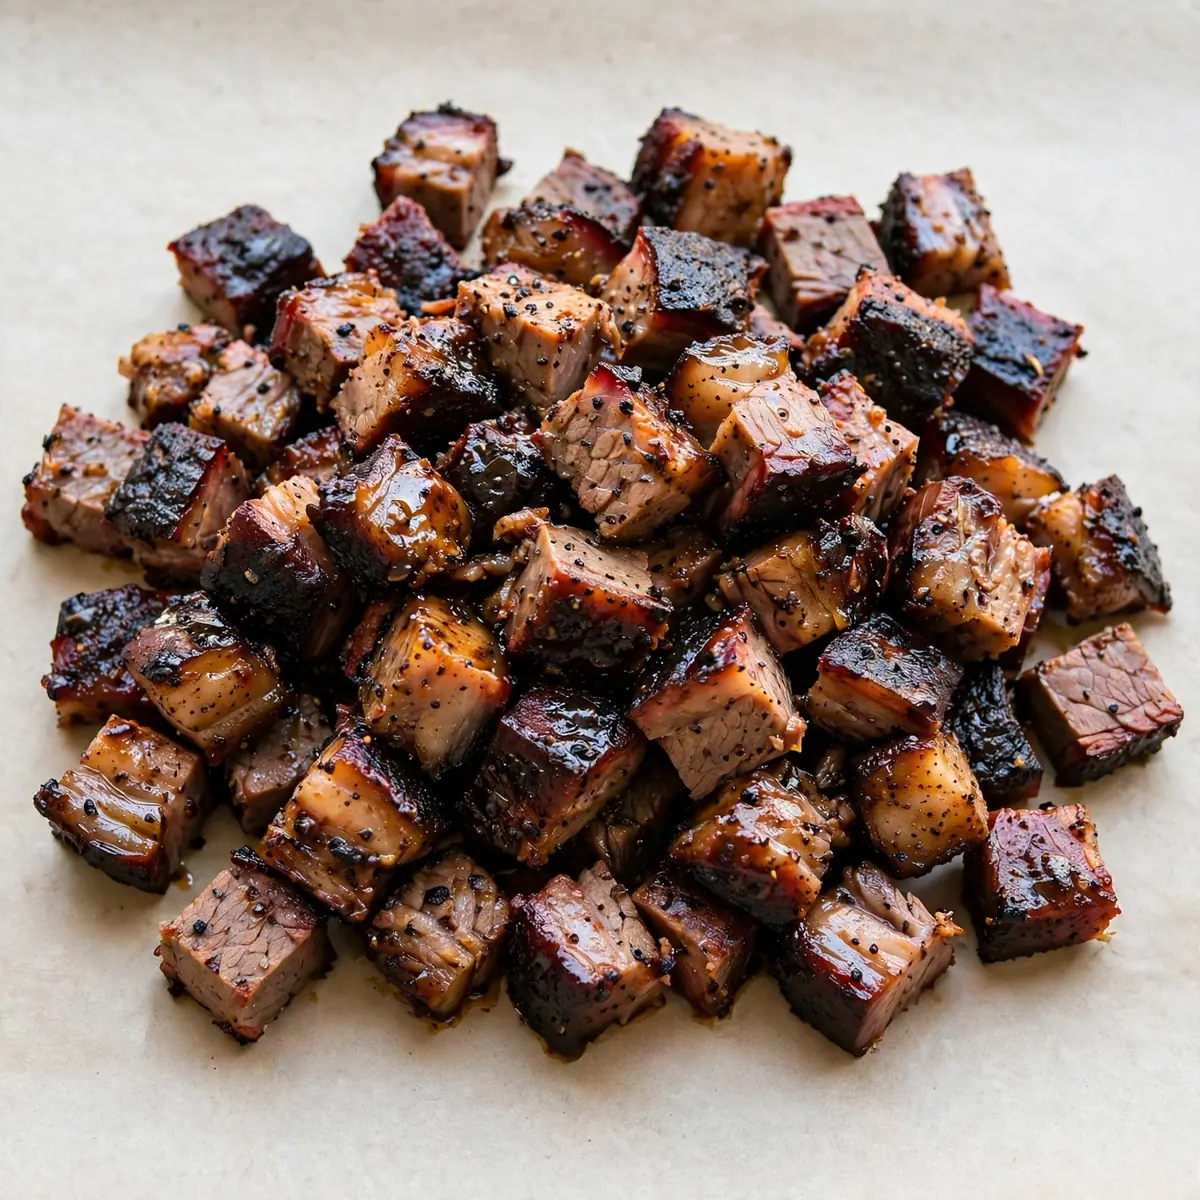
I remember the first time I tried burnt ends at a barbecue joint and thought, “There’s no way I’m spending twelve hours over a smoker to get these at home.” Fast forward a few years, and I’ve cracked the code for a weeknight-friendly version that delivers that same sticky, smoky, caramelised goodness without the all-day commitment. This is my go-to recipe when I need something quick but impressive, and I promise it’ll become a staple in your busy family kitchen, too.
Recipe Overview
- Prep time: 15 minutes
- Cook time: 1 hour 15 minutes
- Total time: 1 hour 30 minutes
- Servings: 4-6
- Difficulty: Easy
Why You’ll Love This Smoked Brisket Burnt Ends
- Weeknight speed: We skip the long, low-and-slow smoking session and use a clever stovetop-to-oven method that cuts the cook time down to just over an hour.
- Minimal cleanup: Everything cooks in a single oven-safe skillet or casserole dish, so you’re left with hardly any washing up after dinner.
- Family-friendly flavour: The sweet, savoury, and gently smoky glaze appeals to both adults and children without being overly spicy or intense.
- Make-ahead magic: You can prepare the brisket cubes and the glaze a day in advance, then simply assemble and bake when you’re ready to eat.
- Budget-friendly: Rather than using an entire whole brisket, this recipe calls for a smaller brisket joint or even thick-cut stewing beef, making it much more affordable for a family dinner.
Ingredients You’ll Need
- 1 kg beef brisket joint (or thick-cut stewing beef), cut into 3cm cubes
- 2 tablespoons smoked paprika
- 1 tablespoon garlic powder
- 1 tablespoon onion powder
- 1 teaspoon black pepper
- 1 teaspoon salt
- 1 tablespoon olive oil
- 100 ml beef stock
- 80 ml tomato ketchup
- 60 ml apple cider vinegar
- 60 ml honey
- 2 tablespoons brown sugar
- 1 tablespoon Worcestershire sauce (ensure it’s halal-certified)
- 1 teaspoon liquid smoke (optional, for a deeper smoky flavour)
Tip: For the best texture, look for a brisket joint with a good layer of fat running through it — this keeps the meat juicy and tender as it cooks.
How to Make Smoked Brisket Burnt Ends
- Preheat and prepare: Preheat your oven to 180°C (350°F). While it’s heating, pat the beef cubes dry with kitchen paper — you’ll notice the surface feels slightly tacky, which helps the seasoning stick. In a large bowl, combine the smoked paprika, garlic powder, onion powder, black pepper, and salt. Toss the beef cubes in the spice mix until each piece is evenly coated, with a deep red-brown colour.
- Sear the beef: Heat the olive oil in a large oven-safe skillet over a high heat. When the oil shimmers and you can feel the heat radiating from the pan, add the beef cubes in a single layer — you should hear a satisfying sizzle as they hit the pan. Sear for 2-3 minutes per side, turning with tongs, until all sides are deeply browned and you can smell the toasted spices. The surface should look crusty and dark, not grey and steamed.
- Build the glaze: Reduce the heat to medium. Pour in the beef stock and use a wooden spoon to scrape up any browned bits from the bottom of the pan — these are packed with flavour and will dissolve into the sauce. Stir in the ketchup, apple cider vinegar, honey, brown sugar, Worcestershire sauce, and liquid smoke if using. The mixture will look thin at first, with a deep mahogany colour, and you’ll smell a sweet-sour aroma rising from the pan.
- Simmer and thicken: Bring the liquid to a gentle bubble — you should see small bubbles breaking the surface, not a rolling boil. Let it simmer for 5 minutes, stirring occasionally. As it cooks, the sauce will start to thicken and coat the back of your spoon, turning a glossy, sticky dark red. The beef cubes will be bathed in the sauce, and the kitchen will smell wonderfully smoky and sweet.
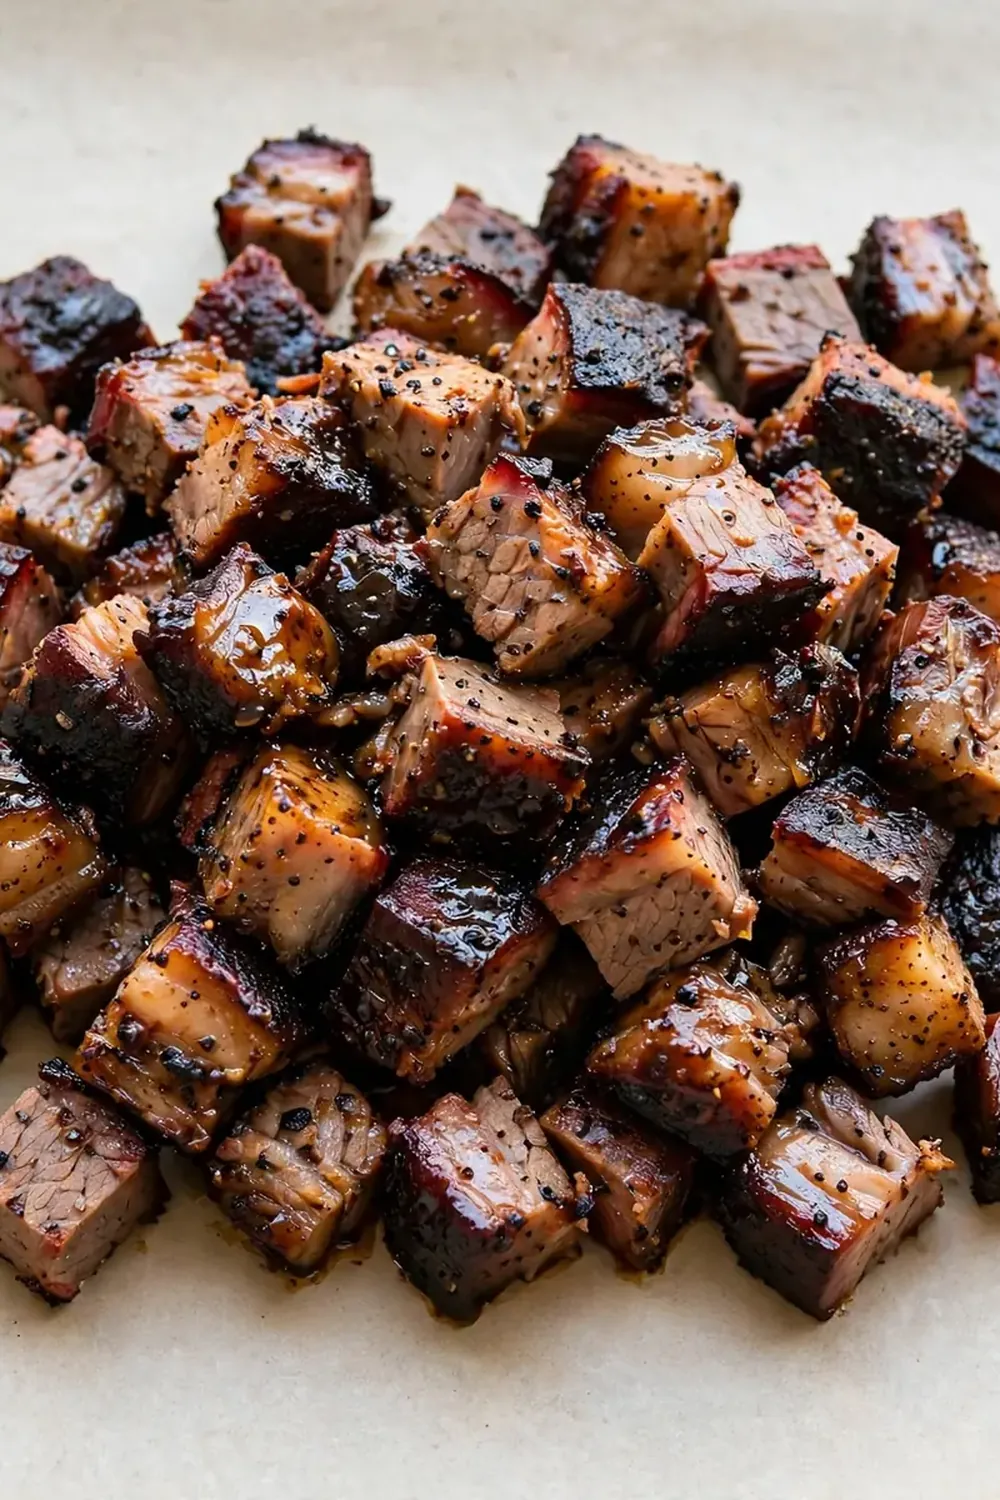
- Bake to perfection: Transfer the skillet to the preheated oven, uncovered. Bake for 45 minutes, giving the pan a gentle stir halfway through. After 30 minutes, check the texture — the sauce should be bubbling and reducing, and the beef cubes should look glossy and caramelised. When done, the meat should be fork-tender, pulling apart easily with a slight tug, and the sauce will have reduced to a thick, sticky glaze that clings to every piece.
- Rest and serve: Remove the skillet from the oven and let the burnt ends rest for 5 minutes. During this time, the juices redistribute within the meat, and the sauce continues to set, becoming even stickier. You’ll notice the glossy sheen on each cube — that’s the sign of a perfect burnt end. Serve immediately, spooning any remaining glaze from the pan over the top.
Tips From My Kitchen
- Cut uniform cubes: I cannot stress this enough — cutting your beef into even 3cm cubes ensures they all cook at the same rate. If some pieces are larger and some smaller, you’ll end up with a mix of overcooked, dry bits and undercooked, chewy ones. Take the extra minute to measure them out; it makes a world of difference.
- Don’t skip the sear: That initial high-heat sear is what builds the deep, savoury flavour base. It creates a crust on the meat through the Maillard reaction, which adds complexity that you simply can’t get from just baking. If you skip this step, your burnt ends will taste more like a stew than the caramelised barbecue treat they should be.
- Use a meat thermometer: While we’re not smoking the brisket for hours, checking the internal temperature is still key. For tender burnt ends, you want the beef to reach around 90°C (195°F) — at this point, the collagen has broken down, and the meat will be wonderfully soft. Use a digital probe thermometer to be precise.
- Make the glaze ahead: If you’re pressed for time on a school night, whisk together all the glaze ingredients (stock, ketchup, vinegar, honey, sugar, Worcestershire sauce, and liquid smoke) and store it in a jar in the fridge for up to a week. When you’re ready to cook, just sear the beef and pour the glaze straight in — you’ve saved yourself 5 minutes.
- Double the batch for leftovers: These burnt ends are even better the next day, as the flavours meld together overnight. I always make a double batch and keep the leftovers in the fridge for quick lunches or to pile onto a jacket potato or a simple salad. They reheat beautifully in a microwave or a low oven.
Common Mistakes to Avoid
- Overcrowding the pan: When searing the beef, if you crowd the pan, the meat will steam rather than brown. You’ll notice the cubes turn grey instead of developing that rich, dark crust. Sear in batches if necessary, giving each piece room to breathe, and wipe the pan clean between batches for the best results.
- Wrong temperature: Baking at too high a temperature will dry out the beef before the sauce has had time to reduce and caramelise. Stick to 180°C (350°F) — it’s the sweet spot where the meat becomes tender and the glaze thickens to that perfect sticky consistency without burning.
- Skipping the rest time: I know it’s tempting to dig in straight away, but letting the burnt ends rest for just 5 minutes makes a noticeable difference. The meat fibres relax, the juices redistribute, and the sauce sets into a thicker, glossier coating. If you skip this step, you’ll have a watery sauce and drier meat.
Delicious Variations to Try
- Spicy Version: For those who like a kick, add 1-2 teaspoons of chipotle paste or a finely chopped red chilli to the glaze alongside the other ingredients. You can also sprinkle a pinch of cayenne pepper into the dry rub for an extra layer of heat that builds as you eat.
- Vegetarian/Vegan Option: Swap the beef for large, meaty king oyster mushrooms or thick slabs of halloumi (if not vegan). For a fully vegan version, use extra-firm tofu, pressed and cubed, then seared until golden. Replace the beef stock with a good-quality vegetable stock and ensure your Worcestershire sauce is vegan-friendly. The glaze works beautifully on these alternatives, giving them that same sticky, smoky character.
- Different Protein: This method works wonderfully with other meats. Try using boneless, skinless chicken thighs cut into chunks — they cook in about 30 minutes and stay incredibly juicy. Lamb shoulder cubes also work well, offering a richer, more gamey flavour that pairs beautifully with the sweet glaze. For a lighter option, turkey breast cubes can be used, though watch the cooking time closely as they can dry out faster.
What to Serve With Smoked Brisket Burnt Ends
- Fluffy white rice or buttery mashed potatoes to soak up the extra glaze
- A crisp coleslaw with a tangy yoghurt dressing to cut through the richness
- Grilled corn on the cob brushed with a little butter and smoked paprika
- Soft flour tortillas for making impromptu burnt ends tacos — try a version inspired by these Beef Birria Tacos Recipe Authentic Mexican for a fun twist
- A simple side of steamed green beans or tenderstem broccoli
Still hungry for ideas? You might also love Ultimate Smoked Beef Brisket Recipe from our sister kitchens.
Frequently Asked Questions
Smoked Brisket Burnt Ends
Ingredients
Method
-
Preheat and prepare: Preheat your oven to 180°C (350°F). While it’s heating, pat the beef cubes dry with kitchen paper — you’ll notice the surface feels slightly tacky, which helps the seasoning stick. In a large bowl, combine the smoked paprika, garlic powder, onion powder, black pepper, and salt. Toss the beef cubes in the spice mix until each piece is evenly coated, with a deep red-brown colour.
-
Sear the beef: Heat the olive oil in a large oven-safe skillet over a high heat. When the oil shimmers and you can feel the heat radiating from the pan, add the beef cubes in a single layer — you should hear a satisfying sizzle as they hit the pan. Sear for 2-3 minutes per side, turning with tongs, until all sides are deeply browned and you can smell the toasted spices. The surface should look crusty and dark, not grey and steamed.
-
Build the glaze: Reduce the heat to medium. Pour in the beef stock and use a wooden spoon to scrape up any browned bits from the bottom of the pan — these are packed with flavour and will dissolve into the sauce. Stir in the ketchup, apple cider vinegar, honey, brown sugar, Worcestershire sauce, and liquid smoke if using. The mixture will look thin at first, with a deep mahogany colour, and you’ll smell a sweet-sour aroma rising from the pan.
-
Simmer and thicken: Bring the liquid to a gentle bubble — you should see small bubbles breaking the surface, not a rolling boil. Let it simmer for 5 minutes, stirring occasionally. As it cooks, the sauce will start to thicken and coat the back of your spoon, turning a glossy, sticky dark red. The beef cubes will be bathed in the sauce, and the kitchen will smell wonderfully smoky and sweet.
-
Bake to perfection: Transfer the skillet to the preheated oven, uncovered. Bake for 45 minutes, giving the pan a gentle stir halfway through. After 30 minutes, check the texture — the sauce should be bubbling and reducing, and the beef cubes should look glossy and caramelised. When done, the meat should be fork-tender, pulling apart easily with a slight tug, and the sauce will have reduced to a thick, sticky glaze that clings to every piece.
-
Rest and serve: Remove the skillet from the oven and let the burnt ends rest for 5 minutes. During this time, the juices redistribute within the meat, and the sauce continues to set, becoming even stickier. You’ll notice the glossy sheen on each cube — that’s the sign of a perfect burnt end. Serve immediately, spooning any remaining glaze from the pan over the top.
Notes
I make this at least once a week – it’s become a family favourite, and it never fails to satisfy that deep craving for something smoky, sweet, and utterly comforting without spending the whole day in the kitchen. I’d love to hear how your version turns out — drop a comment below and let me know if your family devoured it as quickly as mine does. And if you’re looking for another speedy weeknight dinner that packs a punch, you should try this Creamy Garlic Herb Chicken Recipe Skillet Meal for a completely different but equally satisfying flavour profile.