Stuffed Cookies Recipe with Gooey Center
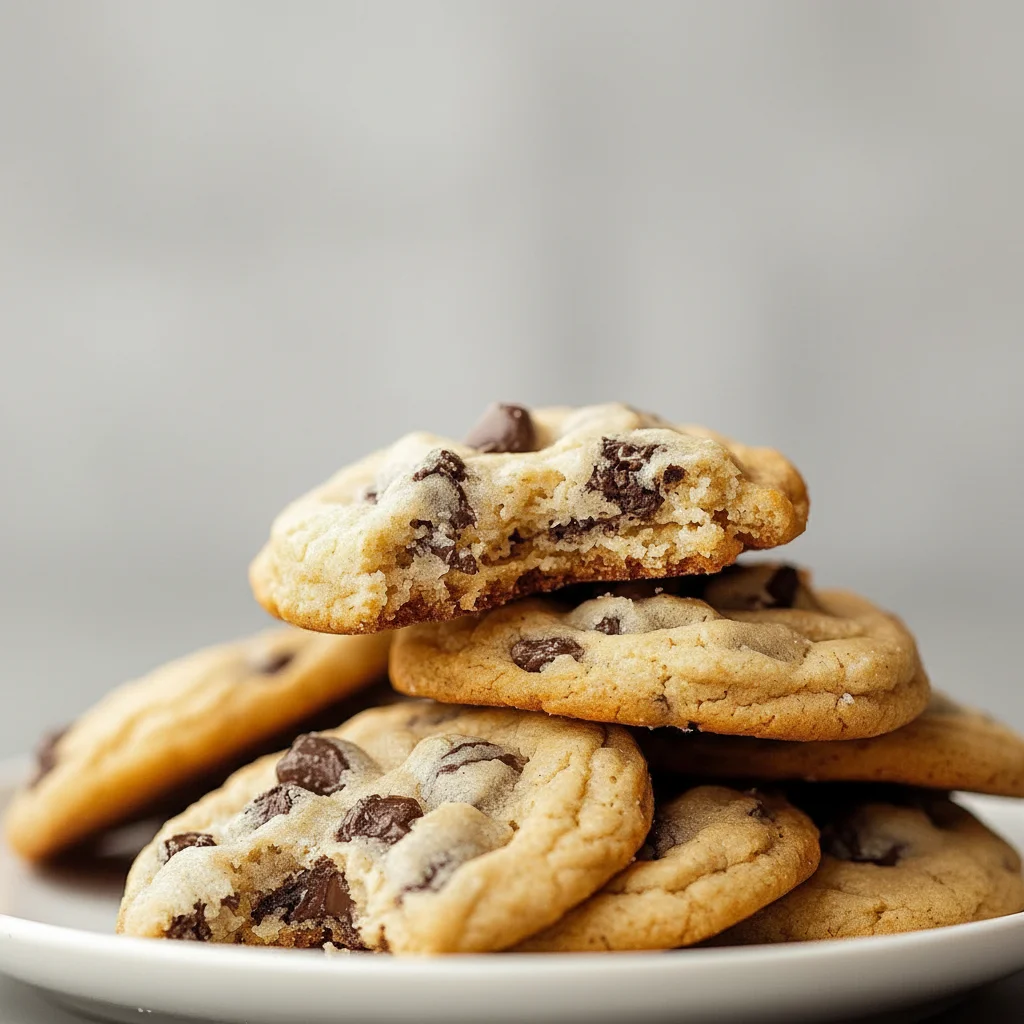
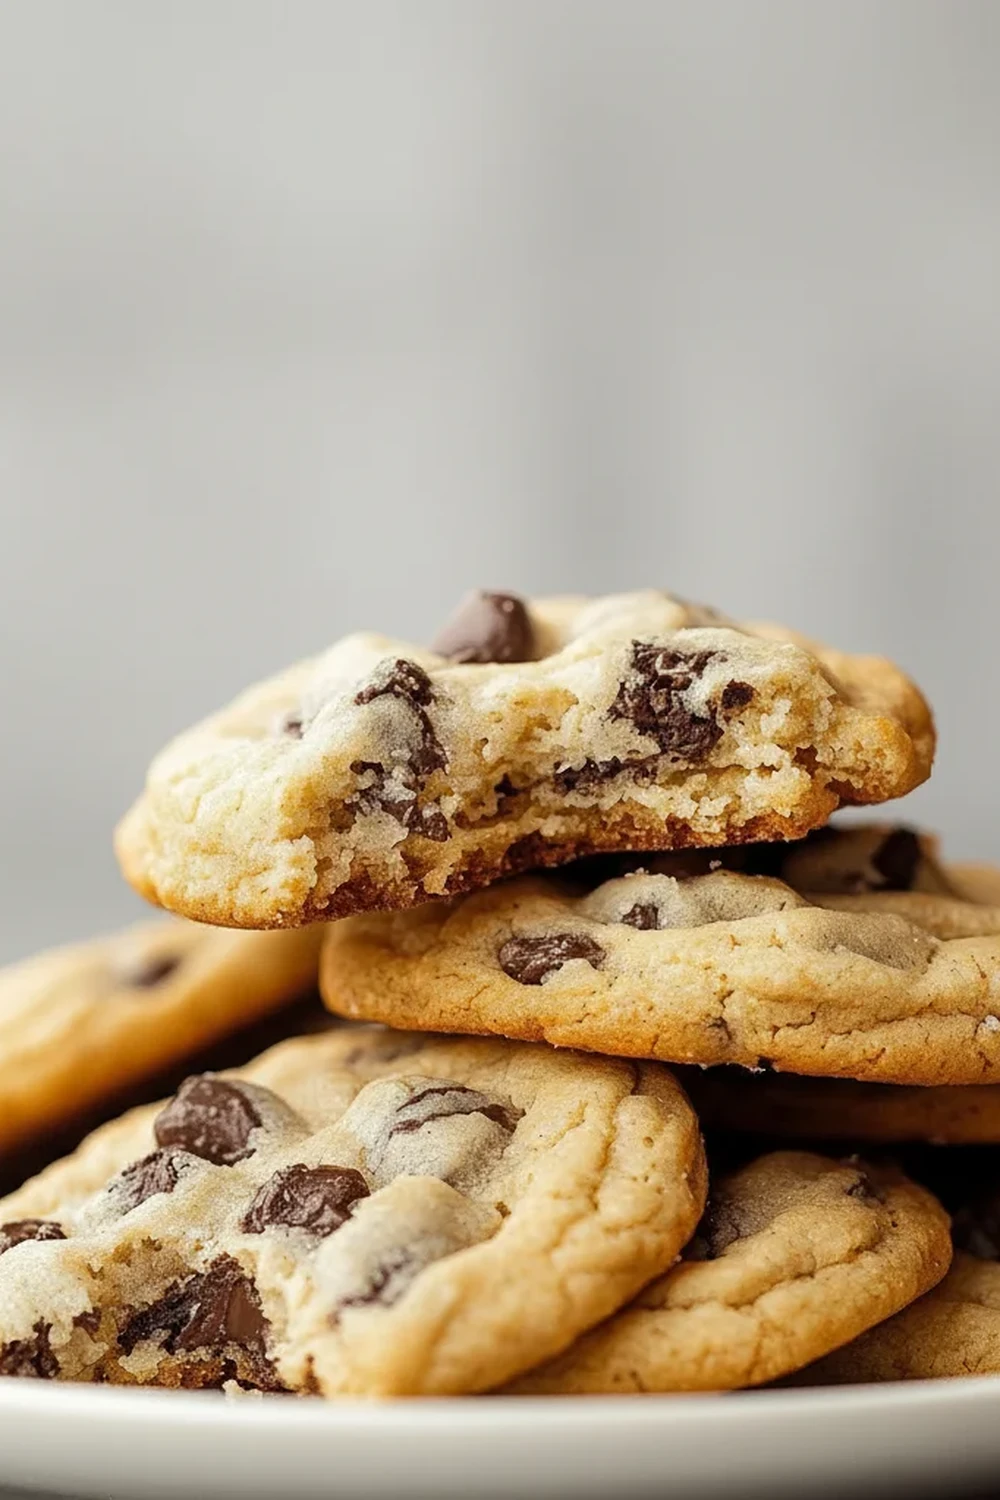
There’s a certain magic to a really good homemade cookie. Not just any cookie, but one that stops you in your tracks. One with crisp, golden edges that give way to a soft, chewy centre, studded with pools of melted chocolate. Now, imagine taking that cookie and hiding a secret inside – a warm, molten core of rich, gooey filling that spills out with the first bite. That, right there, is the heart of this stuffed cookies recipe. It elevates a simple treat into something truly special.
This isn’t just another cookie recipe; it’s a project, a treat, and an experience all in one. The secret starts with browning the butter, a small step that adds an incredible nutty depth of flavour that you just can’t get otherwise. From there, we build a rich, brown sugar dough and stuff it with your favourite filling before baking it to perfection. My kids absolutely devour this every time I make it, and their happy, chocolate-smeared faces are all the proof I need that this recipe is a keeper. It’s ideal for a weekend baking session when you want to create something a little bit extraordinary.
Recipe Overview
This stuffed cookies recipe delivers twelve large, bakery-style cookies with a deeply flavourful brown butter and vanilla dough, loaded with dark chocolate chunks, and a surprise molten Nutella centre. They bake up thick and chewy, with a satisfyingly crisp edge. I once tried rushing the process by not freezing the filling first, and while still tasty, they were much trickier to handle. That little bit of prep makes all the difference for a clean, gooey reveal.
- Prep Time: 25 minutes
- Chill Time: 1 hour 30 minutes
- Cook Time: 14 minutes
- Total Time: 2 hours 9 minutes
- Servings: 12 large cookies
- Difficulty: Medium
Why You’ll Love This Stuffed Cookies Recipe
- Genuine Flavour: We’re not just making sweet cookies; we’re building layers of flavour. The nutty, caramelised notes from the browned butter, the deep molasses hit from dark brown sugar, and a generous amount of high-quality dark chocolate create a truly grown-up taste that’s beautifully balanced by the sweet, creamy filling.
- Active Time is Minimal: While there’s chilling involved, the hands-on part of this recipe comes together in about 25 minutes. It’s a straightforward process of melting, mixing, and shaping.
- A Truly Flexible Recipe: The best part about a stuffed cookie is changing the surprise inside! While I adore Nutella, this works wonderfully with Biscoff spread, a thick salted caramel, or even a ball of peanut butter. You can also swap the dark chocolate chunks for milk chocolate, white chocolate, or chopped nuts.
- Great for Sharing: These substantial cookies are great for gifting. Pack them in a nice box for a friend’s birthday, bring them to a bake sale, or simply share them with family for a special afternoon tea.
- Family Tested: This recipe always gets rave reviews in my house. My husband, who’s usually picky about desserts, asked for seconds the first time I made them, which is the highest praise you can get!
Ingredients You’ll Need
For the best results, using good quality ingredients makes a world of difference, especially with the butter and chocolate. I often use Callebaut chocolate callets as they melt into beautiful pools, but any good quality dark chocolate bar chopped into chunks will work. Ensure your eggs are at room temperature to help them incorporate smoothly into the batter.
- 170g unsalted butter
- 200g dark brown soft sugar
- 50g granulated sugar
- 1 large egg, plus 1 egg yolk (at room temperature)
- 2 teaspoons vanilla extract
- 280g plain flour
- 1/2 teaspoon bicarbonate of soda
- 1/2 teaspoon baking powder
- 1/2 teaspoon salt
- 200g dark chocolate chunks or chips (at least 54% cocoa solids)
- 12 teaspoons (approx. 180g) Nutella, Biscoff spread, or other thick filling
Marcus’s Tip: If you forget to take your egg out of the fridge, you can place it in a bowl of warm (not hot) water for 5-10 minutes to bring it to room temperature quickly. This prevents the cold egg from re-solidifying the creamed butter and sugar mixture.
How to Make Stuffed Cookies
The process is broken down into four main stages: preparing the filling, making the dough, stuffing the cookies, and baking. Don’t be tempted to skip the chilling steps – they are crucial for a thick cookie that doesn’t spread into a puddle in the oven.
- Prepare the Filling: Line a small baking tray or plate with parchment paper. Dollop 12 teaspoon-sized mounds of Nutella (or your chosen filling) onto the paper. Place the tray in the freezer for at least 1 hour, or until the mounds are solid. This makes them much easier to wrap the dough around.
- Brown the Butter: In a small, light-coloured saucepan, melt the unsalted butter over a medium heat. Continue to cook, swirling the pan occasionally, as the butter foams and then subsides. You’ll see little brown bits forming at the bottom and smell a wonderful, nutty aroma. This takes about 5-7 minutes. Immediately pour the browned butter, including all the brown bits, into a large mixing bowl to stop the cooking process. Let it cool for 10 minutes.
- Mix the Dough: To the bowl with the cooled browned butter, add the dark brown sugar and granulated sugar. Whisk vigorously for a minute until well combined. Add the egg, egg yolk, and vanilla extract, and whisk again until the mixture is glossy and smooth.
- Combine Dry Ingredients: In a separate bowl, whisk together the plain flour, bicarbonate of soda, baking powder, and salt.
- Finish the Dough: Add the dry ingredients to the wet ingredients and fold them together with a spatula until just combined. Be careful not to overmix. Fold in the dark chocolate chunks.
- Chill the Dough: Cover the bowl with cling film and place it in the refrigerator to chill for at least 30 minutes. The dough will be firm and less sticky, making it easier to handle.
- Stuff the Cookies: Preheat your oven to 180°C (160°C fan) and line two large baking trays with parchment paper. Using a large cookie scoop or your hands, portion the dough into 12 equal balls (each should be about 60-65g). Take one ball of dough, flatten it into a disc in your palm, place one frozen Nutella mound in the centre, and carefully wrap the dough around it, sealing the edges completely. Roll it back into a smooth ball. I find that a tight seal is key to preventing any filling from escaping during baking. Repeat with the remaining dough and filling.
- Bake to Perfection: Place 6 cookie balls on each prepared tray, leaving plenty of space between them as they will spread. Bake for 12-14 minutes, or until the edges are golden brown and set, but the centres still look slightly soft.
- Cool and Enjoy: Let the cookies cool on the baking trays for 10 minutes before transferring them to a wire rack to cool completely. This allows them to set up properly. They are fantastic when still slightly warm!
Tips From My Kitchen
- Temperature Control is Key: Chilling is your best friend with this recipe. Chilled dough spreads less, leading to a thicker, chewier cookie. And frozen filling is essential for a mess-free stuffing process. Don’t skip these steps!
- The Secret Step: I learned that giving the stuffed cookie balls a final, quick roll between your palms helps to ensure the seam is perfectly sealed. This is the best defence against the filling leaking out in the oven.
- Make-Ahead Method: You can prepare the stuffed, unbaked cookie dough balls and freeze them on a baking tray until solid. Then, transfer them to a freezer-safe bag or container. They can be baked straight from frozen; just add 2-3 minutes to the baking time.
- Storage: Store the baked cookies in an airtight container at room temperature. They will stay fresh and chewy for up to 4 days. You can refresh a day-old cookie by popping it in the microwave for 10-15 seconds to get that gooey centre back.
What to Serve With Stuffed Cookies
While these dessert cookies are a magnificent treat on their own, they can be turned into an even more decadent experience with the right pairing. For another fantastic dessert, check out my Lemon Crumb Bars Recipe.
- A Glass of Cold Milk: The simple, classic pairing. The cold milk cuts through the richness of the chocolate and sweet filling, creating a perfect balance.
- Vanilla Bean Ice Cream: Serve a cookie warm from the oven with a scoop of high-quality vanilla ice cream on top. The contrast of the warm, gooey cookie and the cold, creamy ice cream is absolutely divine.
- A Strong Coffee: For the adults, a cup of freshly brewed black coffee or an espresso is a great companion. The slightly bitter notes of the coffee complement the sweetness of this Stuffed Cookies Recipe beautifully.
Frequently Asked Questions
Stuffed Cookies Recipe
Ingredients
Method
- Prepare the Filling: Line a small baking tray or plate with parchment paper. Dollop 12 teaspoon-sized mounds of Nutella (or your chosen filling) onto the paper. Place the tray in the freezer for at least 1 hour, or until the mounds are solid. This makes them much easier to wrap the dough around.
- Brown the Butter: In a small, light-coloured saucepan, melt the unsalted butter over a medium heat. Continue to cook, swirling the pan occasionally, as the butter foams and then subsides. You'll see little brown bits forming at the bottom and smell a wonderful, nutty aroma. This takes about 5-7 minutes. Immediately pour the browned butter, including all the brown bits, into a large mixing bowl to stop the cooking process. Let it cool for 10 minutes.
- Mix the Dough: To the bowl with the cooled browned butter, add the dark brown sugar and granulated sugar. Whisk vigorously for a minute until well combined. Add the egg, egg yolk, and vanilla extract, and whisk again until the mixture is glossy and smooth.
- Combine Dry Ingredients: In a separate bowl, whisk together the plain flour, bicarbonate of soda, baking powder, and salt.
- Finish the Dough: Add the dry ingredients to the wet ingredients and fold them together with a spatula until just combined. Be careful not to overmix. Fold in the dark chocolate chunks.
- Chill the Dough: Cover the bowl with cling film and place it in the refrigerator to chill for at least 30 minutes. The dough will be firm and less sticky, making it easier to handle.
- Stuff the Cookies: Preheat your oven to 180°C (160°C fan) and line two large baking trays with parchment paper. Using a large cookie scoop or your hands, portion the dough into 12 equal balls (each should be about 60-65g). Take one ball of dough, flatten it into a disc in your palm, place one frozen Nutella mound in the centre, and carefully wrap the dough around it, sealing the edges completely. Roll it back into a smooth ball. I find that a tight seal is key to preventing any filling from escaping during baking. Repeat with the remaining dough and filling.
- Bake to Perfection: Place 6 cookie balls on each prepared tray, leaving plenty of space between them as they will spread. Bake for 12-14 minutes, or until the edges are golden brown and set, but the centres still look slightly soft.
- Cool and Enjoy: Let the cookies cool on the baking trays for 10 minutes before transferring them to a wire rack to cool completely. This allows them to set up properly. They are fantastic when still slightly warm!
Notes
I really hope you give this stuffed cookies recipe a go. It takes a little more effort than a standard drop cookie, but the reward of that molten, hidden centre is more than worth it. There’s something so satisfying about watching someone’s eyes light up when they discover the surprise inside. Let me know in the comments how they turn out for you and what fillings you experiment with! Happy baking.
– Marcus Bennett