Make-Ahead Freezer Breakfast Sandwiches for Busy Mornings
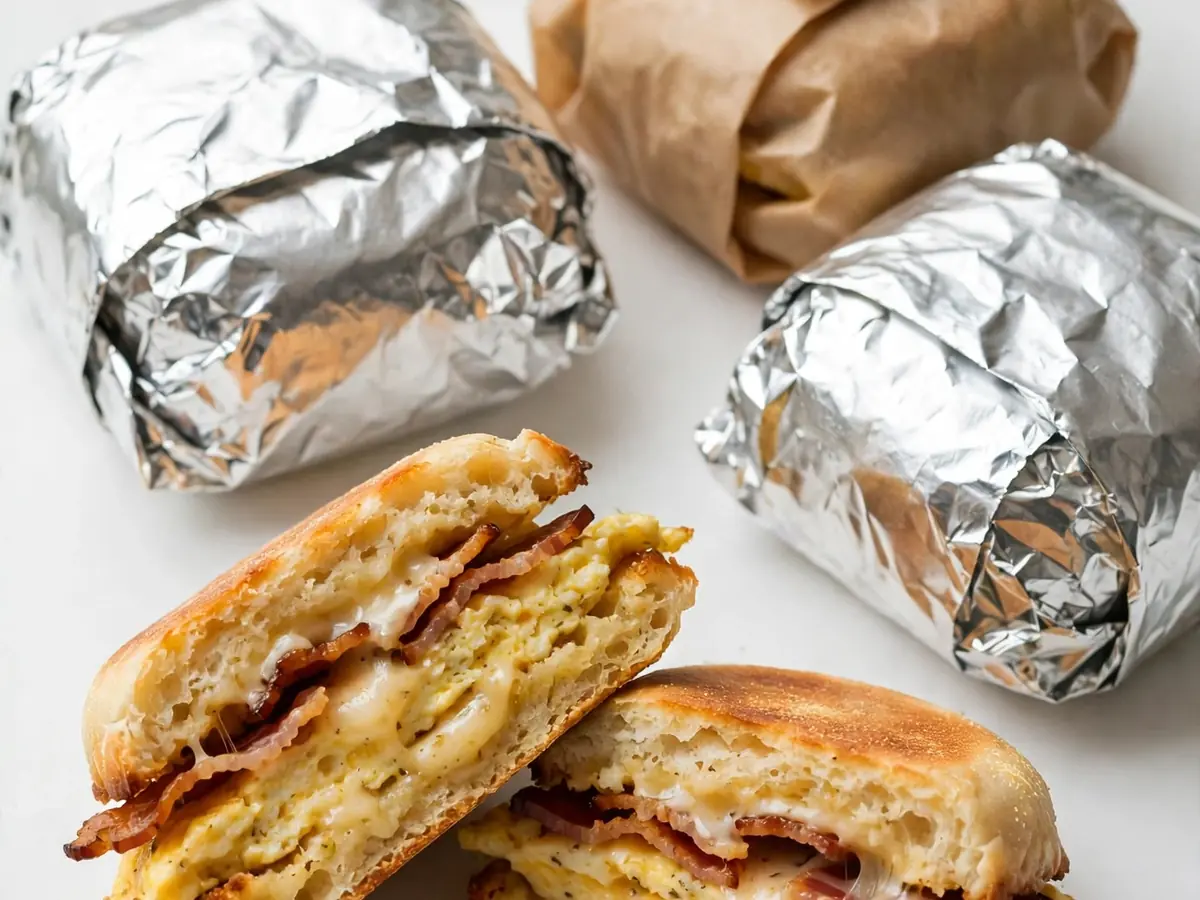
Mornings have a way of collapsing time. The alarm goes off late, the coffee hasn’t brewed, and the thought of standing at the stove to crack eggs and flip sausage feels impossible. That’s exactly where make-ahead freezer breakfast sandwiches earn their place in a busy kitchen. Built in a single batch, wrapped individually, and pulled out as needed, they turn a rushed start into a warm, satisfying meal in about the time it takes to toast a bagel.
This guide covers a complete, tested method for assembling, freezing, reheating, and storing breakfast sandwiches at home. You’ll find precise quantities, a full ingredient list, equipment notes, numbered instructions, and practical substitutions for dietary needs or what happens to be in the fridge. The goal is a reliable formula you can repeat weekly or monthly, with results that reheat tender rather than rubbery. For a stovetop version to enjoy fresh, see our easy egg breakfast sandwich recipe, and for another batch-friendly morning option, browse the Cuisinebite blog.
Why Freezer Breakfast Sandwiches Work
A breakfast sandwich freezes well when its components are handled correctly. The bread acts as a moisture barrier, the egg is cooked through but not dried out, and the cheese is placed so it melts during reheating and binds everything together. The critical rules are simple: cool every component completely before assembly, avoid watery fillings, and wrap tightly to prevent freezer burn.
Batch cooking also saves money and reduces morning decisions. A dozen sandwiches made from basic ingredients can cover two workweeks of breakfasts for one person, or a week for a family of two. Once you’ve mastered the base recipe, the format scales easily.
Ingredients and Exact Quantities
This recipe yields 12 breakfast sandwiches using standard English muffins. Adjust the counts proportionally if you use a different bread size.
- 12 English muffins (standard size, split)
- 12 large eggs
- 120 ml (½ cup) whole milk (or 2% milk)
- 1 teaspoon fine salt
- ½ teaspoon black pepper
- 2 tablespoons unsalted butter, for greasing the pan and optional toasting
- 12 slices cooked breakfast sausage patties (about 450 g / 1 lb raw weight) or 12 slices cooked bacon or 12 thin slices ham
- 12 slices cheese (about 20 g / 0.7 oz each), such as cheddar, Swiss, or American
Optional add-ins: ½ diced bell pepper, 60 g (½ cup) shredded cheese stirred into the eggs, 2 chopped scallions, or 1 teaspoon hot sauce. Keep add-ins dry and finely chopped so the egg layer sets evenly.
Equipment Needed
- Rimmed baking sheet, approximately 23 x 33 cm (9 x 13 inches)
- Parchment paper
- Mixing bowl and whisk
- Nonstick skillet or a second baking sheet for sausage or bacon
- Round cookie cutter or a drinking glass with a 9–10 cm (3½–4 inch) rim
- Plastic wrap or reusable freezer wrap
- Freezer-safe zip-top bags or a large airtight container
- Optional: kitchen scale, instant-read thermometer
Step-by-Step Preparation
- Preheat the oven to 180°C (350°F). Line the rimmed baking sheet with parchment paper and grease the paper lightly with butter.
- Whisk the egg mixture. In a bowl, combine the 12 eggs, 120 ml milk, 1 teaspoon salt, and ½ teaspoon pepper. Whisk until fully blended with no streaks of yolk. Stir in any optional add-ins now.
- Bake the egg sheet. Pour the mixture onto the prepared baking sheet and tilt gently to spread it evenly. Bake for 15–18 minutes, until the center is just set and no longer jiggles when the pan is nudged. Do not overbake; a slightly soft center firms as it cools.
- Cool the egg sheet on a wire rack for 15 minutes. It must be cool enough to handle before cutting, or the squares will tear.
- Cook the meat. While the eggs cool, cook the sausage patties in a skillet over medium heat for 3–4 minutes per side until browned and cooked through (internal temperature 71°C / 160°F). If using bacon, cook until crisp and drain on paper towels. Pat all meat dry with paper towels to remove surface grease.
- Cut the egg squares. Using the cookie cutter or glass rim, press firmly through the cooled egg sheet to make 12 rounds. Save the trimmings for snacking or scramble them into another meal.
- Split and toast the muffins (optional but recommended). Lightly butter the cut sides and toast in a skillet or under the broiler for 1–2 minutes until golden. Toasting creates a moisture barrier that keeps the bread from becoming soggy during reheating. Cool completely.
- Assemble in order. Place the bottom muffin half on a work surface. Add one egg round, then one slice of cheese, then one portion of meat. Top with the upper muffin half and press gently so the sandwich holds together.
- Wrap each sandwich tightly. Tear a sheet of plastic wrap about 30 cm (12 inches) long. Place the sandwich in the center, fold the long edges over, press out as much air as possible, and roll the sandwich snugly. Twist the ends closed. Label with the date if desired.
- Freeze flat. Place the wrapped sandwiches in a single layer on a baking sheet and freeze for 1–2 hours, until firm. Then transfer them to a freezer-safe zip-top bag or airtight container, squeezing out excess air. This two-step method prevents the sandwiches from sticking together and keeps their shape.
Reheating Instructions
Reheating is where freezer sandwiches succeed or fail. The goal is a hot center without a rubbery egg or soggy bread.
Microwave method (fastest): Remove the plastic wrap and wrap the sandwich in a paper towel. Microwave on 50% power for 2 minutes, then on high for 30–60 seconds, until heated through. Flip the sandwich halfway through. Let it rest 1 minute before eating. Starting at lower power prevents the egg from turning tough.
Oven method (best texture): Preheat the oven to 180°C (350°F). Remove the wrap, wrap the sandwich in foil, and bake for 20–25 minutes, until hot throughout. For a crisper exterior, unwrap for the final 5 minutes.
Air fryer method: Remove the wrap, place the sandwich in the basket, and heat at 160°C (320°F) for 8–10 minutes, flipping once. Times vary by appliance, so check the center.
Storage Guidance
- Refrigerator: Assembled, unwrapped sandwiches can be stored in an airtight container for up to 3 days. Wrap individually to prevent drying.
- Freezer: Properly wrapped sandwiches keep for up to 2 months for best quality. Beyond that, texture declines and freezer burn becomes likely.
- Do not refreeze a sandwich that has already been reheated.
- Cool before wrapping: Never wrap warm sandwiches; trapped steam creates ice crystals and sogginess.
Practical Substitutions
Bread: Bagels, English muffins, sandwich thins, croissants, or sturdy rolls all work. Avoid very soft bread, which tears when frozen. If using bagels, allow 15–20 minutes longer in the oven and cover loosely with foil if browning too quickly.
Eggs: The baked egg sheet is the most efficient method for 12 sandwiches. For a single-serve version, cook eggs in a small nonstick skillet or use a silicone egg ring. Egg whites can replace up to half the whole eggs, but the texture will be firmer.
Meat: Sausage, bacon, ham, turkey sausage, or plant-based patties all freeze well. Cook any raw meat fully before assembling. Avoid deli meat with high moisture content, which can make the bread soggy.
Cheese: Cheddar, Swiss, provolone, pepper Jack, and American all melt well. For dairy-free versions, use a firm plant-based cheese slice; add it during assembly rather than baking it into the eggs.
Dairy-free and lactose-free: Replace the milk with unsweetened oat milk or water. The eggs will be slightly less tender but still work.
Gluten-free: Use gluten-free English muffins or rolls. Toast them well before assembling to improve structure.
Vegetarian: Omit the meat and add a thick slice of grilled portobello mushroom, a cooked veggie patty, or extra cheese and spinach. Squeeze cooked spinach dry thoroughly before adding.
Tips for Better Results
- Dry your fillings. Watery vegetables and greasy meat are the main causes of soggy sandwiches. Pat everything dry with paper towels.
- Keep the cheese against the bread. Placing cheese directly on the bottom muffin creates a barrier that protects the bread from egg moisture.
- Season the eggs well. Frozen and reheated food can taste flat, so a full teaspoon of salt for 12 eggs is intentional.
- Use a scale for consistency. Weighing egg portions ensures each sandwich reheats in the same time.
- Label and date. A piece of masking tape on the freezer bag with the date and contents prevents mystery meals.
- Thaw overnight if possible. A refrigerated sandwich reheats more evenly and needs only about 60–90 seconds in the microwave.
- Make a double batch. The effort is nearly identical, and you’ll have a month of breakfasts.
Serving Ideas
Serve a reheated sandwich with fresh fruit, a handful of cherry tomatoes, or a small yogurt cup for a balanced plate. For a heartier brunch, pair sandwiches with sheet pan pancakes for a crowd, which bake while you reheat the sandwiches. A side of salsa or hot sauce adds brightness without extra prep.
Frequently Asked Questions
How long do freezer breakfast sandwiches last?
When wrapped tightly and stored at 0°F (-18°C) or below, they keep for up to 2 months at best quality. They remain safe longer, but the bread and egg texture begin to decline after that point. Always label the bag with the date you froze them.
Can I assemble the sandwiches the night before and freeze them the next day?
Yes. You can assemble and wrap the sandwiches, refrigerate them overnight, and transfer them to the freezer the following day. Keep them refrigerated no longer than 24 hours before freezing. For the best texture, cool all components completely before wrapping.
Why do my reheated egg sandwiches turn out rubbery or soggy?
Rubbery eggs usually come from overcooking, either during baking or reheating. Bake the egg sheet only until just set, and reheat at reduced power in the microwave or at a moderate oven temperature. Sogginess typically comes from wrapping warm sandwiches, using wet fillings, or skipping the toast step on the bread. Pat fillings dry and toast the muffins before assembly.
Can I use fresh eggs instead of the baked egg sheet?
Yes. Cook eggs individually in a nonstick skillet or silicone ring, or scramble them softly and portion them out. The baked sheet method is simply the fastest way to make 12 uniform portions. If you cook eggs individually, cool them completely before assembling and freezing.
Are these sandwiches safe to reheat from frozen?
Yes, if reheated thoroughly. Microwave on 50% power first, then finish on high, or bake wrapped in foil at 180°C (350°F) for 20–25 minutes. The center should be steaming hot. If you have time, thawing overnight in the refrigerator produces the most even results.
Can I make a dairy-free or gluten-free version?
Absolutely. Use gluten-free English muffins or rolls and toast them well before assembling. Replace dairy milk with unsweetened oat milk or water, and choose a firm plant-based cheese slice. Add the plant-based cheese during assembly rather than baking it into the eggs, since it melts differently.