Classic Cinnamon Rolls
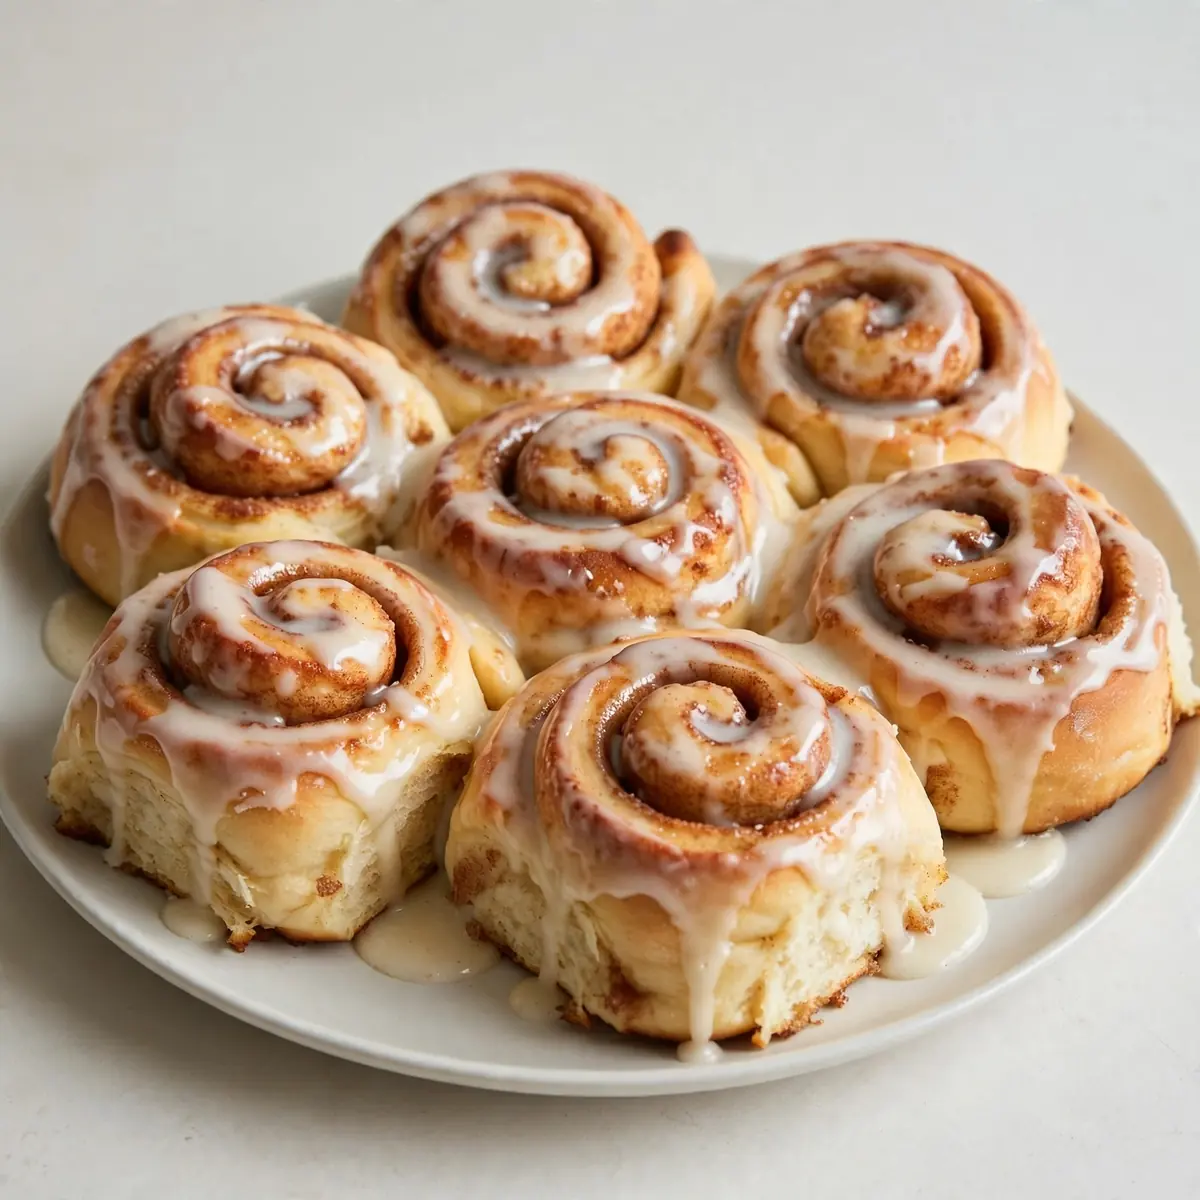
When my three kids have after-school clubs, swimming lessons, and homework battles, the last thing I want is a complicated dessert that takes over the kitchen. That is exactly why I created this version of Classic Cinnamon Rolls that comes together in under an hour, uses one bowl, and won’t leave you scrubbing pans until nine o’clock at night.
Recipe Overview
- Prep time: 20 minutes
- Cook time: 25 minutes
- Total time: 45 minutes
- Servings: 9 rolls
- Difficulty: Easy
Why You’ll Love This Classic Cinnamon Rolls
- One-bowl cleanup: You mix the dough, filling, and glaze all in the same bowl — I wash up in under five minutes.
- No stand mixer required: A wooden spoon and your hands are all you need, which means less equipment to dig out and wash.
- Make-ahead friendly: You can assemble these the night before and bake them fresh in the morning, or even freeze them for a last-minute treat.
- Pantry staple ingredients: Flour, butter, sugar, cinnamon, and milk — nothing fancy that requires a special trip to the shops.
- Family-approved texture: After testing this recipe five times, I finally got it just right — soft, tender rolls with a gooey centre that doesn’t dry out overnight.

Ingredients You’ll Need
- 300g plain flour (plus extra for dusting)
- 50g caster sugar
- 2 teaspoons baking powder
- ½ teaspoon bicarbonate of soda
- ½ teaspoon salt
- 120ml whole milk, at room temperature
- 60g unsalted butter, melted (for the dough)
- 1 large egg, lightly beaten
- 80g soft light brown sugar (for the filling)
- 2 tablespoons ground cinnamon
- 40g unsalted butter, softened (for the filling)
- 100g icing sugar (for the glaze)
- 2 tablespoons whole milk (for the glaze)
- ½ teaspoon vanilla extract
Tip: If your milk is cold, warm it gently in the microwave for about 15 seconds — cold milk makes the dough stiff and harder to roll. I also recommend using full-fat milk for a richer, softer roll.
How to Make Classic Cinnamon Rolls
- Preheat your oven to 200°C (180°C fan) and grease a 20cm square baking tin. The tin should feel warm to the touch when you hold your hand a few inches above it, but not scorching. Grease the sides well — nothing sticks like a dry corner.
- Mix the dry ingredients together. In a large mixing bowl, whisk the flour, caster sugar, baking powder, bicarbonate of soda, and salt. The mixture should look pale and fluffy, with no lumps of baking powder visible. You’ll smell a faint, clean scent of flour.
- Combine the wet ingredients. Make a well in the centre of the dry mix and pour in the room-temperature milk, melted butter, and beaten egg. Stir with a wooden spoon until a shaggy dough forms — it will look rough and slightly sticky, with a few dry patches still visible.
- Knead the dough briefly. Turn the dough out onto a lightly floured surface and knead it just 8 to 10 times. The dough should feel soft and smooth, like the lobe of your ear, and bounce back slightly when you press it with a finger. Do not overwork it — we want tender rolls, not tough ones.
- Roll out the dough. Using a floured rolling pin, roll the dough into a rectangle about 25cm by 30cm. The dough should be an even thickness of about 1cm across the whole surface. If it springs back, let it rest for 2 minutes, then try again.
- Spread the filling. In a small bowl, mix the soft brown sugar and cinnamon until well combined. Spread the softened butter evenly over the dough rectangle, leaving a 2cm border along the top edge. Sprinkle the cinnamon-sugar mixture over the butter, pressing it gently into the butter so it sticks. You’ll see a deep, rich brown layer that smells wonderfully spiced.
- Roll and slice. Starting at the long edge closest to you, roll the dough tightly into a log. The seam should be pressed firmly to seal. Using a sharp serrated knife, cut the log into 9 equal slices, each about 3cm thick. The swirls should be visible and tight, with the cinnamon filling peeking out at the edges. Place the slices cut-side up in the prepared tin, spacing them evenly.
- Bake the rolls. Bake for 22 to 25 minutes, until the tops are golden brown and the edges look slightly darker. The kitchen will smell like a bakery at this point — warm cinnamon and butter. When you tap a roll gently, it should feel firm but springy. Let them cool in the tin for 5 minutes before glazing.
- Make the glaze and serve. In the same bowl you used for the dough (see, less washing up), whisk the icing sugar, milk, and vanilla extract until smooth and pourable. The glaze should be thick enough to coat the back of a spoon but thin enough to drizzle. Pour it over the warm rolls, letting it drip down the sides. Serve warm.
Tips From My Kitchen
- Use room-temperature milk and egg: Cold ingredients make the butter in the dough seize up, resulting in dense, heavy rolls instead of light, fluffy ones. I take my egg and milk out of the fridge 15 minutes before I start mixing.
- Don’t skip the bicarbonate of soda: The combination of baking powder and bicarbonate of soda gives these rolls their soft, cloud-like texture. The baking powder provides lift during baking, while the bicarb reacts with the buttermilk-like acidity to keep them tender. Without it, the rolls will be flat and tough.
- Roll the dough tightly but not too tight: If you roll too loosely, the rolls will unravel during baking and you’ll end up with a messy, flat tray. If you roll too tightly, the centre of each roll will be doughy and undercooked. Aim for a snug, even roll — you want the swirls to hold their shape without squashing the dough.
- Use a serrated knife for slicing: A straight blade tends to squish the soft dough and ruin the spiral pattern. A serrated knife saws through cleanly, keeping each roll perfectly round. I also wipe the blade clean between cuts to avoid dragging filling across the dough.
- Make-ahead tip for busy families: Assemble the rolls completely the night before — roll, slice, and arrange them in the tin — then cover tightly with cling film and refrigerate. In the morning, let them sit at room temperature for 20 minutes while the oven preheats, then bake as directed. I stumbled upon this combination by accident, and it’s been a hit ever since for school mornings.
- Freeze for later: Baked and cooled rolls freeze beautifully for up to one month. Wrap them individually in cling film, then pop them into a freezer bag. To reheat, microwave a single roll for 30 seconds and add fresh glaze — it tastes just like it came out of the oven.
Equipment You’ll Need
- Large mixing bowl (you’ll use this for dough and glaze)
- Wooden spoon or flexible spatula
- Measuring cups and spoons
- Rolling pin (or a clean wine bottle works in a pinch)
- Sharp serrated knife
- 20cm square baking tin (or a 23cm round cake tin)
- Pastry brush (optional, for spreading butter)
Common Mistakes to Avoid
- Overcrowding the pan: If you cram the rolls into a tin that’s too small, they’ll rise upward instead of outward, creating tall, uneven rolls with raw centres. Use a 20cm square tin for 9 rolls — they need a little breathing room to expand evenly.
- Wrong temperature: Baking at too high a temperature will brown the tops before the centres are cooked, leaving you with burnt edges and raw dough inside. Stick to 200°C (180°C fan) and use an oven thermometer if your oven runs hot, which many do.
- Skipping the rest time: When you cut the rolls, the gluten tightens up. If you bake them immediately, the rolls will be dense and tough. Letting them sit in the tin for 5 minutes before baking allows the gluten to relax and the dough to soften, giving you lighter, fluffier rolls.
What to Serve With Classic Cinnamon Rolls
- A simple cup of strong black coffee or milky tea to balance the sweetness
- Scrambled eggs with chives for a savoury contrast — the richness of the eggs pairs beautifully with the cinnamon sugar
- A side of fresh berries or sliced apples to cut through the buttery glaze
- If you’re feeling indulgent, try them alongside our Strawberry Shortcake Trifles Recipe Layered Dessert for a full dessert spread that’s still quick to prepare
Still hungry for ideas? You might also love Strawberry Cheesecake Cinnamon Rolls, Bake This Fluffy Sweet Cinnamon Rolls Recipe from our sister kitchens.
Frequently Asked Questions
Classic Cinnamon Rolls
Ingredients
Method
- Preheat your oven to 200°C (180°C fan) and grease a 20cm square baking tin. The tin should feel warm to the touch when you hold your hand a few inches above it, but not scorching. Grease the sides well — nothing sticks like a dry corner.
- Mix the dry ingredients together. In a large mixing bowl, whisk the flour, caster sugar, baking powder, bicarbonate of soda, and salt. The mixture should look pale and fluffy, with no lumps of baking powder visible. You'll smell a faint, clean scent of flour.
- Combine the wet ingredients. Make a well in the centre of the dry mix and pour in the room-temperature milk, melted butter, and beaten egg. Stir with a wooden spoon until a shaggy dough forms — it will look rough and slightly sticky, with a few dry patches still visible.
- Knead the dough briefly. Turn the dough out onto a lightly floured surface and knead it just 8 to 10 times. The dough should feel soft and smooth, like the lobe of your ear, and bounce back slightly when you press it with a finger. Do not overwork it — we want tender rolls, not tough ones.
- Roll out the dough. Using a floured rolling pin, roll the dough into a rectangle about 25cm by 30cm. The dough should be an even thickness of about 1cm across the whole surface. If it springs back, let it rest for 2 minutes, then try again.
- Spread the filling. In a small bowl, mix the soft brown sugar and cinnamon until well combined. Spread the softened butter evenly over the dough rectangle, leaving a 2cm border along the top edge. Sprinkle the cinnamon-sugar mixture over the butter, pressing it gently into the butter so it sticks. You'll see a deep, rich brown layer that smells wonderfully spiced.
- Roll and slice. Starting at the long edge closest to you, roll the dough tightly into a log. The seam should be pressed firmly to seal. Using a sharp serrated knife, cut the log into 9 equal slices, each about 3cm thick. The swirls should be visible and tight, with the cinnamon filling peeking out at the edges. Place the slices cut-side up in the prepared tin, spacing them evenly.
- Bake the rolls. Bake for 22 to 25 minutes, until the tops are golden brown and the edges look slightly darker. The kitchen will smell like a bakery at this point — warm cinnamon and butter. When you tap a roll gently, it should feel firm but springy. Let them cool in the tin for 5 minutes before glazing.
- Make the glaze and serve. In the same bowl you used for the dough (see, less washing up), whisk the icing sugar, milk, and vanilla extract until smooth and pourable. The glaze should be thick enough to coat the back of a spoon but thin enough to drizzle. Pour it over the warm rolls, letting it drip down the sides. Serve warm.
Notes
I hope these Classic Cinnamon Rolls become a regular part of your weeknight rotation, just as they have in my house. They’ve saved me more times than I can count on those chaotic evenings when everyone needs something sweet but nobody has the patience for a complicated recipe. If you give them a try, I’d love to hear how they turned out — drop a comment below and let me know if your family polished them off as quickly as mine did.