How to Cook Perfectly Poached Eggs Every Time
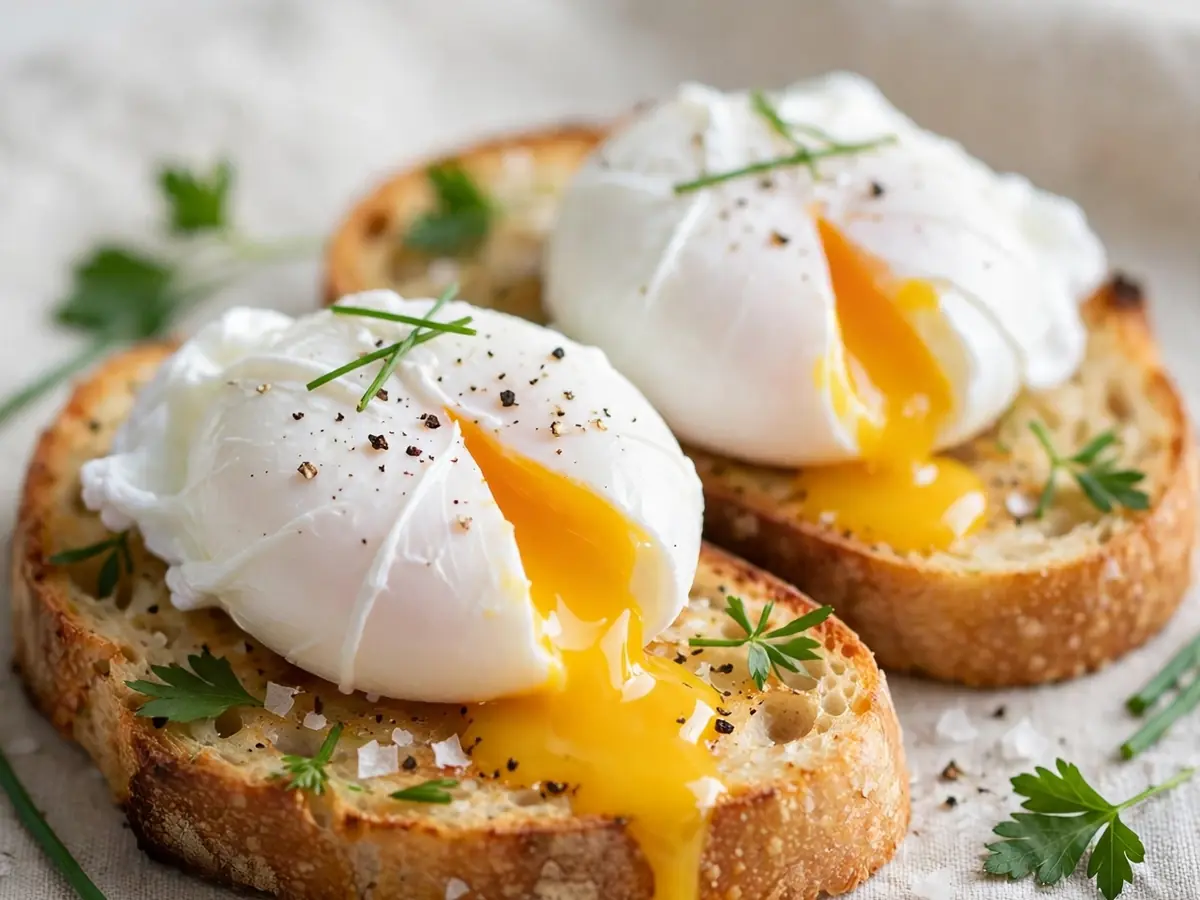
Poached eggs have a reputation for being fussy, but the truth is simpler: they reward attention to a few small details and punish nothing else. A perfectly poached egg has a tender white that holds its shape around a yolk that runs when pierced — no vinegar tang, no ragged ribbons of stray white, no rubbery exterior. This guide covers the equipment that actually matters, a precise stovetop method, an oven method for cooking several eggs at once, and the practical fixes that solve the most common failures. Quantities, timings, and temperatures are given exactly so you can repeat the result rather than hope for it.
What “Perfectly Poached” Actually Means
A poached egg is an egg cooked gently in water held below a simmer, never a rolling boil. Three qualities define success. First, the white should be fully set but still soft — opaque, not translucent, and compact rather than wispy. Second, the yolk should be warm and liquid at the center, or just barely thickened if you prefer it medium. Third, the egg should taste of egg, which means the cooking water should be clean and lightly salted rather than sharply acidic.
That last point matters because vinegar is the most over-prescribed trick in egg cookery. A small amount can help a very fresh egg hold together, but too much leaves a flavor that no sauce fully hides. Freshness does more for structure than acid does, so buy the freshest eggs you can and treat vinegar as an optional crutch rather than a rule.
Equipment and Ingredients
You need less than you might think. A wide, deep saucepan or a straight-sided sauté pan is better than a small pot because the eggs need room to spread without touching. A fine-mesh skimmer or a slotted spoon lifts eggs out without tearing them. A small bowl or ramekin lets you slide each egg into the water gently instead of cracking it directly over the pot. A kitchen timer is non-negotiable, and a plate lined with paper towels catches drained eggs.
For four servings (four eggs), measure:
- 4 large eggs, as fresh as possible, cold from the refrigerator
- 8 cups (about 2 liters) water
- 1 tablespoon (about 18 g) fine sea salt or kosher salt
- 1 teaspoon (5 ml) white vinegar, optional
- 1 teaspoon (5 ml) neutral oil, only if you plan to hold the eggs before serving
Salt the water at roughly 1 tablespoon per 8 cups. This seasons the egg lightly from the outside and does not meaningfully change the cooking time. If you use vinegar, keep it to 1 teaspoon per 8 cups — enough to nudge a fresh white into cohesion, not enough to taste.
The Stovetop Method: Step by Step
This is the standard method and the one to master first. It produces four eggs in about 12 minutes of active work, including the water coming to temperature.
- Bring the water to 180–190°F (82–88°C). Heat the salted water over medium-high until small bubbles cling to the bottom and a few rise lazily. There should be no vigorous bubbling at the surface. If you do not have a thermometer, look for the moment just before a simmer: the water shivers, and steam rises steadily but quietly. Reduce the heat to low to hold that temperature.
- Crack each egg into a small bowl. Do this one at a time, and check that the yolk is intact. A broken yolk will leak and cook into threads, so save that egg for scrambling.
- Create a gentle whirlpool, if you like. Stir the water in one direction with a spoon, then stop. The residual motion helps the white wrap around the yolk. This is optional; a still pot works fine with fresh eggs.
- Slide the egg in from the bowl. Lower the lip of the bowl to the water’s surface and let the egg slip in. Do not drop it from height. Work in batches of no more than two or three eggs so they do not collide.
- Set the timer for 3 minutes. For a runny yolk and set white, 3 minutes at 180–190°F is the target. For a medium yolk, 3 minutes 30 seconds. For a firm yolk, 4 minutes. Do not stir during cooking.
- Lift the egg with a skimmer. Slide the skimmer underneath and raise the egg gently. Touch the edge of the white with a fingertip or the back of a spoon: it should feel firm and springy, not jelly-like. If it still feels soft, return it for 20 seconds and check again.
- Drain on paper towels for 30 seconds. Blot the top gently. Trim any loose, trailing white with kitchen scissors if you want a neat edge.
- Serve immediately on toast, greens, grains, or hash, with a pinch of flaky salt and black pepper.
For a larger batch, poach in rounds of two or three and hold finished eggs in a bowl of warm (not hot) water at about 140°F (60°C) for up to 10 minutes. A thin film of oil in the holding water prevents sticking.
The Oven Method for a Crowd
When you need six or more poached eggs at once — for a brunch plate or a batch of eggs Benedict — the oven is more reliable than a crowded pot. The technique uses a water bath and ramekins.
For six servings, measure:
- 6 large eggs
- 1 tablespoon (15 ml) butter or neutral oil, for greasing
- 6 tablespoons (90 ml) water, one per ramekin
- Boiling water for the roasting pan, enough to come halfway up the ramekins
- Heat the oven to 350°F (175°C). Grease six 4-ounce ramekins lightly.
- Add 1 tablespoon of water to each ramekin.
- Crack one egg into each ramekin, taking care not to break the yolk.
- Set the ramekins in a roasting pan and pour boiling water into the pan until it reaches halfway up their sides.
- Bake for 11–13 minutes, until the whites are opaque and set but the yolks still jiggle when the ramekin is nudged. Begin checking at 11 minutes; ovens vary.
- Lift the ramekins out with tongs and rest them for 1 minute. Run a small knife or spoon around the edge and invert onto a paper towel, then slide the egg onto the plate.
The oven method is slower per egg but far more forgiving, and it frees the stovetop for other components.
Why Poached Eggs Fail — and How to Fix Each Problem
Most disappointments trace to one of five causes. Match the symptom to the fix.
- Ragged, stringy whites: the water was boiling, or the egg was old. Lower the heat to 180–190°F and use fresher eggs. A teaspoon of vinegar per 8 cups can help a borderline egg.
- Egg stuck to the bottom: the pot was too shallow or the egg was dropped rather than slid in. Use a deeper pan and lower the bowl to the surface.
- Watery, undercooked white around a set yolk: the temperature was too low, so the white set slowly while the yolk caught up. Hold the water at 180–190°F and check the white’s firmness with your fingertip.
- Rubbery white, chalky yolk: overcooked. Pull the egg at 3 minutes and check; add time in 20-second increments only.
- Vinegar taste: too much acid. Reduce to 1 teaspoon per 8 cups or omit it entirely with fresh eggs.
Practical Substitutions
If you lack an ingredient or piece of equipment, these swaps work without changing the method.
- No white vinegar: use the same amount of cider vinegar or lemon juice. Do not use balsamic, which colors the water and flavors the egg.
- No fine sea salt: kosher salt works at the same weight; if using table salt, reduce to about 2 teaspoons per 8 cups because it is denser and saltier by volume.
- No ramekins for the oven method: use small heatproof teacups or a muffin tin. If using a muffin tin, grease well and reduce the water to 2 teaspoons per cup.
- No skimmer: a slotted spoon or a small fine-mesh strainer works; drain well before plating.
- Duck or quail eggs: duck eggs need about 4 minutes at the same temperature; quail eggs need about 1 minute 45 seconds.
Storage and Make-Ahead Guidance
Poached eggs are best eaten within a minute or two of draining, but they can be prepared ahead for entertaining. Cook them 1 minute short of your target doneness, then plunge them into ice water for 1 minute to stop the cooking. Store them submerged in cold water in a covered container in the refrigerator for up to 24 hours. To reheat, lower them into water at 160°F (71°C) for 60–90 seconds, then drain and serve. Do not reheat in boiling water, which will overcook the white before the center warms.
Do not freeze poached eggs; the white becomes spongy and releases water on thawing. Leftover poached eggs that have already been served should be refrigerated within 2 hours and eaten within 1 day, though quality drops noticeably.
Tips for Consistent Results
- Use the freshest eggs you can find. A fresh white is thick and clings to the yolk; an older white is thin and spreads.
- Keep eggs cold until the moment they go into the water. Cold eggs hold their shape better than room-temperature ones.
- Crack eggs into a bowl first, always. It costs five seconds and saves a pot of cloudy water.
- Salt the water, not the egg. Salting the surface of a raw egg draws moisture out and toughens the white.
- Cook in small batches. Three eggs in an 8-cup pan is comfortable; six is a traffic jam.
- Judge doneness by touch, not only by the clock. The white should feel firm and springy under a fingertip.
- If you are serving a sauce, drain the egg thoroughly. Water on the plate dilutes hollandaise and makes toast soggy.
Once the stovetop method is reliable, poached eggs become a fast breakfast rather than a project. The same technique scales to brunch plates and pairs naturally with the hollandaise-based classic preparation, and it is worth browsing the Cuisinebite blog for more breakfast ideas to serve alongside.
Frequently Asked Questions
How much vinegar should I add to poaching water?
At most 1 teaspoon (5 ml) of white vinegar per 8 cups (about 2 liters) of water. That is enough to help a slightly older egg’s white hold together without leaving a noticeable flavor. With very fresh eggs, you can omit vinegar entirely; freshness does more for structure than acid does. If you can taste vinegar in the finished egg, you used too much.
What is the exact water temperature for poaching eggs?
Hold the water at 180–190°F (82–88°C). At this range the water shivers and small bubbles form on the bottom, but the surface does not roll. A rolling boil tears the whites into ribbons, while water below about 170°F (77°C) sets the white so slowly that it turns watery before the yolk is warm. A thermometer is the most reliable tool; without one, look for the moment just before a simmer.
How long should I poach an egg for a runny yolk?
Three minutes at 180–190°F gives a fully set white and a runny yolk. For a medium yolk, poach 3 minutes 30 seconds; for a firm yolk, 4 minutes. These times assume a large cold egg and a small batch of two or three eggs. Check the white by touch at the 3-minute mark and add time in 20-second increments rather than guessing.
Can I poach eggs ahead of time and reheat them?
Yes. Cook them 1 minute short of your target, chill in ice water for 1 minute, and store submerged in cold water in a covered container in the refrigerator for up to 24 hours. Reheat in water at 160°F (71°C) for 60–90 seconds, then drain. Do not reheat in boiling water, and do not freeze poached eggs — the whites become spongy and release water when thawed.
Why do my poached eggs have stringy, wispy whites?
Two causes dominate: water that is too hot and eggs that are not fresh. Boiling water agitates the white and breaks it apart, and an older egg has a thin white that spreads instead of wrapping the yolk. Lower the heat to 180–190°F, use the freshest eggs available, crack each egg into a small bowl first, and slide it into the water from the bowl’s lip rather than dropping it in.
Do I need a special poaching pan or egg poacher?
No. A wide, deep saucepan, a fine-mesh skimmer, and a small bowl are enough for the stovetop method. For six or more eggs at once, a roasting pan with ramekins and a water bath in a 350°F (175°C) oven is more reliable than a crowded pot. Specialty poaching inserts work, but they are not required for a good result.