Chocolate Hazelnut Mousse Recipe Silky Dessert
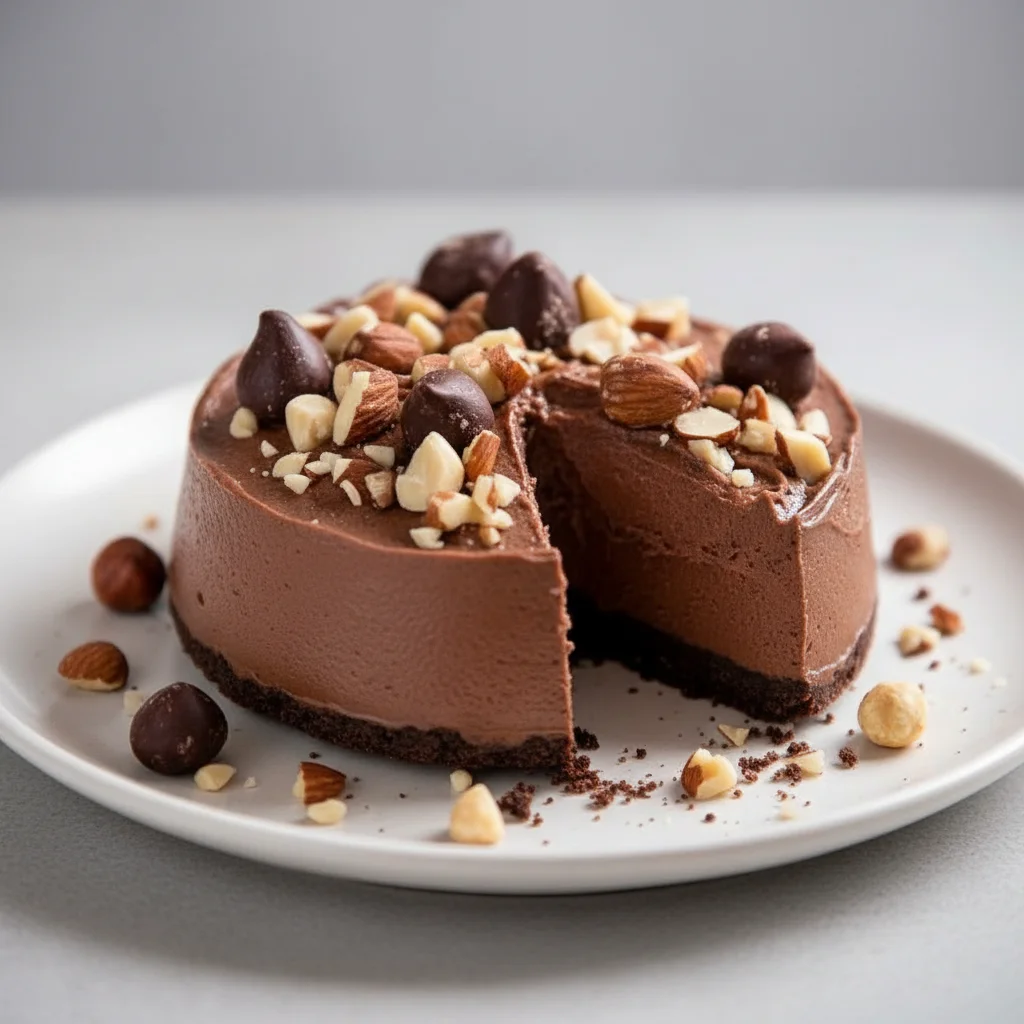
There are few flavour pairings as universally adored as rich, dark chocolate and earthy, toasted hazelnuts. It’s a combination that feels both comforting and utterly luxurious. This chocolate hazelnut mousse recipe is something I’ve refined over the years, and it’s a dessert that never fails to impress. This was inspired by a dessert I had at a tiny trattoria in the Piedmont region of Italy, where hazelnuts are practically a way of life. Unlike many recipes that rely on pre-made spreads, this one is built from scratch, resulting in a mousse that is ethereally light yet intensely flavourful, with a deep cocoa backbone and the unmistakable warmth of freshly toasted nuts.
What we’re creating here is a proper, classic mousse. It gets its incredible airy texture from carefully whisked egg whites and softly whipped cream, which are gently folded into a rich chocolate and hazelnut base. The process itself is a wonderfully mindful kitchen task – melting, whisking, and folding your way to something truly special. It’s the kind of dessert that works beautifully as the finale for a dinner party, making your guests feel truly spoiled. But honestly, it’s also ideal for a quiet weekend when you just feel like treating yourself to something decadent. If you love deep, complex chocolate flavours, this is the hazelnut mousse for you.
Recipe Overview
This is a true chocolate hazelnut mousse, balancing the bitterness of 70% dark chocolate with the sweet, toasty notes of ground hazelnuts. The texture is key; it’s light and melts in the mouth, not dense or pudding-like. When I first tested this recipe, I was worried the hazelnut flavour wouldn’t come through enough against the strong chocolate, but toasting the nuts first makes all the difference, ensuring their flavour is front and centre.
- Prep Time: 25 minutes
- Cook Time: 5 minutes
- Chill Time: At least 4 hours
- Total Time: 4 hours 30 minutes
- Servings: 6 people
- Difficulty: Medium
Why You’ll Love This Chocolate Hazelnut Mousse
- Intense, Genuine Flavour: We use high-quality 70% cocoa dark chocolate and freshly toasted hazelnuts. This creates a deep, nutty flavour profile that is rich and satisfying without being cloyingly sweet like some other chocolate desserts can be.
- Ready in Under 30 Minutes (plus chilling): The active kitchen time is remarkably short. You can have this mousse prepared and chilling in the fridge in about 30 minutes, making it a great make-ahead dessert.
- A Truly Flexible Recipe: Feel free to add a splash of Frangelico or dark rum to the chocolate base for a boozy kick. You can also swap the dark chocolate for a good quality milk chocolate if you prefer a sweeter, creamier mousse.
- Ideal for Special Occasions: This mousse looks elegant served in individual glass pots or ramekins. It works beautifully for a birthday celebration, a festive holiday meal, or a quiet date night at home.
- Family Tested and Approved: This is a recipe that always gets compliments in my house. My husband, who’s usually picky about desserts, asked for seconds the first time I made it!
Ingredients You’ll Need
For a dessert this pure, the quality of your ingredients really shines through. I always opt for a good quality dark chocolate with at least 70% cocoa solids; brands like Green & Black’s or Callebaut work wonderfully here. They provide a robust chocolate flavour that stands up to the hazelnuts.
- 100g whole blanched hazelnuts
- 150g dark chocolate (70% cocoa solids), finely chopped
- 40g unsalted butter, cubed
- 3 large free-range eggs, separated
- 75g caster sugar, divided
- 1 tsp vanilla extract
- A tiny pinch of sea salt
- 150ml double cream
Marcus’s Tip: Toasting the hazelnuts is a non-negotiable step! It seems small, but it completely transforms their flavour, releasing their natural oils and deepening their nutty character. It’s the difference between a good mousse and a great one.
How to Make Chocolate Hazelnut Mousse
The process for making this chocolate mousse involves a few distinct stages, but none are overly complicated. The key is to be gentle during the folding stage to keep all that lovely air we’ve incorporated. Take your time, and you’ll be rewarded with a perfect texture.
- Toast and Prepare the Hazelnuts: Preheat your oven to 180°C (160°C fan). Spread the blanched hazelnuts on a baking tray and toast for 8-10 minutes, or until they are fragrant and lightly golden. Keep a close eye on them as they can burn quickly. Let them cool completely. Set aside about 12-15 of the best-looking nuts for garnish, and place the rest into a food processor. Blitz until you have a fine, sandy powder.
- Melt the Chocolate Base: Place the chopped dark chocolate and cubed butter in a heatproof bowl set over a saucepan of simmering water (a bain-marie). Make sure the bottom of the bowl doesn’t touch the water. Stir occasionally until smooth and fully melted. Remove from the heat and set aside to cool for about 10 minutes. It should be tepid, not hot.
- Prepare the Egg Yolks: In a separate large bowl, use an electric mixer to whisk the egg yolks with 50g of the caster sugar until the mixture is pale, thick, and has doubled in volume. This usually takes about 3-4 minutes. Whisk in the vanilla extract.
- Combine Chocolate and Yolks: Gently pour the slightly cooled chocolate mixture into the egg yolk mixture. Add the ground hazelnuts and fold everything together with a spatula until just combined. The mixture will be quite thick at this point.
- Whisk the Egg Whites: In a clean, dry bowl, whisk the egg whites with a pinch of salt until they form soft peaks. Gradually add the remaining 25g of caster sugar and continue to whisk until the whites are glossy and form stiff peaks.
- Whip the Cream: In another bowl, whip the double cream until it holds soft, pillowy peaks. Be careful not to over-whip, as this can make the final mousse grainy.
- Fold it All Together: Now for the most important part. Take about a third of the whisked egg whites and fold them into the chocolate mixture to lighten it up. Then, gently fold in the remaining egg whites in two batches. What works best for me is a large metal spoon, using a gentle cutting and lifting motion to preserve the air. For a detailed guide on this crucial step, BBC Good Food has an excellent video tutorial on folding technique.
- Finish with Cream: Finally, gently fold the softly whipped cream into the mixture until there are no more white streaks. Be careful not to overmix and knock out the air.
- Chill the Mousse: Carefully spoon the mousse into 6 small glasses, pots, or ramekins. Cover with cling film and place in the refrigerator to chill and set for at least 4 hours, or preferably overnight.
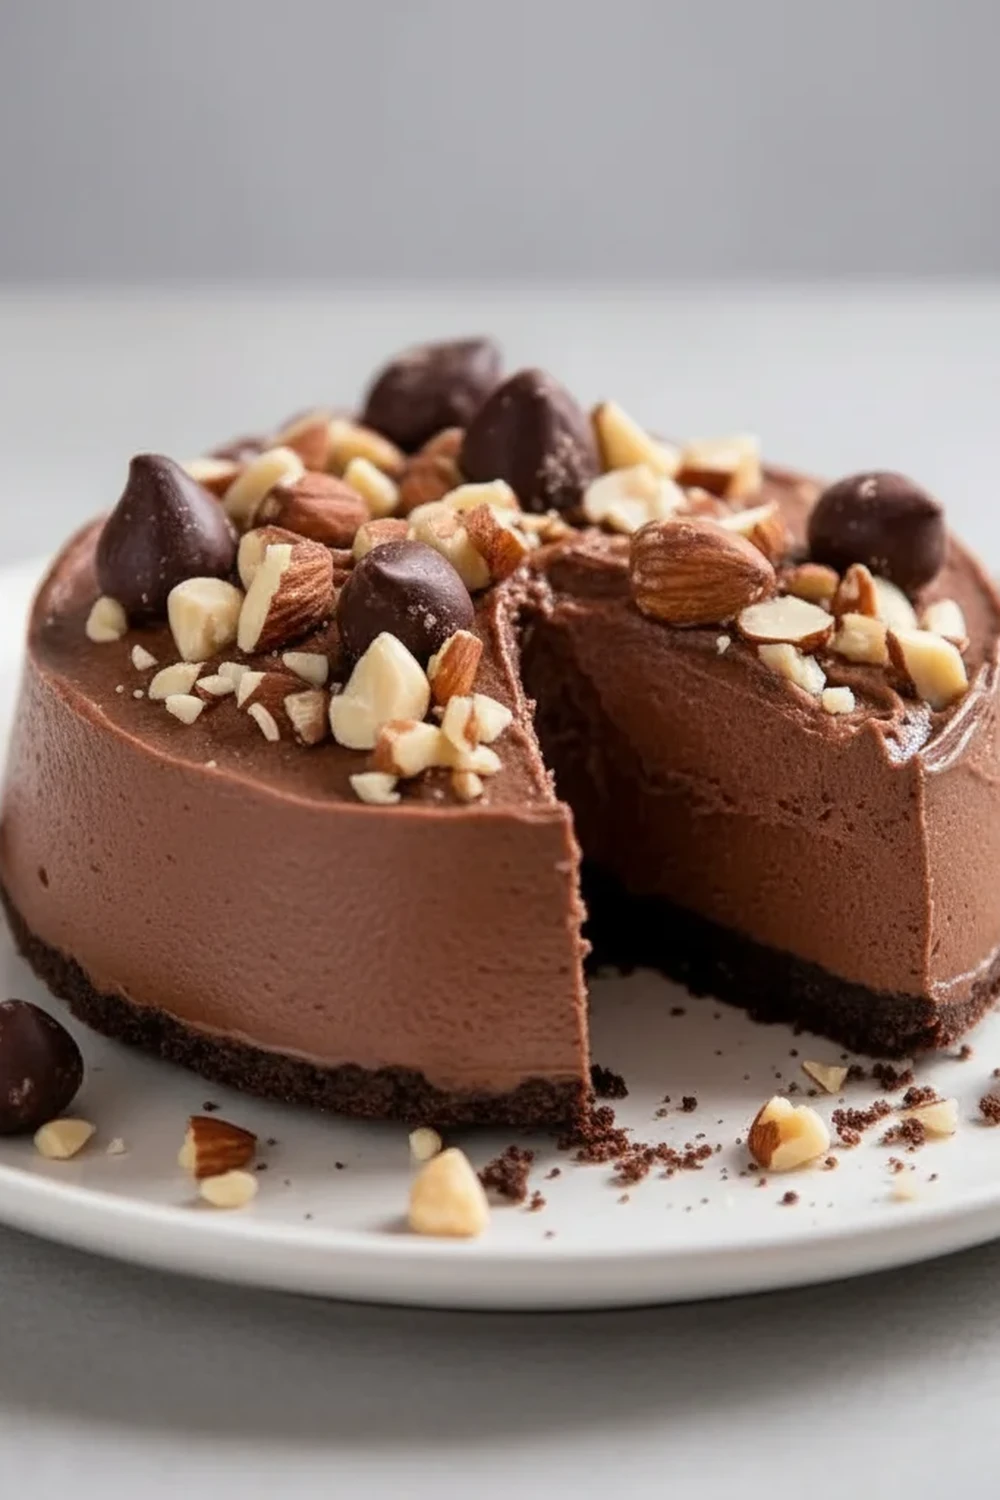
- Garnish and Serve: Just before serving, roughly chop the reserved toasted hazelnuts and sprinkle them over the top of each mousse.
Tips From My Kitchen
- Temperature is Key: Ensure your melted chocolate has cooled sufficiently before adding it to the egg yolks. If it’s too hot, it can scramble the yolks or cause the mixture to split. Tepid to the touch is what you’re aiming for.
- The Secret to Lightness: I learned that folding the egg whites in three separate stages makes a world of difference. The first addition ‘sacrifices’ a bit of air to slacken and lighten the heavy chocolate base, making it far easier to gently incorporate the remaining whites without deflating them.
- Make-Ahead Magic: This is a brilliant dessert to make in advance. You can prepare the mousse completely up to 24 hours before you plan to serve it. Just keep it covered in the fridge and add the chopped hazelnut garnish at the last minute to ensure they stay crunchy.
- Storing Leftovers: Any leftover mousse can be stored, covered, in the fridge for up to 3 days. The texture may become a little denser by day three, but the flavour will still be wonderful.
Common Mistakes to Avoid
- Over-whipping the Cream: It’s tempting to whip the cream until it’s very stiff, but for mousse, you want soft, billowy peaks. Over-whipped cream won’t fold in as easily and can create a heavy, slightly grainy texture in the finished product.
- Rushing the Chocolate Cooling: Patience is vital here. If you fold hot chocolate into your airy egg and cream mixtures, the heat will instantly collapse them. You’ll lose all that volume you worked hard to create, resulting in a dense, disappointing pudding.
- Aggressive Folding: The goal of folding is to combine ingredients while retaining air. Use a large spatula and a gentle ‘scoop from the bottom, turn over the top’ motion. Vigorous stirring will knock out the air and leave you with a flat mousse.
Delicious Variations to Try
While I adore this recipe as it is, it’s also a fantastic base for a few creative twists. Once you’ve mastered the basic technique, feel free to experiment.
- Mocha Hazelnut Mousse: Add one teaspoon of high-quality instant espresso powder to the chocolate and butter mixture as it melts. The coffee will deepen the chocolate flavour without making it taste overtly of coffee.
- A Boozy Twist: For an adult-only version, fold in two tablespoons of Frangelico (hazelnut liqueur), Amaretto, or even a dark rum into the chocolate and yolk mixture.
- Orange & Hazelnut: The zest of one orange folded into the final mousse adds a beautiful, bright citrus note that cuts through the richness. It’s a classic pairing for a reason, far more delicate than the bold flavours in my zesty lemon crumb bars.
What to Serve With Chocolate Hazelnut Mousse
This mousse is rich and satisfying all on its own, but a little something on the side can provide a lovely textural contrast. It’s a self-contained star, unlike some bakes like our Maple Pecan Sticky Buns which are a complete package.
- Shortbread Biscuits: A simple, buttery shortbread finger is perfect for dipping. Its crumbly texture is a wonderful contrast to the smoothness of the mousse.
- Fresh Berries: A few fresh raspberries or sliced strawberries on the side provide a welcome sharpness that cuts through the richness of the chocolate.
- Drink Pairing: A small glass of dessert wine, a nutty Amaretto on the rocks, or even a strong black coffee complements the deep flavours of the mousse beautifully.
Frequently Asked Questions
Chocolate Hazelnut Mousse
Ingredients
Method
- Toast and Prepare the Hazelnuts: Preheat your oven to 180°C (160°C fan). Spread the blanched hazelnuts on a baking tray and toast for 8-10 minutes, or until they are fragrant and lightly golden. Keep a close eye on them as they can burn quickly. Let them cool completely. Set aside about 12-15 of the best-looking nuts for garnish, and place the rest into a food processor. Blitz until you have a fine, sandy powder.
- Melt the Chocolate Base: Place the chopped dark chocolate and cubed butter in a heatproof bowl set over a saucepan of simmering water (a bain-marie). Make sure the bottom of the bowl doesn't touch the water. Stir occasionally until smooth and fully melted. Remove from the heat and set aside to cool for about 10 minutes. It should be tepid, not hot.
- Prepare the Egg Yolks: In a separate large bowl, use an electric mixer to whisk the egg yolks with 50g of the caster sugar until the mixture is pale, thick, and has doubled in volume. This usually takes about 3-4 minutes. Whisk in the vanilla extract.
- Combine Chocolate and Yolks: Gently pour the slightly cooled chocolate mixture into the egg yolk mixture. Add the ground hazelnuts and fold everything together with a spatula until just combined. The mixture will be quite thick at this point.
- Whisk the Egg Whites: In a clean, dry bowl, whisk the egg whites with a pinch of salt until they form soft peaks. Gradually add the remaining 25g of caster sugar and continue to whisk until the whites are glossy and form stiff peaks.
- Whip the Cream: In another bowl, whip the double cream until it holds soft, pillowy peaks. Be careful not to over-whip, as this can make the final mousse grainy.
- Fold it All Together: Now for the most important part. Take about a third of the whisked egg whites and fold them into the chocolate mixture to lighten it up. Then, gently fold in the remaining egg whites in two batches. What works best for me is a large metal spoon, using a gentle cutting and lifting motion to preserve the air. For a detailed guide on this crucial step, BBC Good Food has an excellent video tutorial on folding technique.
- Finish with Cream: Finally, gently fold the softly whipped cream into the mixture until there are no more white streaks. Be careful not to overmix and knock out the air.
- Chill the Mousse: Carefully spoon the mousse into 6 small glasses, pots, or ramekins. Cover with cling film and place in the refrigerator to chill and set for at least 4 hours, or preferably overnight.
- Garnish and Serve: Just before serving, roughly chop the reserved toasted hazelnuts and sprinkle them over the top of each mousse.
Notes
I really hope you give this chocolate hazelnut mousse a go. It’s one of those recipes that feels incredibly special yet is so rewarding to make at home. The depth of flavour from real chocolate and toasted nuts is something you just can’t get from a shop-bought dessert. Let me know how it turns out for you in the comments below – I love hearing about your kitchen adventures! From my kitchen to yours, Marcus.