Crispy Fresh Spring Rolls
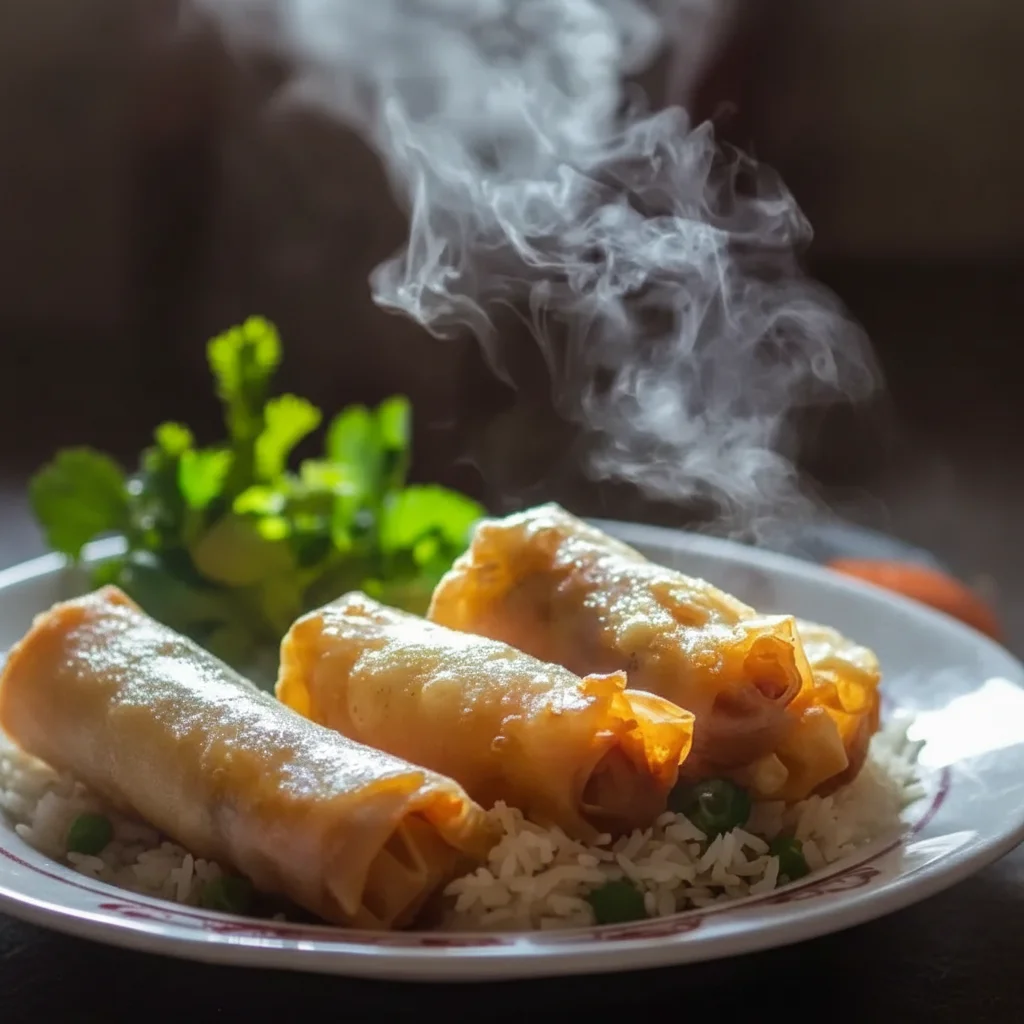
There’s an undeniable satisfaction that comes from biting into a perfectly cooked spring roll. That initial, audible crunch gives way to a steamy, savoury filling of tender-crisp vegetables, all wrapped up in a delicate, golden parcel. For years, I was convinced that creating these at home was a task best left to the professionals. My early attempts were often soggy, misshapen, or they’d burst in the pan. But after testing this recipe five times, I finally got it just right, and I’m thrilled to share the secrets to achieving that takeaway-quality crispness in your own kitchen.
This recipe is all about balance. We’re not just throwing vegetables in a wrapper; we’re building layers of flavour with fragrant ginger, garlic, and a touch of soy sauce that complements, rather than overwhelms, the fresh ingredients. The filling has just the right amount of moisture to be flavourful, but not so much that it compromises the integrity of the wrapper – that’s the key.
These crispy veggie rolls are ideal for when you want a starter for an Asian-inspired meal, a satisfying snack for a movie night, or part of a larger spread for a get-together. Everyone I’ve served these to seems to love them, and the process of rolling them can be a fun activity to do with a partner or older kids.
Recipe Overview
This recipe will guide you through creating incredibly crispy, flavourful vegetable spring rolls from scratch. We focus on a simple but aromatic filling and a foolproof method for frying that guarantees a golden, non-greasy finish. I’ve found that the secret lies in letting the filling cool completely before you even think about rolling.
- Prep Time: 30 minutes
- Cook Time: 15 minutes
- Total Time: 45 minutes (plus cooling time)
- Servings: Makes 12-14 rolls
- Difficulty: Medium
Why You’ll Love This Spring Rolls Recipe
- Authentic Texture and Flavour: The combination of sesame oil, fresh ginger, and garlic gives the simple vegetable filling a genuinely aromatic and savoury depth, while the wrappers fry up to a shatteringly crisp texture.
- Ready in Under an Hour: From chopping the vegetables to pulling the last golden roll from the pan, the active process comes together in about 45 minutes. It’s a rewarding cooking project for any night of the week.
- A Truly Flexible Recipe: The vegetable base is a fantastic canvas. You can easily add finely shredded cooked chicken, some small prawns, or even crumbled firm tofu. Finely chopped shiitake mushrooms also add a wonderful earthy note.
- Great for Entertaining: These work beautifully as an appetiser for a dinner party. I often serve them before a main like my Creamy Chicken And Rice for a meal with contrasting flavours. They always get compliments.
- Family Tested: My whole family adores these. My youngest, who is usually suspicious of cabbage, will happily eat three of these crispy rolls without a second thought. It’s a great way to pack in the vegetables.
Ingredients You’ll Need
For the best results, try to find proper spring roll pastry (not egg roll wrappers, which are thicker) in the freezer section of your local Asian supermarket. I always have a packet of TYJ Spring Roll Pastry in my freezer; it’s wonderfully thin and reliable. Make sure it’s fully defrosted before you start.
- For the Filling:
- 1 tbsp vegetable oil
- 2 cloves garlic, minced
- 2 cm piece of fresh ginger, grated
- 1 large carrot, julienned or coarsely grated
- 200g white cabbage, finely shredded
- 100g beansprouts
- 2 spring onions, finely sliced
- 2 tbsp light soy sauce
- 1 tbsp oyster sauce (optional, for extra depth)
- 1 tsp toasted sesame oil
- 1/4 tsp white pepper
- For Assembly:
- 1 packet (approx. 20 sheets) frozen spring roll wrappers, thawed
- 1 tbsp cornflour mixed with 2 tbsp water (to make a sealing paste)
- Approx. 1 litre vegetable or sunflower oil, for frying
Marcus’s Tip: When working with the spring roll wrappers, keep the stack you aren’t using covered with a slightly damp, clean tea towel. They are incredibly thin and can dry out and crack within minutes if left exposed to the air.
How to Make Spring Rolls
The process is straightforward. We’ll first cook and completely cool the filling, then we’ll wrap and fry. Don’t rush the cooling step – it is the single most important part of getting a crisp, intact roll.
- Sauté the Aromatics: Heat 1 tablespoon of vegetable oil in a large frying pan or wok over a medium-high heat. Add the minced garlic and grated ginger and stir-fry for about 30 seconds until fragrant, but not browned.
- Cook the Vegetables: Add the julienned carrot and shredded cabbage to the pan. Stir-fry for 3-4 minutes until the vegetables have softened but still retain a slight bite. We’re not looking for mushy here; a little texture is good.
- Finish the Filling: Add the beansprouts and sliced spring onions, and cook for another minute. Turn off the heat. Stir in the soy sauce, oyster sauce (if using), toasted sesame oil, and white pepper. Mix everything together well.
- Cool Completely: This is crucial. Transfer the filling to a large, shallow dish and spread it out to cool down as quickly as possible. You can even pop it in the fridge. The filling must be at room temperature before you start wrapping. I learned the hard way that warm filling creates steam, which makes the wrappers soggy and prone to tearing.
- Prepare for Rolling: Set up your wrapping station. You’ll need the cooled filling, the stack of wrappers (under a damp cloth), and your little bowl of cornflour slurry.
- Wrap the Spring Rolls: Place one wrapper on a clean, dry surface in a diamond shape, with one corner pointing towards you. Spoon about 2 heaped tablespoons of the filling onto the bottom third of the wrapper. Fold the bottom corner up and over the filling, tucking it in tightly. Fold in the left and right corners towards the centre, like an envelope. Then, roll it forward tightly until you have about 2 inches of wrapper left at the top.
- Seal the Rolls: Brush a little of the cornflour paste along the top edges of the wrapper and complete the roll. The paste acts as a glue to keep it sealed. Place the finished roll on a tray, seam-side down. Repeat with the remaining filling and wrappers.
- Fry to Golden Perfection: Pour the vegetable oil into a deep saucepan or wok until it is about 5cm deep. Heat the oil to 180°C. If you don’t have a thermometer, you can test it by dropping a small piece of a wrapper into the oil; it should sizzle immediately and turn golden in about 30-40 seconds. Carefully place 3-4 spring rolls into the hot oil, ensuring not to overcrowd the pan.
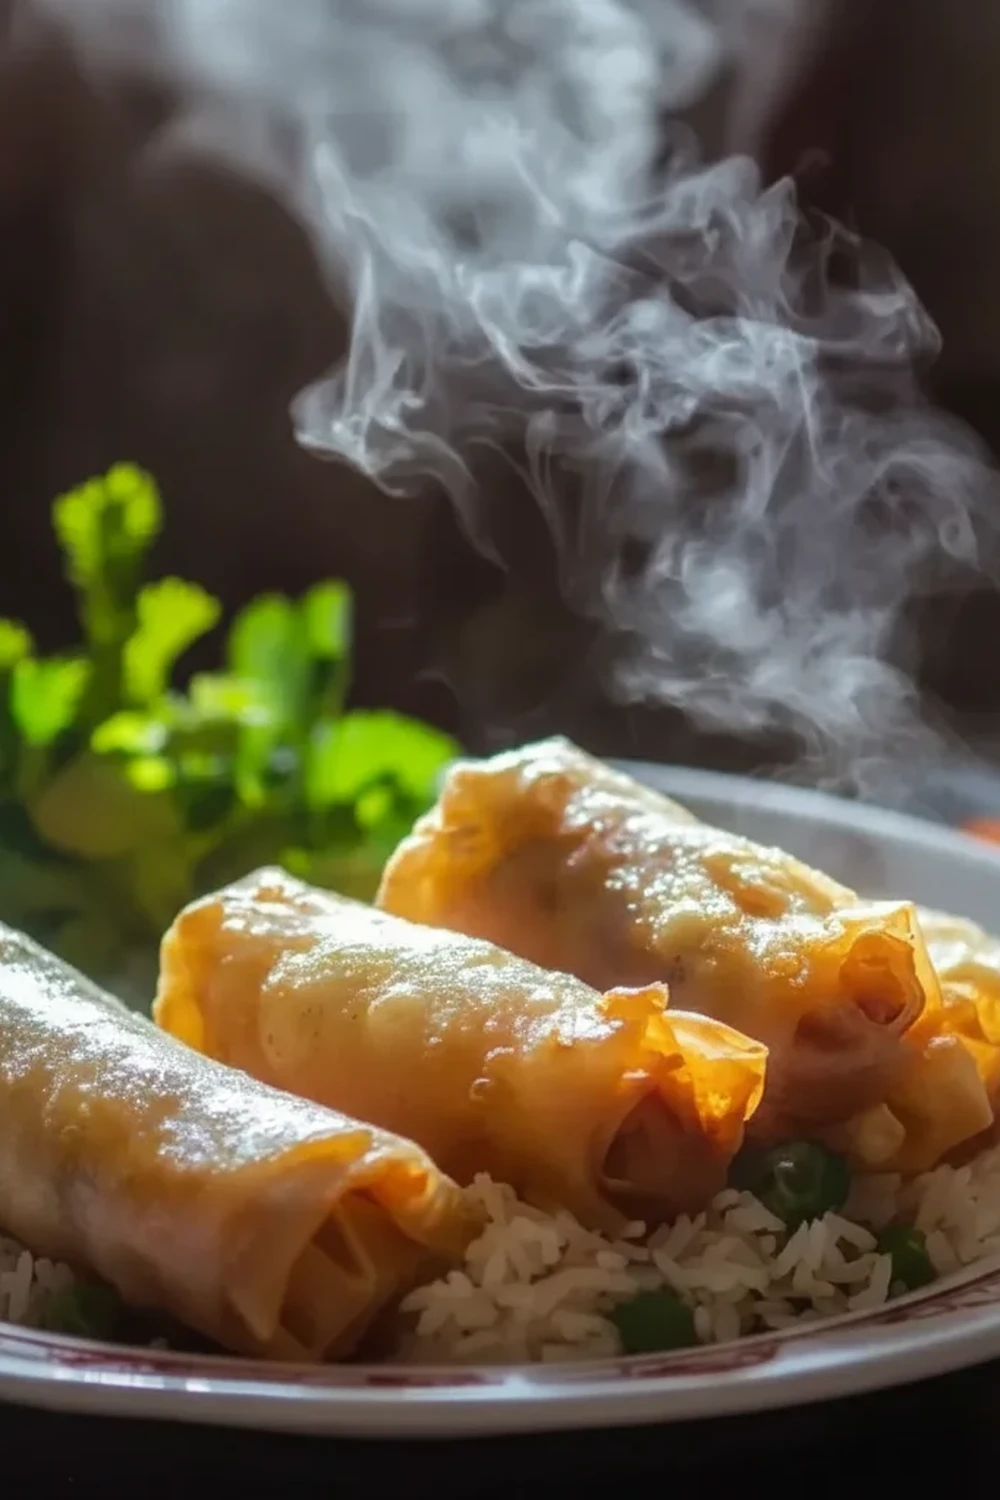
- Drain and Serve: Fry for 3-5 minutes, turning occasionally, until they are a beautiful deep golden brown and crisp all over. Using a slotted spoon or spider strainer, remove them from the oil and let them drain on a wire rack. Draining on a wire rack instead of paper towels helps keep the bottoms from getting steamy and soft. Serve hot with your favourite dipping sauce.
Tips From My Kitchen
- Oil Temperature is Key: Maintaining the oil at around 180°C is vital. If the oil is too cool, the spring rolls will absorb too much oil and become greasy. If it’s too hot, the wrapper will burn before the filling has a chance to heat through. A kitchen thermometer is a brilliant investment for frying.
- The Secret to a Tight Roll: I learned that the initial tuck is the most important part of the wrapping process. When you first fold the bottom corner over the filling, use your fingers to pull it back slightly, tucking it tightly against the filling. This removes any air pockets and ensures a compact, neat roll that won’t unravel.
- Make-Ahead Method: You can prepare the filling up to two days in advance and keep it in an airtight container in the fridge. You can also assemble the uncooked rolls, place them in a single layer on a baking sheet, freeze until solid, and then transfer them to a freezer bag for up to 3 months. Fry them directly from frozen, adding a couple of extra minutes to the cooking time.
- Storage and Reheating: These crispy rolls are definitely best enjoyed fresh. However, if you have leftovers, store them in an airtight container in the fridge for up to 2 days. To reheat and bring back the crunch, place them on a baking tray in an oven preheated to 190°C (170°C fan) for 8-10 minutes. Avoid the microwave at all costs!
Equipment You’ll Need
- Large frying pan or wok
- Sharp knife and cutting board
- A few mixing bowls
- Wooden spoon or spatula
- Deep saucepan or deep-fat fryer
- Spider strainer or slotted spoon
- Wire cooling rack
What to Serve With Spring Rolls
While fantastic on their own, these veggie rolls are elevated with the right accompaniments. It’s a versatile snack that could even be served alongside something unexpected like my Smashed Burgers Recipe for a fun, eclectic meal.
- Dipping Sauces: A simple sweet chilli sauce is the classic choice. For something different, try a mixture of soy sauce, a splash of rice vinegar, and a few slivers of fresh ginger.
- Drink Pairing: A cold, crisp lager like a Japanese Asahi or a German Pilsner is a brilliant match. For wine lovers, a dry or off-dry Riesling has the acidity and slight sweetness to complement the Asian flavours.
– A Fresh Salad: A crisp, light salad with a sesame-ginger vinaigrette works wonderfully to cut through the richness of the fried rolls.
Frequently Asked Questions
Spring Rolls
Ingredients
Method
- Sauté the Aromatics: Heat 1 tablespoon of vegetable oil in a large frying pan or wok over a medium-high heat. Add the minced garlic and grated ginger and stir-fry for about 30 seconds until fragrant, but not browned.
- Cook the Vegetables: Add the julienned carrot and shredded cabbage to the pan. Stir-fry for 3-4 minutes until the vegetables have softened but still retain a slight bite. We're not looking for mushy here; a little texture is good.
- Finish the Filling: Add the beansprouts and sliced spring onions, and cook for another minute. Turn off the heat. Stir in the soy sauce, oyster sauce (if using), toasted sesame oil, and white pepper. Mix everything together well.
- Cool Completely: This is crucial. Transfer the filling to a large, shallow dish and spread it out to cool down as quickly as possible. You can even pop it in the fridge. The filling must be at room temperature before you start wrapping. I learned the hard way that warm filling creates steam, which makes the wrappers soggy and prone to tearing.
- Prepare for Rolling: Set up your wrapping station. You'll need the cooled filling, the stack of wrappers (under a damp cloth), and your little bowl of cornflour slurry.
- Wrap the Spring Rolls: Place one wrapper on a clean, dry surface in a diamond shape, with one corner pointing towards you. Spoon about 2 heaped tablespoons of the filling onto the bottom third of the wrapper. Fold the bottom corner up and over the filling, tucking it in tightly. Fold in the left and right corners towards the centre, like an envelope. Then, roll it forward tightly until you have about 2 inches of wrapper left at the top.
- Seal the Rolls: Brush a little of the cornflour paste along the top edges of the wrapper and complete the roll. The paste acts as a glue to keep it sealed. Place the finished roll on a tray, seam-side down. Repeat with the remaining filling and wrappers.
- Fry to Golden Perfection: Pour the vegetable oil into a deep saucepan or wok until it is about 5cm deep. Heat the oil to 180°C. If you don’t have a thermometer, you can test it by dropping a small piece of a wrapper into the oil; it should sizzle immediately and turn golden in about 30-40 seconds. Carefully place 3-4 spring rolls into the hot oil, ensuring not to overcrowd the pan.
- Drain and Serve: Fry for 3-5 minutes, turning occasionally, until they are a beautiful deep golden brown and crisp all over. Using a slotted spoon or spider strainer, remove them from the oil and let them drain on a wire rack. Draining on a wire rack instead of paper towels helps keep the bottoms from getting steamy and soft. Serve hot with your favourite dipping sauce.
Notes
I really hope you give this spring roll recipe a try. Taking the time to make them from scratch is such a rewarding process, and the taste is worlds apart from anything you can buy frozen. They’re a real treat and a technique worth mastering. Let me know how you get on in the comments below – I’d love to hear about it!
Happy cooking,
Marcus