
Japanese Katsu Bowls Tonkatsu Sauce
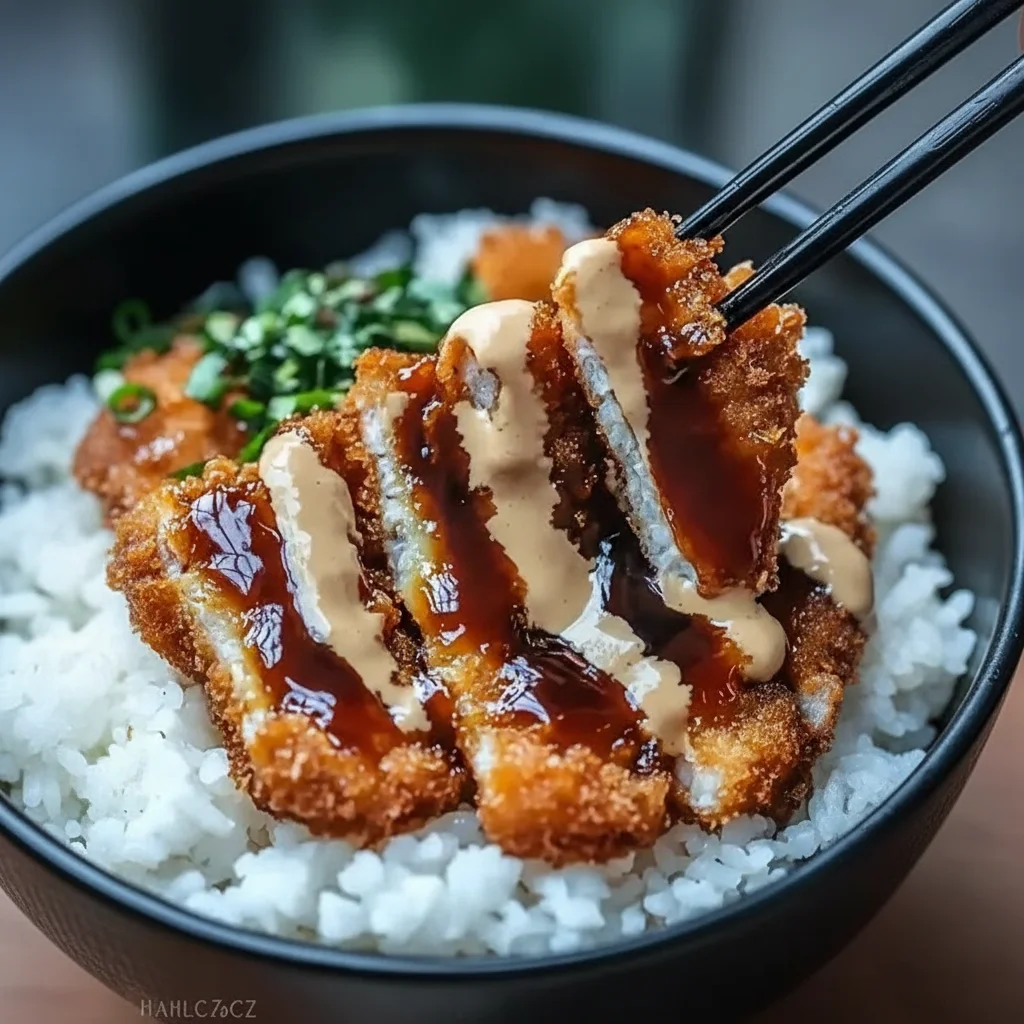
There’s a unique satisfaction that comes from creating a restaurant-quality meal in your own kitchen. For me, that meal is often a Japanese Katsu Bowl. The sound of the knife slicing through the shatteringly crisp panko coating on the pork, revealing the juicy meat inside, is just fantastic. It’s a dish of wonderful contrasts: the crunchy pork, the fluffy steamed rice, and the rich, tangy-sweet homemade tonkatsu sauce that brings everything together. This is my go-to recipe when I need something that feels special on a weeknight but doesn’t require hours of effort. It’s less complicated than you might think, and the result is a truly memorable Japanese dinner.
What really elevates this katsu bowl from good to great is the homemade sauce. While you can buy it in a bottle, the flavour of a freshly made tonkatsu sauce is so much more vibrant and nuanced. It’s a simple mix of common pantry staples that creates something deeply savoury and complex. This entire meal, from the crispy pork cutlet to the final drizzle of sauce, is a brilliant way to introduce someone to the joys of Japanese cooking or to satisfy a long-held craving. It’s as hearty and satisfying as my Easy Ground Beef Tacos Recipe but brings a completely different and exciting flavour profile to the table.
Recipe Overview
This recipe guides you through creating the ultimate Japanese Katsu Bowl, focusing on two key elements: an exceptionally crispy pork cutlet and a perfectly balanced homemade tonkatsu sauce. You can expect a juicy, tender pork loin coated in airy panko breadcrumbs, fried to a perfect golden brown. This sits atop a bed of fluffy Japanese rice and is generously drizzled with a sauce that is simultaneously sweet, tangy, and rich with umami. I stumbled upon this particular sauce combination by accident when I ran out of a store-bought version, and it’s been a non-negotiable part of the recipe ever since.
- Prep Time: 15 minutes
- Cook Time: 15 minutes
- Total Time: 30 minutes
- Servings: 2 people
- Difficulty: Medium
Why You’ll Love This Japanese Katsu Bowl with Tonkatsu Sauce
- Genuine Flavour: The homemade tonkatsu sauce is leagues ahead of bottled versions. It has a beautiful depth from the Worcestershire sauce, a gentle sweetness from ketchup and mirin, and a savoury backbone from soy sauce. It perfectly complements the rich, crispy pork.
- Ready in 30 Minutes: This impressive Japanese dinner comes together in about half an hour, making it entirely achievable for a weeknight meal when you want something a bit special.
- Flexible Recipe: This method works beautifully with other proteins. Try it with chicken breast pounded thin (Chicken Katsu) or even thick slices of aubergine for a vegetarian option.
- Great for a Dinner for Two: The recipe is scaled for two, making it ideal for a date night in or a quiet, satisfying meal. It’s easy to double if you’re cooking for more people.
- Family Tested: My whole family enjoys this, but my wife particularly loves the crispiness of the pork. It always gets compliments on the texture.
Ingredients You’ll Need
The key to an amazing katsu bowl lies in using good quality ingredients, especially for the pork and the panko. For the panko, I always recommend a Japanese brand if you can find one; the flakes are larger and lighter, which creates a far superior, crunchier crust. I usually grab a bag from our local Asian supermarket.
- For the Tonkatsu Sauce:
- 60ml tomato ketchup
- 2 tbsp Worcestershire sauce
- 1 tbsp soy sauce
- 1 tbsp mirin (Japanese sweet rice wine)
- 1 tsp granulated sugar
- 1/2 tsp Dijon mustard
- For the Pork Katsu:
- 2 boneless pork loin steaks, about 1.5cm thick (approx. 120-150g each)
- 1/2 tsp salt
- 1/4 tsp black pepper
- 50g plain flour
- 1 large egg, beaten
- 100g panko breadcrumbs
- Vegetable or rapeseed oil, for frying (about 500-700ml)
- For Assembling the Bowls:
- 300g cooked Japanese short-grain rice, warm
- 1 spring onion, finely sliced
- Toasted sesame seeds, for garnish
Marcus’s Tip: Patting the pork completely dry with a paper towel before seasoning is crucial. It helps the flour, egg, and panko adhere properly, giving you a flawless, crispy coating that won’t fall off during frying.
How to Make Japanese Katsu Bowls with Tonkatsu Sauce
The process is quite straightforward. We’ll make the sauce first, then prepare and fry the pork, and finally assemble our delicious katsu bowls. Having everything prepped and ready to go (a little ‘mise en place’) makes the cooking stage smooth and stress-free.
- Make the Tonkatsu Sauce: In a small bowl, whisk together the ketchup, Worcestershire sauce, soy sauce, mirin, sugar, and Dijon mustard until the sugar has dissolved and the sauce is smooth. Set it aside. The flavours will meld together while you prepare the pork.
- Prepare the Pork: Place the pork loin steaks on a cutting board. If they are slightly uneven, you can cover them with cling film and gently pound them to an even thickness. This ensures they cook evenly. Season both sides generously with salt and pepper.
- Set Up Your Dredging Station: You’ll need three shallow dishes or plates. Place the plain flour in the first one. In the second, pour the beaten egg. In the third, spread out the panko breadcrumbs.
- Coat the Pork: Take one pork steak and dredge it in the flour, shaking off any excess. Then, dip it into the beaten egg, ensuring it’s fully coated. Finally, press it firmly into the panko breadcrumbs, covering both sides completely. Pat the panko on to help it adhere. Set the coated cutlet on a wire rack and repeat with the second steak.
- Heat the Oil: Pour the oil into a large, deep frying pan or a medium saucepan to a depth of about 3-4cm. Heat the oil over a medium-high heat until it reaches 170°C. If you don’t have a thermometer, you can test it by dropping in a panko breadcrumb; it should sizzle immediately and turn golden in about 30 seconds.
- Fry the Pork Katsu: Carefully lower one pork cutlet into the hot oil. Fry for 3-4 minutes per side, until it’s a deep golden brown and the pork is cooked through. I find that using tongs to gently turn the pork once is the best way to avoid disturbing the crust. Cook the cutlets one at a time to avoid lowering the oil temperature.
- Rest the Pork: Once cooked, remove the pork katsu from the oil and let it drain on a wire rack for a few minutes. This keeps the underside from becoming soggy. Resting also allows the juices in the meat to settle.
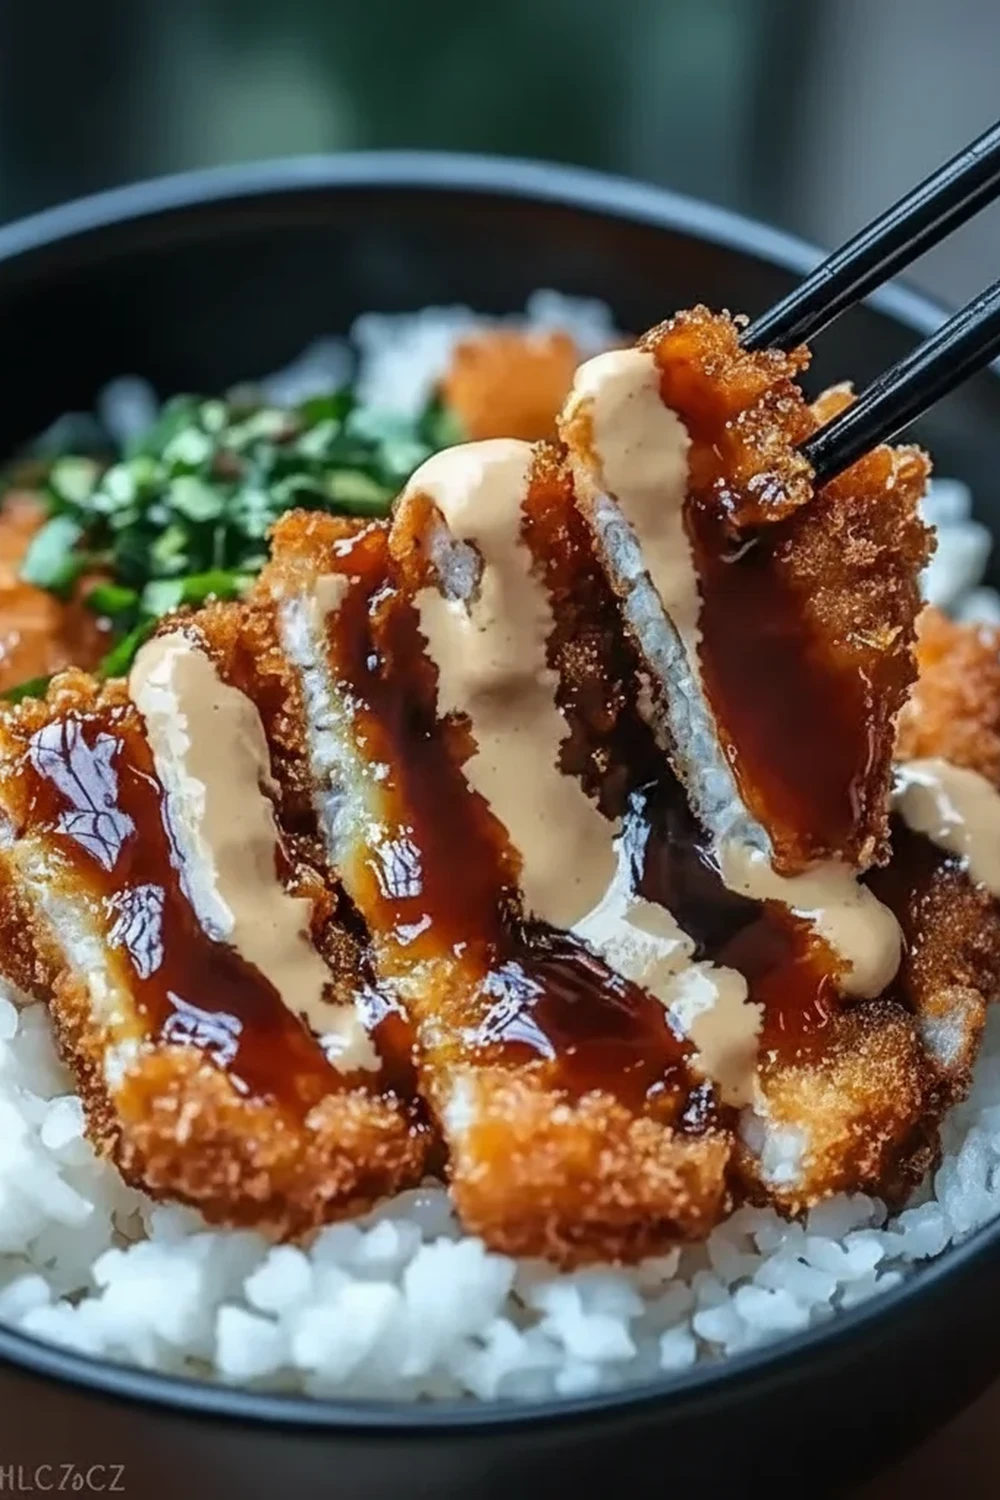
- Assemble the Katsu Bowls: Divide the warm cooked rice between two bowls. Slice the rested pork katsu into 1-2cm thick strips. Arrange the strips over the rice. Drizzle generously with your homemade tonkatsu sauce, then garnish with sliced spring onions and a sprinkle of toasted sesame seeds. Serve immediately.
Tips From My Kitchen
- Temperature Control: The secret to a non-greasy, crispy cutlet is maintaining the oil temperature at around 170-180°C. A kitchen thermometer is a brilliant investment for frying. If you see the panko browning too quickly, lower the heat slightly. This is a fundamental technique explained well in guides about the science of frying.
- The Secret Step: Don’t skip resting the pork on a wire rack. Placing it directly onto a plate or paper towels will trap steam and can make the wonderfully crispy coating go soft on one side.
- Make-Ahead: The tonkatsu sauce is fantastic for making ahead. It can be stored in an airtight container in the fridge for up to two weeks. The pork is best cooked fresh, but you can bread it up to an hour before you plan to fry.
- Storage: Store leftover cooked katsu and rice in separate airtight containers in the fridge for up to 2 days. To reheat the pork and bring back its crunch, place it in an air fryer or an oven preheated to 180°C (160°C fan) for 5-7 minutes.
Equipment You’ll Need
- Large deep-sided frying pan or Dutch oven
- Kitchen thermometer (highly recommended)
- Tongs
- Three shallow dishes for breading
- Wire rack
- Sharp knife and cutting board
Common Mistakes to Avoid
- Overcrowding the pan: Frying both cutlets at once will cause the oil temperature to drop significantly, resulting in a pale, greasy coating instead of a crisp, golden one. Cook them one at a time for the best results.
- Using the Wrong Pork Cut: Extremely thick or bone-in chops will not cook through in the time it takes for the panko to brown. Stick to boneless loin steaks that are about 1.5cm thick for this quick-frying method. Historically, Tonkatsu was developed as a Japanese take on a European-style cutlet, and the choice of cut is key.
- Slicing Too Soon: Be patient and let the pork rest for at least 3-5 minutes before you slice it. This simple step makes a huge difference, ensuring the pork remains succulent and tender.
Delicious Variations to Try
Once you’ve mastered the classic crispy pork katsu bowl, it’s fun to experiment. If you enjoy dishes with a great crunch, you might also like the texture on these Smashed Burgers Recipe With Crispy Edges.
- Spicy Katsu Bowl: Add 1/2 teaspoon of sriracha or a pinch of shichimi togarashi (Japanese seven-spice) to the tonkatsu sauce for a gentle, warming heat.
- Katsukarē (Katsu Curry): Instead of tonkatsu sauce, serve the crispy pork cutlet over rice with a generous ladle of Japanese curry sauce. It’s a hugely popular dish in Japan and for good reason.
- Chicken Katsu Donburi: Swap the pork for chicken breast fillets, pounded to an even thickness. For a ‘donburi’ style, simmer the sliced katsu with dashi, soy sauce, and onion, then pour it over the rice with a lightly cooked egg.
What to Serve With Your Japanese Katsu Bowl
While this katsu bowl is a complete meal in itself, a few simple sides can turn it into a full Japanese-style feast.
- Finely Shredded Cabbage: This is the classic accompaniment. The raw, crisp cabbage provides a refreshing, clean contrast to the rich, fried pork. A simple Japanese-style sesame dressing works well with it.
- Miso Soup: A small bowl of warm, savoury miso soup served alongside is traditional and helps balance the meal.
– Quick Pickled Cucumber: Thinly slice a cucumber and toss with a splash of rice vinegar, a pinch of sugar, and a little salt. Let it sit for 15 minutes for a tangy, crunchy side.
Frequently Asked Questions
There you have it—a complete guide to making incredible Japanese Katsu Bowls at home. The combination of textures and the deeply savoury homemade tonkatsu sauce makes this a dish we return to again and again. It’s a wonderful project for a weekend or a way to make any weeknight feel a little more special. And if you’ve got room for something sweet afterwards, a slice of my Giant Skillet Cookie would be a brilliant finish. I hope you enjoy making it as much as I do. Let me know in the comments how your katsu bowls turn out!
Japanese Katsu Bowls with Tonkatsu Sauce
Ingredients
Method
- Make the Tonkatsu Sauce: In a small bowl, whisk together the ketchup, Worcestershire sauce, soy sauce, mirin, sugar, and Dijon mustard until the sugar has dissolved and the sauce is smooth. Set it aside. The flavours will meld together while you prepare the pork.
- Prepare the Pork: Place the pork loin steaks on a cutting board. If they are slightly uneven, you can cover them with cling film and gently pound them to an even thickness. This ensures they cook evenly. Season both sides generously with salt and pepper.
- Set Up Your Dredging Station: You’ll need three shallow dishes or plates. Place the plain flour in the first one. In the second, pour the beaten egg. In the third, spread out the panko breadcrumbs.
- Coat the Pork: Take one pork steak and dredge it in the flour, shaking off any excess. Then, dip it into the beaten egg, ensuring it’s fully coated. Finally, press it firmly into the panko breadcrumbs, covering both sides completely. Pat the panko on to help it adhere. Set the coated cutlet on a wire rack and repeat with the second steak.
- Heat the Oil: Pour the oil into a large, deep frying pan or a medium saucepan to a depth of about 3-4cm. Heat the oil over a medium-high heat until it reaches 170°C. If you don't have a thermometer, you can test it by dropping in a panko breadcrumb; it should sizzle immediately and turn golden in about 30 seconds.
- Fry the Pork Katsu: Carefully lower one pork cutlet into the hot oil. Fry for 3-4 minutes per side, until it's a deep golden brown and the pork is cooked through. I find that using tongs to gently turn the pork once is the best way to avoid disturbing the crust. Cook the cutlets one at a time to avoid lowering the oil temperature.
- Rest the Pork: Once cooked, remove the pork katsu from the oil and let it drain on a wire rack for a few minutes. This keeps the underside from becoming soggy. Resting also allows the juices in the meat to settle.
- Assemble the Katsu Bowls: Divide the warm cooked rice between two bowls. Slice the rested pork katsu into 1-2cm thick strips. Arrange the strips over the rice. Drizzle generously with your homemade tonkatsu sauce, then garnish with sliced spring onions and a sprinkle of toasted sesame seeds. Serve immediately.
Notes
Happy cooking,
Marcus