New York Cheesecake
If your weeknight dinners have become a blur of tired takeaways and the same three meals on rotation, I have just the thing to break the cycle. This New York Cheesecake is my secret weapon for turning a frantic Tuesday into something that feels a little bit special, without demanding hours in the kitchen or leaving a mountain of washing up.
Recipe Overview
- Prep time: 20 minutes
- Cook time: 55 minutes (plus 1 hour in the oven with the door off, then cooling)
- Total time: 1 hour 15 minutes (active), plus 4 hours chilling
- Servings: 12 generous slices
- Difficulty: Medium (but I promise it’s simpler than it looks)
Why You’ll Love This New York Cheesecake
- It’s a genuine time-saver. Unlike many cheesecakes that require a water bath and a fussy crust, this one bakes beautifully with minimal fuss. The filling comes together in one bowl, and the crust uses a simple press-in method.
- Minimal cleanup is baked right in. I use a single mixing bowl for the filling and line my tin with parchment paper. You’re left with a mixing bowl, a spatula, and a springform tin to wash.
- It’s a make-ahead miracle, much like preparing the batter for Homemade Waffles the night before. You can bake this New York Cheesecake two days ahead and keep it in the fridge. It actually tastes better on day two, which means you can prep it on a Sunday for a stress-free Monday dinner finale.
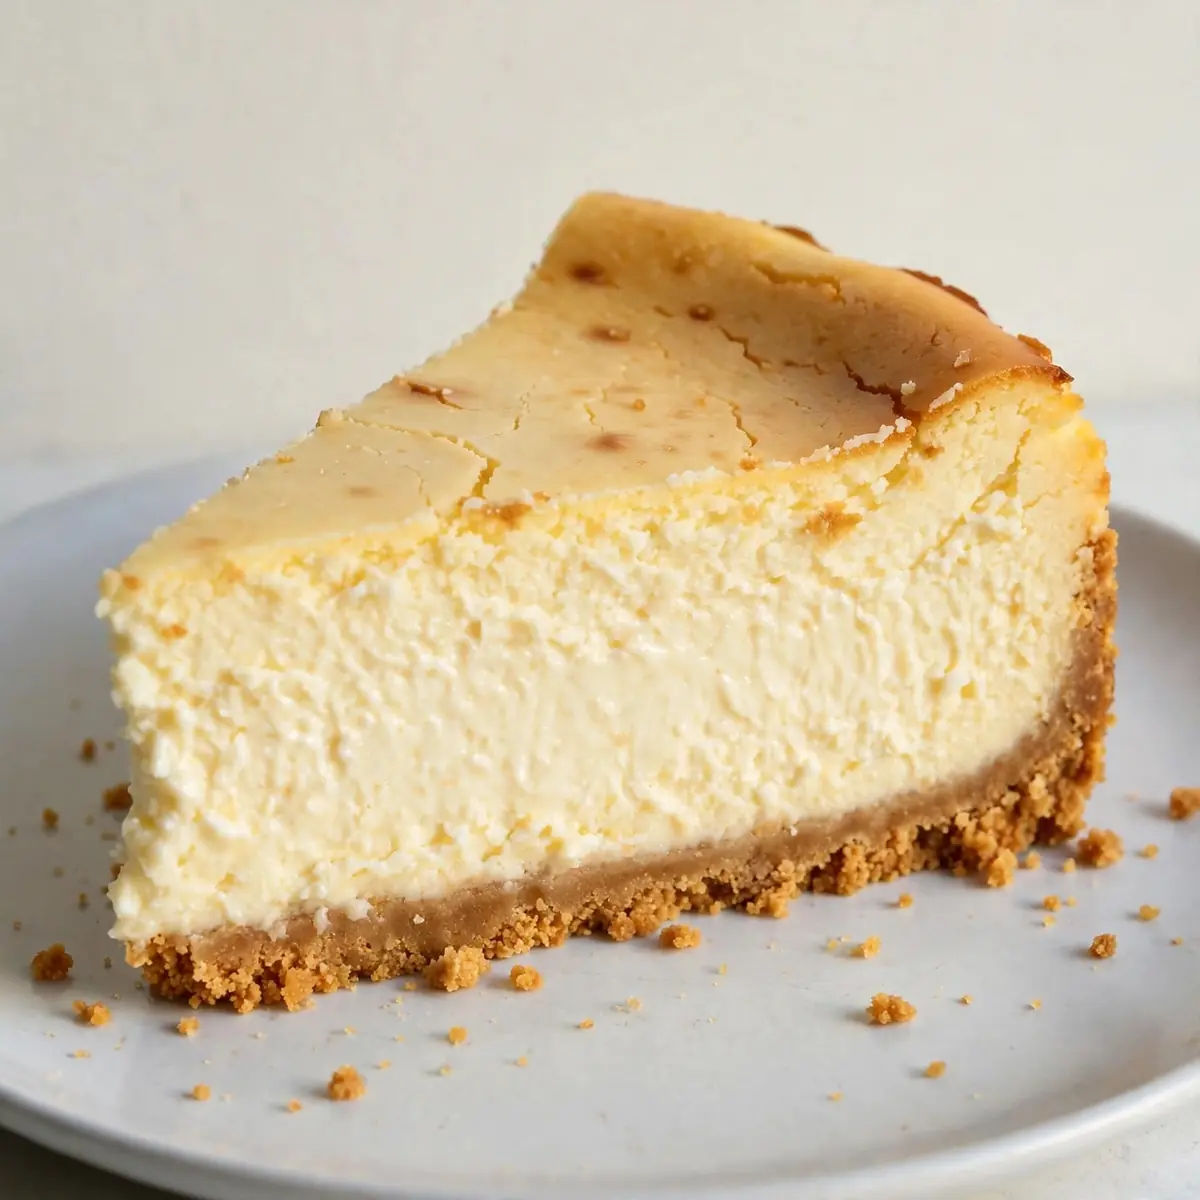
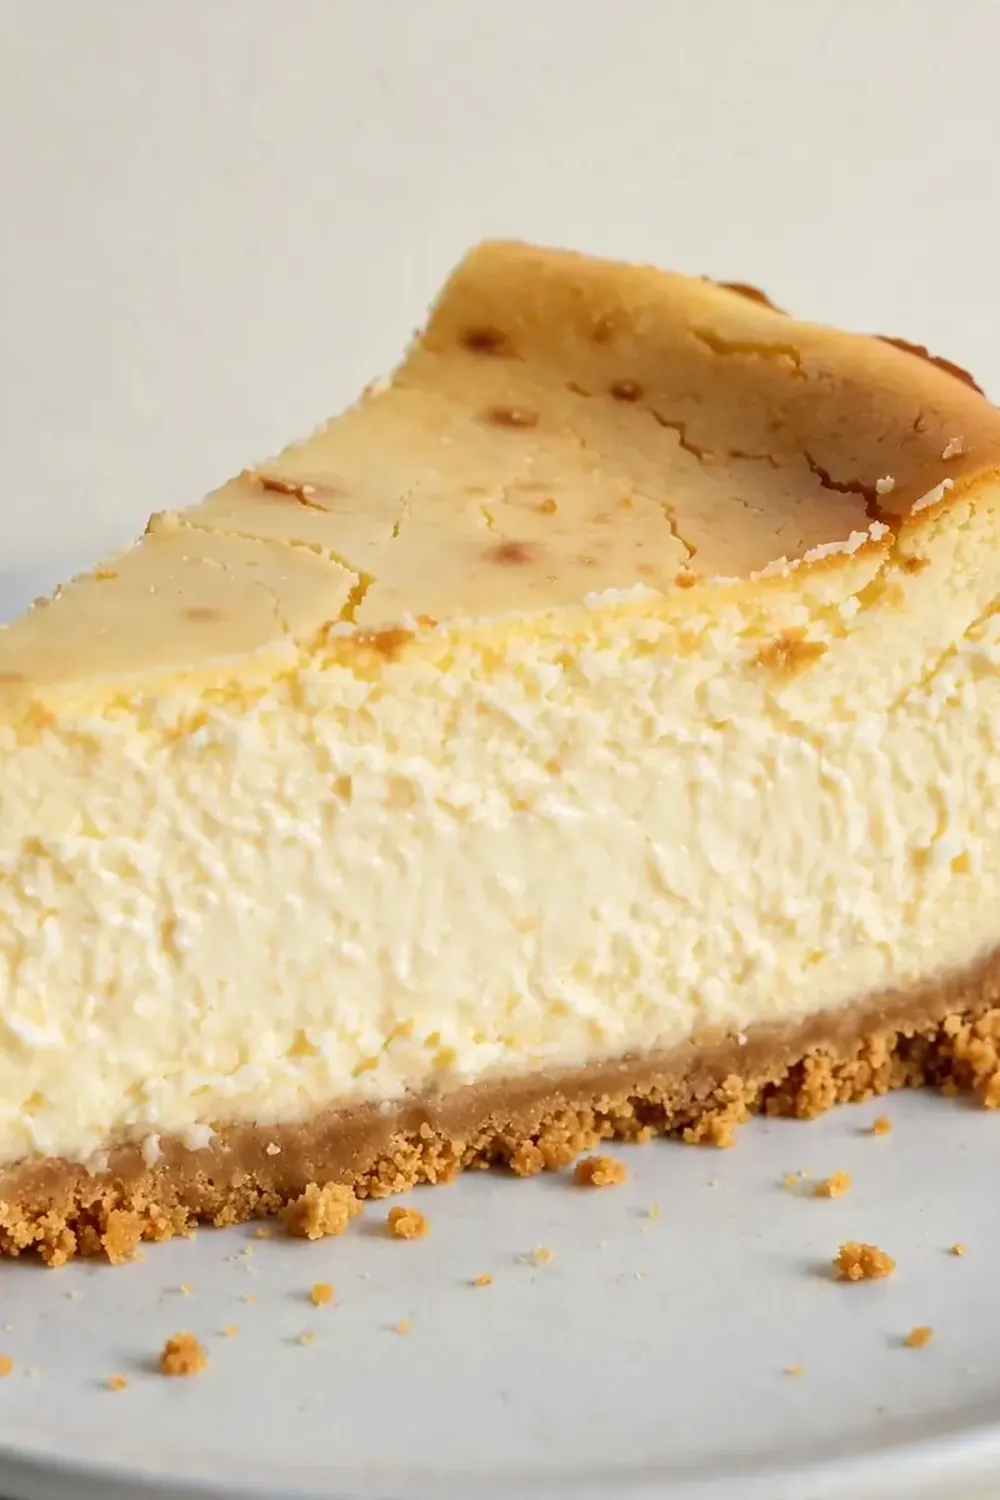
- The texture is pure luxury. Dense, creamy, and with that signature tangy finish, this cheesecake satisfies a deep craving for something rich and indulgent without being overly sweet.
- It’s a crowd-pleaser in the best way. I’ve served this to everyone from my picky kids to my in-laws, and it disappears every single time. It’s the kind of dessert that makes people close their eyes and sigh.
Ingredients You’ll Need
- For the crust:
- 200g digestive biscuits (or any plain, buttery biscuit)
- 75g unsalted butter, melted
- 1 tablespoon caster sugar
- For the filling:
- 900g full-fat cream cheese, at room temperature (I use Philadelphia)
- 200g caster sugar
- 1 tablespoon plain flour
- 1 teaspoon vanilla extract
- Zest of 1 lemon (optional, but it lifts the flavour beautifully)
- 3 large eggs, at room temperature
- 1 large egg yolk, at room temperature
- 150ml double cream
- 2 tablespoons soured cream
Tip: Room temperature ingredients are non-negotiable here. Cold cream cheese will give you a lumpy filling that never bakes smooth. Take everything out of the fridge at least an hour before you start.
How to Make New York Cheesecake
- Prepare the crust. Preheat your oven to 160°C (140°C fan). Place the digestive biscuits in a sealed bag and crush them with a rolling pin until they resemble fine, golden sand. You’ll know it’s ready when no large chunks remain. Mix the crumbs with the melted butter and sugar until the mixture feels like wet, clumping sand when pressed between your fingers.
- Press and bake the crust. Tip the crumb mixture into a 23cm springform tin lined with parchment paper. Press it firmly and evenly into the base using the bottom of a glass. Bake for 10 minutes until it smells toasty and the edges are just beginning to darken. Set aside to cool while you make the filling. The crust should feel firm and slightly crisp when you touch it.
- Beat the cream cheese. In a large bowl, beat the cream cheese on medium speed for about 2 minutes until it’s smooth, silky, and completely lump-free. You should see a glossy sheen develop on the surface. Scrape down the sides and the paddle thoroughly.
- Add the sugar and dry ingredients. Add the sugar, flour, and lemon zest if using. Beat on low speed just until combined. The mixture will look slightly grainy at this stage, but that’s fine. Overmixing now will incorporate too much air, which leads to cracks later.
- Incorporate the eggs one at a time. Add the eggs and the extra yolk one by one, mixing on low speed after each addition until just combined. The batter should look thick, pale, and utterly luscious, with a smooth, velvety texture. You should hear a soft, creamy sound as the mixer works, not a sloshing one.
- Add the cream and soured cream. Pour in the double cream and soured cream, then mix on low until the batter is uniform and glossy. It should flow slowly off a spatula, like a thick ribbon. Give it one final scrape down the bowl to ensure everything is incorporated.
- Bake low and slow. Pour the filling over the cooled crust and gently tap the tin on the counter a few times to release any air bubbles. Bake at 160°C (140°C fan) for 50-55 minutes. The cheesecake is ready when the edges are set and puffed slightly, but the centre still wobbles like a jelly when you gently shake the tin. The top should be a pale, creamy gold, not brown.
- Cool in the oven. Turn the oven off, crack the door open (I wedge a wooden spoon in it), and leave the cheesecake inside for a full hour. This gentle cooling prevents the dreaded cracks. After an hour, transfer the tin to a wire rack to cool completely. You’ll hear a faint crackling as it settles. Once at room temperature, refrigerate for at least 4 hours, but overnight is best.
Tips From My Kitchen
- Use a springform tin and line it well. I line the base and sides with parchment paper, letting it rise a couple of inches above the rim. This makes unmoulding a dream and prevents any sticking. It also catches any butter that might leak from the crust during baking.
- Don’t overmix the filling after adding eggs. I used to struggle with this cheesecake until I discovered this technique. Overmixing incorporates too much air, which expands in the oven and then collapses, creating cracks. Keep the mixer on low and stop the moment each egg disappears into the batter.
- Bake on the middle rack. The middle rack provides the most even heat distribution. If you bake too low, the bottom crust can burn; too high, and the top sets before the centre is done. This simple positioning is key to that smooth, even finish.
- Use a sharp, hot knife for slicing. For clean, restaurant-style slices, run your knife under hot water, dry it, then make one smooth cut. Wipe the blade clean and reheat between each slice. This prevents the cream cheese from dragging and tearing.
- Let it come to room temperature before serving. A cold cheesecake tastes firm and muted. Take it out of the fridge 20-30 minutes before you plan to serve it. The texture will soften to that glorious, creamy, melt-in-the-mouth consistency that makes New York Cheesecake so legendary.
Common Mistakes to Avoid
- Overcrowding the pan: This isn’t a problem with a standard cheesecake, but if you’re making a smaller batch in a larger tin, the filling will be too thin and bake too quickly, resulting in a dry, rubbery texture. Stick to a 23cm tin for this quantity.
- Wrong temperature: Baking at too high a temperature will cause the cheesecake to puff up, crack, and then sink. I bake at a steady 160°C (140°C fan) and rely on the gentle residual heat of the oven for the final set. A slow, steady bake is your friend.
- Skipping the rest time: The cheesecake continues to set as it cools. Cutting into it while it’s still warm will result in a soupy mess. The 4-hour chill (and ideally overnight) allows the structure to firm up and the flavours to meld into that dense, creamy perfection.
Delicious Variations to Try
- Spicy Version: Add ½ teaspoon of ground cinnamon and a pinch of cayenne pepper to the crust mixture. For the filling, stir in 1 tablespoon of finely chopped crystallised ginger. The warmth of the spices cuts through the richness beautifully.
- Vegetarian/Vegan Option: For a plant-based version, use a vegan cream cheese (like Violife or Sheese), vegan soured cream, and a flax egg (1 tablespoon ground flaxseed mixed with 3 tablespoons water per egg). The texture will be slightly less dense but still creamy and delicious.
- Different Protein: While this is a dessert, if you’re looking for a savoury twist, fold 150g of finely grated, well-drained halloumi into the filling before baking. It creates a salty, savoury cheesecake that is surprisingly wonderful with a drizzle of honey and a sprinkle of chilli flakes.
What to Serve With New York Cheesecake
- A simple berry compote (just simmer frozen berries with a spoonful of sugar and a squeeze of lemon until jammy).
- A dollop of lightly whipped double cream.
- A drizzle of warm salted caramel sauce (homemade or from a good jar).
- A strong, black coffee or an espresso to cut through the richness.
- A scattering of fresh, sliced strawberries or a few raspberries.
Frequently Asked Questions
New York Cheesecake
Ingredients
Method
-
Prepare the crust. Preheat your oven to 160°C (140°C fan). Place the digestive biscuits in a sealed bag and crush them with a rolling pin until they resemble fine, golden sand. You’ll know it’s ready when no large chunks remain. Mix the crumbs with the melted butter and sugar until the mixture feels like wet, clumping sand when pressed between your fingers.
-
Press and bake the crust. Tip the crumb mixture into a 23cm springform tin lined with parchment paper. Press it firmly and evenly into the base using the bottom of a glass. Bake for 10 minutes until it smells toasty and the edges are just beginning to darken. Set aside to cool while you make the filling. The crust should feel firm and slightly crisp when you touch it.
-
Beat the cream cheese. In a large bowl, beat the cream cheese on medium speed for about 2 minutes until it’s smooth, silky, and completely lump-free. You should see a glossy sheen develop on the surface. Scrape down the sides and the paddle thoroughly.
-
Add the sugar and dry ingredients. Add the sugar, flour, and lemon zest if using. Beat on low speed just until combined. The mixture will look slightly grainy at this stage, but that’s fine. Overmixing now will incorporate too much air, which leads to cracks later.
-
Incorporate the eggs one at a time. Add the eggs and the extra yolk one by one, mixing on low speed after each addition until just combined. The batter should look thick, pale, and utterly luscious, with a smooth, velvety texture. You should hear a soft, creamy sound as the mixer works, not a sloshing one.
-
Add the cream and soured cream. Pour in the double cream and soured cream, then mix on low until the batter is uniform and glossy. It should flow slowly off a spatula, like a thick ribbon. Give it one final scrape down the bowl to ensure everything is incorporated.
-
Bake low and slow. Pour the filling over the cooled crust and gently tap the tin on the counter a few times to release any air bubbles. Bake at 160°C (140°C fan) for 50-55 minutes. The cheesecake is ready when the edges are set and puffed slightly, but the centre still wobbles like a jelly when you gently shake the tin. The top should be a pale, creamy gold, not brown.
-
Cool in the oven. Turn the oven off, crack the door open (I wedge a wooden spoon in it), and leave the cheesecake inside for a full hour. This gentle cooling prevents the dreaded cracks. After an hour, transfer the tin to a wire rack to cool completely. You’ll hear a faint crackling as it settles. Once at room temperature, refrigerate for at least 4 hours, but overnight is best.
Notes
This New York Cheesecake has genuinely changed my weeknight dinners. It’s the dessert I turn to when I need something that feels like a hug in a slice, but without the stress. I love hearing how others get on with it, so do let me know in the comments if you give it a go. If you’re also a fan of a speedy, impressive dessert, you might enjoy my Blackberry Cheesecake Brownies Recipe Swirled Treat for another quick fix, or perhaps the Chocolate Hazelnut Mousse Recipe Silky Dessert when you want something even lighter. Happy baking!