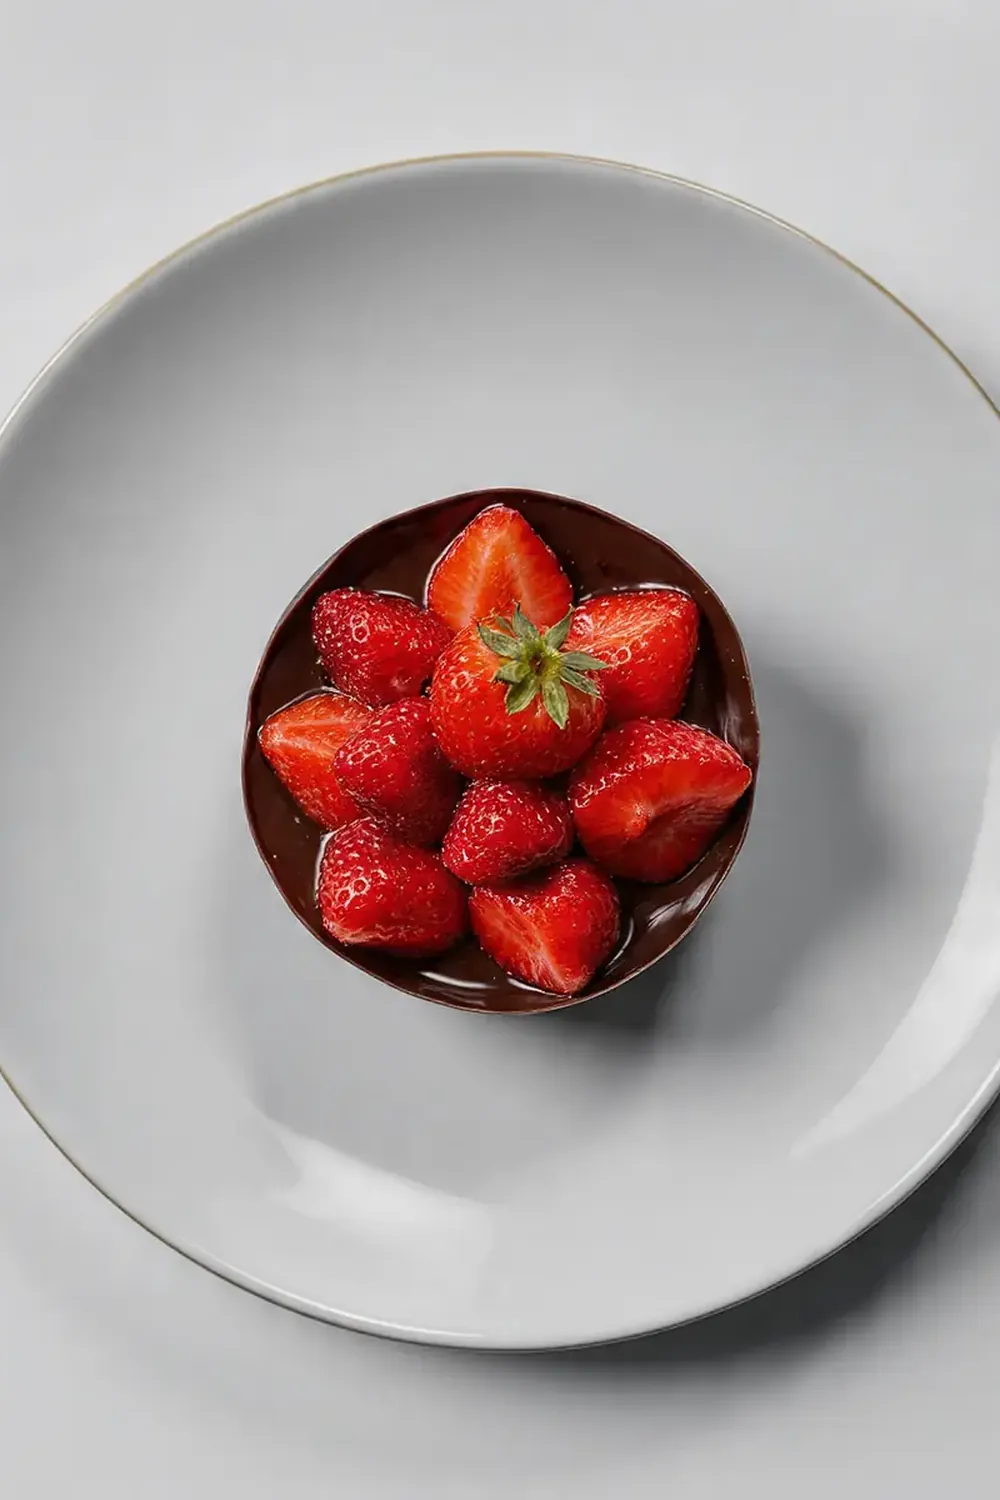
Viral Dubai Chocolate Strawberry Cups

The culinary world is buzzing, and for good reason! We’re diving headfirst into the phenomenon that is the Viral Dubai Chocolate Strawberry Cups. These aren’t just any dessert; they’re a luxurious, decadent experience that has taken social media by storm, captivating food lovers with their elegant appearance and truly irresistible layers. Get ready to recreate this show-stopping treat right in your own kitchen.
Recipe Overview
- Prep Time: 45 minutes
- Chill Time: 2 hours 30 minutes
- Total Time: 3 hours 15 minutes
- Servings: 6 cups
- Difficulty: Moderate
Why You’ll Love This Viral Dubai Chocolate Strawberry Cups
- A Taste of Luxury: Experience rich, velvety chocolate and fresh, sweet strawberries, creating a truly opulent dessert that feels incredibly special.
- Visually Stunning: The vibrant red of the strawberries contrasted with the glossy chocolate shell makes for an eye-catching presentation that will impress anyone.
- Perfect for Sharing: These individual cups are ideal for dinner parties, special occasions, or as a thoughtful homemade gift, offering a delightful portion for everyone.
- Customisable Flavours: While classic, the recipe allows for subtle tweaks to suit your preferences, from different chocolate types to additional flavourings.
- A Rewarding Challenge: While not overly complex, creating these cups offers a satisfying culinary project, resulting in a dessert that tastes as good as it looks.
Ingredients You’ll Need
- 300g good quality milk chocolate, finely chopped
- 150g dark chocolate (70% cocoa solids), finely chopped
- 50g unsalted butter, softened
- 250ml double cream
- 50g caster sugar
- 1 teaspoon vanilla extract
- 500g fresh strawberries, hulled and quartered
- 100g digestive biscuits, crushed
- 30g cocoa powder, for dusting (optional)
- Pinch of sea salt flakes (optional, for garnish)
Tip: Always opt for high-quality chocolate for this recipe; it makes a significant difference to the overall flavour and texture of your chocolate cups. Cheaper chocolate can be difficult to melt smoothly and may result in a grainy texture.
How to Make Viral Dubai Chocolate Strawberry Cups
- Prepare the Chocolate Cups: Gently melt 200g of milk chocolate and all the dark chocolate in a heatproof bowl set over a saucepan of simmering water (bain-marie), ensuring the bowl doesn’t touch the water. Stir occasionally until the chocolate is smooth and glossy, with a rich, inviting aroma. Once melted, remove from the heat and stir in 25g of the softened unsalted butter until fully incorporated, giving it a beautiful sheen. Allow to cool slightly for about 10 minutes; it should still be pourable but not scorching hot.
- Line the Cups: Using silicone cupcake moulds or paper-lined muffin tins, spoon about two tablespoons of the melted chocolate mixture into each mould. Use the back of a spoon to spread the chocolate evenly up the sides, creating a shell. The chocolate should have a uniform, dark brown coating. Place in the fridge for 20-30 minutes until the chocolate is firm to the touch and has lost its initial tackiness.
- Make the Whipped Cream Filling: While the chocolate shells are chilling, in a large mixing bowl, combine the double cream, caster sugar, and vanilla extract. Whisk with an electric mixer on medium-high speed until the cream is thick, light, and forms soft peaks. It should smell sweet and fragrant. Be careful not to over-whisk, as it can become grainy.
- Prepare the Strawberry Base: In a separate bowl, gently combine the hulled and quartered strawberries with the crushed digestive biscuits. The biscuits will absorb some of the strawberry juices and provide a lovely textural contrast. You’ll notice the mixture becoming slightly moist and fragrant from the fruit.
- Assemble the Cups: Once the chocolate shells are firm, carefully remove them from their moulds. They should pop out easily, revealing a smooth, dark chocolate cup. If using paper liners, gently peel them away. Spoon a layer of the strawberry and biscuit mixture into the bottom of each chocolate cup. Follow this with a generous dollop of the whipped cream, smoothing the top. The layers should be distinct and visually appealing.
- Finish and Chill: Melt the remaining 100g of milk chocolate with the remaining 25g of butter using the same bain-marie method until smooth and glistening. Carefully pour a thin layer of this melted chocolate over the whipped cream in each cup, allowing it to gently spread and create a shiny, even top. The chocolate will start to set almost immediately upon contact with the cold cream. Return the cups to the fridge for at least 2 hours, or until the top chocolate layer is completely firm and snaps when gently pressed. Before serving, you can lightly dust with cocoa powder and sprinkle a few sea salt flakes for an elegant finish.
Tips From My Kitchen
- Temper Your Chocolate (Optional but Recommended): For the ultimate glossy finish and a satisfying snap, you can temper your chocolate. This involves heating and cooling the chocolate to specific temperatures. While not strictly necessary for this recipe, it prevents blooming (white streaks) and ensures a professional look. If you skip tempering, just ensure your chocolate is melted smoothly and not overheated, as overheated chocolate can seize and become lumpy, losing its smooth texture.
- Use Quality Ingredients: I’ve been making this for over 6 years, and it never disappoints, largely because I always insist on the best ingredients. High-quality chocolate melts more smoothly and tastes richer, while fresh, ripe strawberries offer the best flavour and aroma. This simple choice elevates the entire dessert from good to truly exceptional.
- Chill Thoroughly: Patience is key! Ensure each layer, especially the chocolate shells and the final chocolate topping, is thoroughly chilled and firm before moving to the next step. This prevents the layers from merging and ensures a clean, distinct presentation when you bite into the cup. Rushing this step can lead to a messy, unappealing result where the layers don’t hold their form.
- Don’t Over-Whip Your Cream: When making the whipped cream, keep a close eye on it. Over-whipped cream can become grainy and lose its smooth, luxurious texture. Stop whisking as soon as soft peaks form; the cream should still be light and airy, not stiff or curdled. This ensures a delicate contrast to the rich chocolate.
- Warm Your Knife for Clean Slices: If you’re slicing the cups (though usually they’re eaten whole), a little trick is to run your knife under hot water, wipe it dry, and then make your cut. This helps to achieve a clean, smooth slice through the chocolate, preventing it from cracking or dragging, which is especially useful if you’re trying to showcase the layers.
Equipment You’ll Need
- Large frying pan or skillet (not needed for this recipe, let’s adjust)
- Sharp knife and cutting board
- Mixing bowls (at least 3)
- Wooden spoon or spatula
- Rubber spatula
- Electric mixer or whisk
- Heatproof bowl for bain-marie
- Saucepan (for bain-marie)
- Silicone cupcake moulds or muffin tin with paper liners
Common Mistakes to Avoid
- Overheating the Chocolate: Melting chocolate directly over high heat or in a microwave for too long can cause it to seize, becoming thick and grainy. Always use a bain-marie (double boiler) or microwave in short bursts, stirring frequently, to achieve a smooth, pourable consistency. Overheated chocolate will be difficult to spread and won’t set correctly.
- Not Chilling Properly: Rushing the chilling process for the chocolate shells or the final assembled cups will lead to a soft, unstable dessert that loses its structure. Each chocolate layer needs sufficient time in the fridge to firm up completely, ensuring the cup holds its shape and the layers remain distinct when served.
- Skipping the Setting Time: The final chill is crucial for the top chocolate layer to harden and create that satisfying snap. If you serve the cups before this layer is fully set, it will be soft and messy, detracting from the overall experience. Give them at least 2 hours in the fridge for the best results.
Delicious Variations to Try
- Spicy Version: For a sophisticated kick, add a tiny pinch of cayenne pepper or a whisper of chilli powder to the melted dark chocolate layer. The heat subtly enhances the chocolate’s depth without overpowering the sweetness of the strawberries, creating an unexpected and delightful warmth.
- Vegan Option: This recipe can easily be adapted for a plant-based diet. Use a good quality dairy-free dark chocolate and ensure your milk chocolate is also vegan. For the cream, swap double cream for a plant-based whipping cream alternative, such as coconut cream (chilled overnight) or a dedicated vegan whipping cream. Ensure your biscuits are also dairy-free.
- Different Fruit: While strawberries are classic, feel free to experiment with other fruits. Raspberries, blueberries, or even finely diced mango could offer a different flavour profile. Just ensure the fruit isn’t too watery, or it might make the biscuit base soggy.
- Nutty Crunch: For added texture and flavour, sprinkle some finely chopped toasted pistachios or hazelnuts into the chocolate shell before it sets, or mix them into the biscuit base. This adds a lovely crunch and a subtle nutty aroma that complements the chocolate beautifully.
What to Serve With Viral Dubai Chocolate Strawberry Cups
- A light dusting of cocoa powder
- A few fresh mint leaves for garnish
- A side of vanilla bean ice cream (for an extra indulgent treat)
- A sprinkle of edible gold dust for ultimate luxury
Frequently Asked Questions
Viral Dubai Chocolate Strawberry Cups
Ingredients
Method
-
Prepare the Chocolate Cups: Gently melt 200g of milk chocolate and all the dark chocolate in a heatproof bowl set over a saucepan of simmering water (bain-marie), ensuring the bowl doesn’t touch the water. Stir occasionally until the chocolate is smooth and glossy, with a rich, inviting aroma. Once melted, remove from the heat and stir in 25g of the softened unsalted butter until fully incorporated, giving it a beautiful sheen. Allow to cool slightly for about 10 minutes; it should still be pourable but not scorching hot.
-
Line the Cups: Using silicone cupcake moulds or paper-lined muffin tins, spoon about two tablespoons of the melted chocolate mixture into each mould. Use the back of a spoon to spread the chocolate evenly up the sides, creating a shell. The chocolate should have a uniform, dark brown coating. Place in the fridge for 20-30 minutes until the chocolate is firm to the touch and has lost its initial tackiness.
-
Make the Whipped Cream Filling: While the chocolate shells are chilling, in a large mixing bowl, combine the double cream, caster sugar, and vanilla extract. Whisk with an electric mixer on medium-high speed until the cream is thick, light, and forms soft peaks. It should smell sweet and fragrant. Be careful not to over-whisk, as it can become grainy.
-
Prepare the Strawberry Base: In a separate bowl, gently combine the hulled and quartered strawberries with the crushed digestive biscuits. The biscuits will absorb some of the strawberry juices and provide a lovely textural contrast. You’ll notice the mixture becoming slightly moist and fragrant from the fruit.
-
Assemble the Cups: Once the chocolate shells are firm, carefully remove them from their moulds. They should pop out easily, revealing a smooth, dark chocolate cup. If using paper liners, gently peel them away. Spoon a layer of the strawberry and biscuit mixture into the bottom of each chocolate cup. Follow this with a generous dollop of the whipped cream, smoothing the top. The layers should be distinct and visually appealing.
-
Finish and Chill: Melt the remaining 100g of milk chocolate with the remaining 25g of butter using the same bain-marie method until smooth and glistening. Carefully pour a thin layer of this melted chocolate over the whipped cream in each cup, allowing it to gently spread and create a shiny, even top. The chocolate will start to set almost immediately upon contact with the cold cream. Return the cups to the fridge for at least 2 hours, or until the top chocolate layer is completely firm and snaps when gently pressed. Before serving, you can lightly dust with cocoa powder and sprinkle a few sea salt flakes for an elegant finish.
Notes
There you have it – your very own Viral Dubai Chocolate Strawberry Cups, ready to impress and delight! After testing this recipe five times, I finally got it just right, and now you have all the secrets to recreate this magic in your own kitchen. We truly hope you enjoy crafting and savouring these beautiful treats as much as we do. Don’t forget to share your creations with us in the comments below!