One-Bowl Desserts with Minimal Cleanup
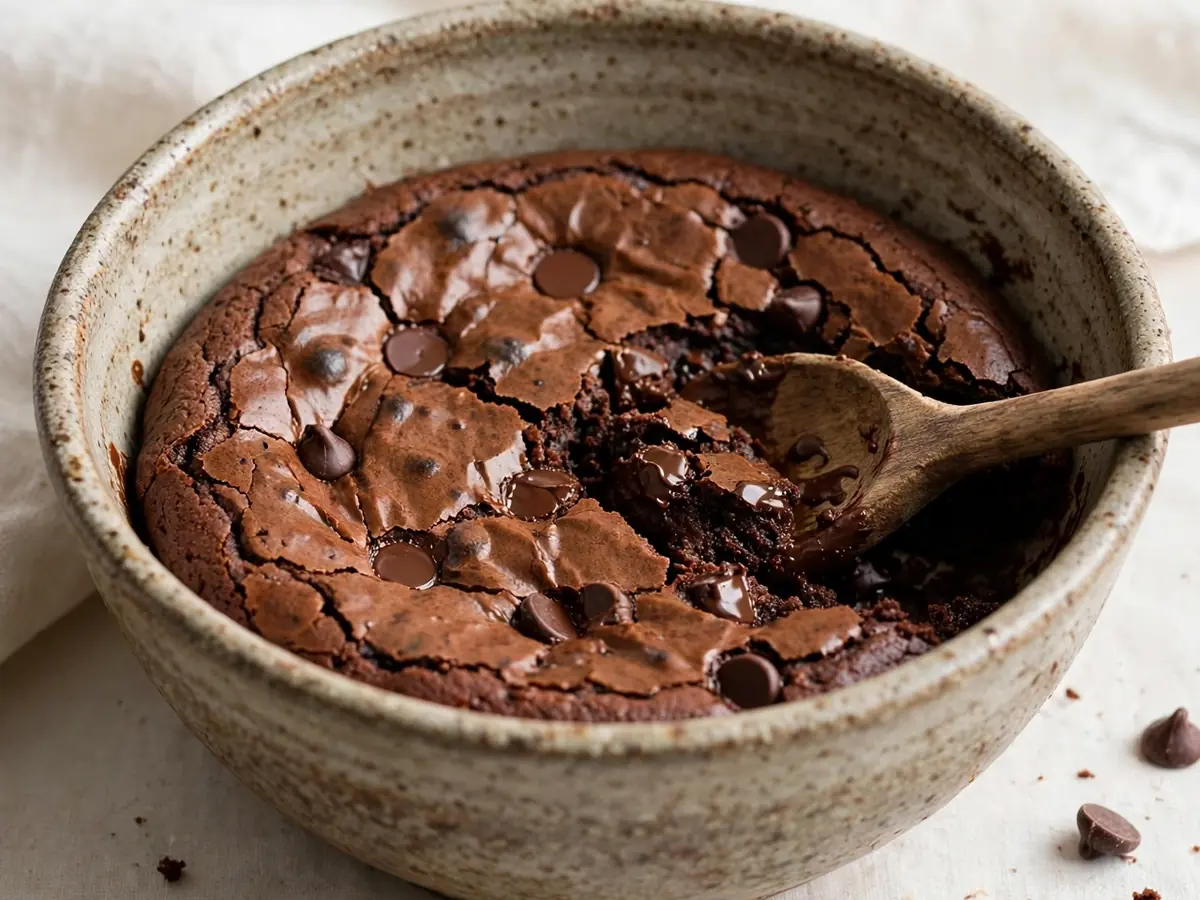
There’s a particular kind of exhaustion that comes from baking something delicious and then facing a sink full of bowls, whisks, measuring cups, and spatulas. The dessert was worth it, but the cleanup lingers like a bad aftertaste. One-bowl desserts solve that problem without sacrificing flavor or texture. By building recipes around a single mixing vessel and a short list of tools, you cut the washing-up dramatically while still ending up with something genuinely worth eating.
This guide covers the principles behind successful one-bowl desserts, four complete recipes you can make tonight, and practical guidance on substitutions, storage, and the small habits that keep cleanup to a minimum. Every recipe below is written to be made in one bowl, with quantities precise enough to follow confidently.
Why One-Bowl Desserts Actually Work
Most dessert recipes accumulate bowls because of a classic sequence: dry ingredients in one bowl, wet ingredients in another, then combine. One-bowl recipes restructure that sequence so that wet ingredients go in first, dry ingredients are whisked together separately on a sheet of parchment or simply layered on top and folded in, and the same bowl carries the batter all the way to the pan. The result is fewer dishes and often a more tender crumb, because overmixing is harder to do when you’re folding dry ingredients into wet by hand.
The key constraints are simple. Choose recipes where the fat is melted or soft rather than creamed with sugar for several minutes. Choose recipes where the leavening is baking powder or baking soda rather than whipped egg whites. And choose recipes where the batter is forgiving, so a little uneven mixing won’t ruin the outcome. Brownies, blondies, skillet cakes, no-bake bars, and single-layer snack cakes all fit comfortably.
Your Minimal-Cleanup Toolkit
You don’t need special equipment, but a few choices reduce washing-up:
- One large mixing bowl (3 to 4 quarts) that can handle whisking without splashing.
- A silicone spatula that scrapes the bowl clean, so you don’t need a second bowl to transfer batter.
- A balloon whisk for combining dry ingredients directly in the bowl before adding wet ingredients, or a fork if you prefer.
- Measuring cups and spoons that you wipe with a dry cloth between dry and wet ingredients when the recipe allows.
- Parchment paper for lining pans, which eliminates scrubbing.
One useful trick: measure dry ingredients first, into the bowl, then set them aside on parchment while you measure wet ingredients into the same bowl. You’ll reuse the bowl and only dirty one sheet of paper.
Recipe 1: One-Bowl Fudgy Brownies
Servings: 16 squares | Prep time: 15 minutes | Bake time: 25–28 minutes | Total: about 45 minutes
Ingredients:
- 170 g (6 oz) unsalted butter, melted and slightly cooled
- 200 g (1 cup) granulated sugar
- 100 g (½ cup packed) light brown sugar
- 2 large eggs, at room temperature
- 1 teaspoon vanilla extract
- 60 g (½ cup) unsweetened cocoa powder
- 95 g (¾ cup) all-purpose flour
- ½ teaspoon fine salt
- 100 g (about ⅔ cup) semisweet chocolate chips, optional
Instructions:
- Preheat the oven to 175°C (350°F). Line an 8-inch square baking pan with parchment, leaving an overhang on two sides.
- In a large bowl, whisk the melted butter with both sugars until smooth and slightly glossy, about 1 minute.
- Whisk in the eggs one at a time, then the vanilla, until the mixture is uniform.
- Add the cocoa powder, flour, and salt directly to the bowl. Fold with a spatula until just combined, with no dry streaks remaining. Fold in the chocolate chips if using.
- Scrape the batter into the prepared pan and smooth the top.
- Bake for 25–28 minutes, until the center is set and a toothpick inserted 2 inches from the edge comes out with moist crumbs. A center toothpick may still look slightly fudgy, which is correct for this style.
- Cool completely in the pan, about 1 hour, before lifting out and cutting into 16 squares.
Substitutions: Replace the brown sugar with an equal weight of granulated sugar for a slightly less chewy brownie. Use dairy-free butter and chocolate chips for a lactose-free version. For a darker flavor, use Dutch-process cocoa and add ¼ teaspoon baking soda.
Storage: Keep in an airtight container at room temperature for up to 4 days, or freeze cut squares between parchment for up to 2 months.
Recipe 2: One-Bowl Lemon Olive Oil Cake
Servings: 8 slices | Prep time: 15 minutes | Bake time: 30–35 minutes | Total: about 50 minutes plus cooling
Ingredients:
- 150 g (¾ cup) granulated sugar
- 2 large eggs
- 120 ml (½ cup) extra-virgin olive oil
- 120 ml (½ cup) whole milk
- Zest of 1 lemon, plus 2 tablespoons fresh lemon juice
- 1 teaspoon vanilla extract
- 180 g (1½ cups) all-purpose flour
- 2 teaspoons baking powder
- ½ teaspoon fine salt
Instructions:
- Preheat the oven to 175°C (350°F). Grease a 9-inch round cake pan and line the base with parchment.
- In a large bowl, whisk the sugar and eggs until pale and slightly thickened, about 2 minutes.
- Whisk in the olive oil, milk, lemon zest, lemon juice, and vanilla until emulsified.
- Add the flour, baking powder, and salt to the bowl. Fold gently until just combined; a few small lumps are fine.
- Pour the batter into the prepared pan and smooth the top.
- Bake for 30–35 minutes, until golden and a toothpick inserted in the center comes out clean.
- Cool in the pan for 10 minutes, then turn out onto a rack to cool completely.
Substitutions: Swap the lemon for orange zest and juice. Use a neutral oil in place of olive oil for a milder flavor. For a dairy-free version, use oat milk or almond milk.
Storage: Wrap tightly and store at room temperature for up to 3 days. The cake also freezes well, wrapped whole or in slices, for up to 2 months.
Recipe 3: One-Bowl No-Bake Chocolate Oat Bars
Servings: 12 bars | Prep time: 15 minutes | Chill time: 2 hours | Total: about 2 hours 15 minutes
Ingredients:
- 200 g (1 cup) rolled oats
- 60 g (½ cup) unsweetened shredded coconut
- 80 g (⅓ cup) honey or maple syrup
- 120 g (½ cup) creamy peanut butter or almond butter
- 60 ml (¼ cup) coconut oil, melted
- 1 teaspoon vanilla extract
- ¼ teaspoon fine salt
- 100 g (about ⅔ cup) dark chocolate chips, melted for topping
Instructions:
- Line an 8-inch square pan with parchment, leaving an overhang.
- In a large bowl, combine the oats, coconut, honey, nut butter, melted coconut oil, vanilla, and salt. Stir with a sturdy spatula until evenly coated and the mixture clumps together.
- Press the mixture firmly and evenly into the prepared pan, using the back of a spatula or the base of a measuring cup.
- Spread the melted chocolate over the top in an even layer.
- Refrigerate for at least 2 hours, until firm.
- Lift out using the parchment overhang and cut into 12 bars. Store in the refrigerator.
Substitutions: Use sunflower seed butter for a nut-free version. Replace honey with maple syrup for a vegan bar. Add 2 tablespoons of cocoa powder to the base for a double-chocolate flavor.
Storage: Keep refrigerated in an airtight container for up to 1 week, or freeze for up to 3 months.
Recipe 4: One-Bowl Skillet Chocolate Chip Cookie
Servings: 8 wedges | Prep time: 10 minutes | Bake time: 20–24 minutes | Total: about 35 minutes
Ingredients:
- 115 g (½ cup) unsalted butter, melted
- 100 g (½ cup packed) light brown sugar
- 50 g (¼ cup) granulated sugar
- 1 large egg
- 1 teaspoon vanilla extract
- 150 g (1¼ cups) all-purpose flour
- ½ teaspoon baking soda
- ½ teaspoon fine salt
- 150 g (1 cup) semisweet chocolate chips
Instructions:
- Preheat the oven to 175°C (350°F). Lightly grease a 10-inch oven-safe skillet.
- In a large bowl, whisk the melted butter with both sugars until smooth.
- Whisk in the egg and vanilla until glossy.
- Add the flour, baking soda, and salt. Fold until just combined, then fold in the chocolate chips.
- Press the dough evenly into the skillet.
- Bake for 20–24 minutes, until the edges are golden and the center is set but still soft.
- Cool in the skillet for 15 minutes before cutting into wedges.
Substitutions: Use a 9-inch skillet for a thicker cookie and add 3–4 minutes to the bake time. Swap chocolate chips for chopped chocolate or butterscotch chips. For a gluten-free version, use a 1:1 gluten-free flour blend.
Storage: Cover leftovers tightly at room temperature for up to 2 days. Reheat in a 150°C (300°F) oven for 5 minutes to soften.
Practical Tips for Keeping Cleanup Minimal
- Read the recipe fully before starting. One-bowl recipes often require a specific order of operations, and skipping ahead can force you to dirty extra tools.
- Use a kitchen scale. Weighing ingredients directly into the bowl eliminates measuring cups and reduces the temptation to transfer between vessels.
- Melt butter in the bowl you’ll mix in. If the bowl is microwave-safe, melt the butter first, let it cool slightly, then add the remaining ingredients.
- Line pans with parchment. It’s the single biggest cleanup saver for brownies, bars, and cakes.
- Wipe, don’t wash, between steps. A dry paper towel removes cocoa or flour residue from a spatula or cup, letting you reuse it immediately.
- Soak the bowl while dessert bakes. A few minutes of warm water in the mixing bowl makes final washing quick.
If you enjoy one-pan cooking as much as one-bowl baking, our one pan Mediterranean rice bowl recipe applies the same low-mess logic to a savory meal, and our easy sheet pan pancakes show how a single pan can serve a crowd. For more ideas along these lines, browse the Cuisinebite blog.
Frequently Asked Questions
Can I really make brownies in one bowl without a separate bowl for dry ingredients?
Yes. The key is to whisk the wet ingredients thoroughly first, then add the dry ingredients directly on top and fold them in with a spatula. Because the batter is thick and the flour is folded rather than beaten, the brownies still come out fudgy. The only caution is to scrape the bottom and corners of the bowl so no pockets of dry flour remain.
Do one-bowl desserts taste different from traditional recipes?
They can be slightly more tender, because folding dry ingredients into wet ones by hand reduces gluten development compared with electric mixing. Recipes that rely on creaming butter and sugar for structure, such as certain cookies and butter cakes, don’t convert well. Recipes built around melted fat, oil, or no-bake mixtures convert reliably.
How should I store one-bowl brownies and bars so they don’t dry out?
Cool completely, then store in an airtight container at room temperature for brownies and skillet cookies, or in the refrigerator for no-bake bars. Place a sheet of parchment between layers to prevent sticking. For longer storage, wrap individual portions tightly and freeze for up to 2 months, thawing at room temperature before serving.
What is the best way to substitute ingredients in these recipes?
Substitute by weight whenever possible, especially for flour and sugar. For butter, use an equal weight of a neutral oil only in recipes that already call for melted butter, and reduce the amount by about 15 percent. For eggs, a flax egg made from 1 tablespoon ground flaxseed and 3 tablespoons water works in the brownies and no-bake bars, though it will make the brownies slightly fudgier.
Can I double a one-bowl recipe without dirtying more bowls?
Yes, provided your bowl is large enough, typically 6 quarts or more for a doubled brownie or cake recipe. Mix in the same order and bake in two pans rather than one deep pan so the center sets properly. Keep in mind that doubling a skillet cookie requires two skillets or a longer bake at a slightly lower temperature.