Garlic Butter Roasted Chicken Thighs Recipe

There are some aromas that instantly signal comfort and contentment, and for me, the scent of garlic and butter melting together is right at the top of that list. Now, imagine that glorious aroma combined with chicken thighs roasting to perfection, the skin turning shatteringly crisp while the meat underneath stays unbelievably juicy. That, my friends, is the magic of these Garlic Butter Roasted Chicken Thighs. It’s a dish that fills the kitchen with the most incredible smells and delivers a meal that feels both special and wonderfully straightforward.
This isn’t just another chicken recipe. It’s the result of years of tinkering in my own kitchen to find the perfect balance. We’re talking about a rich, savoury butter sauce infused with plenty of garlic that mellows in the oven’s heat, fresh herbs that cut through the richness, and chicken thighs that are, quite simply, cooked perfectly. I’ve been making this for over 3 years, and it never disappoints. It’s the dinner I turn to on a drizzly Tuesday when we need a lift, and it’s impressive enough to serve when friends pop over on a Saturday evening.
Whether you’re an experienced cook or just starting to build your confidence, this recipe is designed to give you a spectacular result every time. It’s all about a few good ingredients and a method that ensures that beautiful garlic butter coats every single piece of chicken. It’s a hearty, satisfying meal that tastes like it took far more effort than it actually does. If you’re looking for a reliable and delicious chicken dinner, you’ve definitely come to the right place.
Recipe Overview
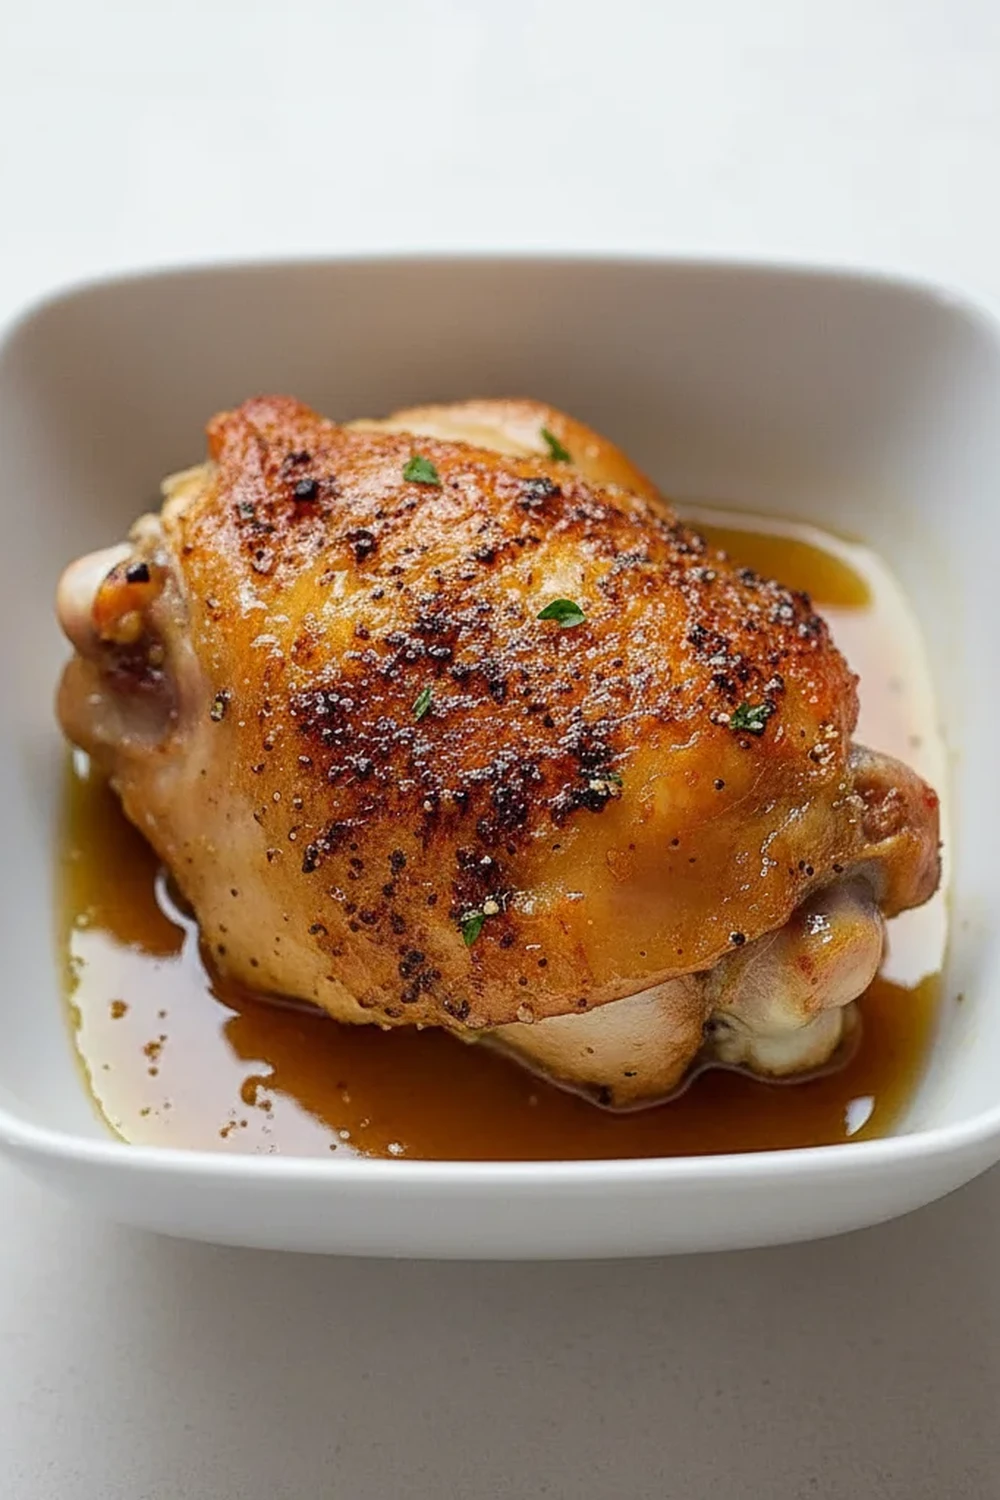
These Garlic Butter Roasted Chicken Thighs deliver tender, succulent meat with a deeply savoury flavour. The skin becomes wonderfully golden and crisp from the high heat of the oven, while the garlic butter sauce reduces in the pan, creating a luscious elixir to spoon over everything at the end. I’ve found that letting the chicken sit in the seasoning for just 10 minutes before roasting makes a remarkable difference to the final taste.
- Prep Time: 15 minutes
- Cook Time: 30 minutes
- Total Time: 45 minutes
- Servings: 4 people
- Difficulty: Easy
Why You’ll Love These Garlic Butter Roasted Chicken Thighs
- Sublime Flavour: We use unsalted butter, which allows it to brown slightly in the pan, giving it a nutty depth. This combines with garlic that sweetens as it roasts (no harsh, raw taste here!) and a hint of thyme for an earthy, aromatic finish. The pan juices are liquid gold.
- On the Table in Under an Hour: With only 15 minutes of hands-on prep, this dish comes together efficiently. The oven does most of the work, leaving you free to prepare a simple side dish or just relax.
- Wonderfully Adaptable: Feel free to make this your own. Add a squeeze of lemon juice at the end for brightness, a pinch of red pepper flakes for a gentle warmth, or swap the thyme for fresh rosemary or parsley.
- Ideal for Any Night of the Week: This recipe works beautifully for a satisfying family dinner but is also special enough for a casual weekend meal with guests. It’s a truly versatile main course that pairs with almost anything. For other family-friendly ideas, our Easy Ground Beef Tacos are always a hit.
- Family Tested and Approved: This is one of those rare dishes that gets a universal thumbs-up in my house. My husband, who’s usually picky about chicken, asked for seconds the first time I made it!
Ingredients You’ll Need
For this recipe, we rely on a handful of quality ingredients to do the heavy lifting. I always opt for free-range, bone-in, skin-on chicken thighs as they have so much more flavour and the bone helps keep the meat incredibly moist. When it comes to the butter, using a good quality unsalted block, like Kerrygold or a local farm butter, allows you to control the saltiness perfectly.
- 8 bone-in, skin-on chicken thighs (about 1.2kg total)
- 90g unsalted butter, softened
- 6-8 cloves of garlic, finely minced
- 1 tbsp fresh thyme leaves, finely chopped (plus extra sprigs for garnish)
- 1 tbsp fresh parsley, finely chopped
- 1 tsp sea salt flakes
- 1/2 tsp freshly ground black pepper
- 1/2 tsp paprika (not smoked)
- 1 tbsp olive oil
- 60ml dry white wine or chicken stock (optional, for deglazing)
Marcus’s Tip: Don’t be tempted to use pre-minced garlic from a jar. Taking a few minutes to finely mince fresh cloves provides a much sweeter, more aromatic garlic flavour that makes all the difference in the final sauce.
How to Make Garlic Butter Roasted Chicken Thighs
The process for these roasted chicken thighs is straightforward. We create a flavour-packed compound butter, get the chicken skin nice and dry for maximum crispiness, and let the oven work its magic. The final step of basting is key to that glossy, flavourful finish.
- Preheat and Prepare: First things first, preheat your oven to 200°C (180°C fan). Take the chicken thighs out of the fridge and pat them thoroughly dry with paper towels. This is a critical step for getting that super crispy skin, so don’t skip it! Season both sides generously with the salt, pepper, and paprika.
- Make the Garlic Butter: In a small mixing bowl, combine the softened unsalted butter, minced garlic, chopped thyme, and chopped parsley. Mix everything together with a fork until it’s well combined into a fragrant, savoury butter.
- Butter the Chicken: Now for the fun part. Gently lift the skin on each chicken thigh, creating a small pocket. I find that using my fingers is the easiest way to do this. Spoon or push about a teaspoon of the garlic butter mixture under the skin of each thigh. Rub the remaining butter all over the outside of the skin.
- Sear for Colour and Crispiness: Heat the olive oil in a large, oven-safe skillet or frying pan over a medium-high heat. Place the chicken thighs skin-side down in the hot pan. Let them sear, without moving them, for 4-5 minutes until the skin is a beautiful golden brown. This initial sear is what locks in the juices and starts the crisping process.
- Deglaze the Pan (Optional): Flip the chicken thighs over. If you’re using white wine or chicken stock, pour it into the pan now. It will bubble up and lift all those delicious brown bits from the bottom of the pan – this is pure flavour! Let it simmer for about a minute.
- Roast in the Oven: Transfer the entire skillet to the preheated oven. Roast for 25-30 minutes. The chicken is cooked when the juices run clear and an internal thermometer inserted into the thickest part reads at least 74°C, as recommended by the Food Standards Agency. The skin should be deeply golden and crisp.
- Baste and Rest: About halfway through roasting, I like to pull the pan out and spoon some of the garlic butter pan juices over the chicken. This little step adds an extra layer of flavour. Once cooked, remove the pan from the oven and let the chicken rest in the skillet for 5-10 minutes before serving. This allows the juices to redistribute, ensuring every bite is succulent.
- Serve: Serve the chicken thighs hot, spooning any of the remaining garlic butter sauce from the pan over the top. Garnish with a few fresh thyme sprigs if you like.
Tips From My Kitchen
- Temperature is Key: Don’t be tempted to roast at a lower temperature. The initial high heat of 200°C is essential for rendering the fat from the skin, which is what makes it so irresistibly crisp. A cooler oven can result in soggy skin.
- The Basting Secret: I learned over time that a quick baste halfway through the cooking time makes a huge difference. It keeps the top of the chicken from drying out and glazes it with that incredible garlic butter, creating a beautiful, glossy finish.
- Make-Ahead Prep: You can prepare the garlic herb butter up to 3 days in advance. Just keep it in an airtight container in the fridge. Let it soften at room temperature for about 20 minutes before you need to use it.
- Storing Leftovers: If you have any leftovers, store them in an airtight container in the fridge for up to 3 days. To reheat, I recommend using the oven or an air fryer to help crisp the skin back up. The microwave will work, but you’ll lose that lovely texture.
Equipment You’ll Need
You don’t need any fancy gadgets for this recipe, just a few kitchen staples.
- Large oven-safe skillet or frying pan (cast iron is excellent here)
- Sharp knife and cutting board
- Small mixing bowl
- Tongs
- Meat thermometer (highly recommended for perfect results)
What to Serve With Your Garlic Butter Roasted Chicken Thighs
This garlic butter chicken is the star of the show, but it plays very well with others. The rich pan sauce is just begging to be soaked up by something delicious.
- Creamy Mashed Potatoes: The ultimate pairing. The smooth, buttery mash is the perfect vehicle for mopping up every last drop of the garlic butter sauce.
- Steamed Green Beans or Asparagus: A simple green vegetable provides a lovely, fresh contrast to the richness of the chicken. A squeeze of lemon over the top works wonders.
- A Crisp Green Salad: A simple salad with a light vinaigrette can cut through the richness and round out the meal beautifully.
- Wine Pairing: A crisp, dry white wine like a Sauvignon Blanc or an unoaked Chardonnay complements the garlic and butter flavours without overpowering them.
And if you’re thinking about dessert, why not follow this savoury dish with something sweet and zesty like my Lemon Crumb Bars?
Frequently Asked Questions
Garlic Butter Roasted Chicken Thighs
Ingredients
Method
- Preheat and Prepare: First things first, preheat your oven to 200°C (180°C fan). Take the chicken thighs out of the fridge and pat them thoroughly dry with paper towels. This is a critical step for getting that super crispy skin, so don't skip it! Season both sides generously with the salt, pepper, and paprika.
- Make the Garlic Butter: In a small mixing bowl, combine the softened unsalted butter, minced garlic, chopped thyme, and chopped parsley. Mix everything together with a fork until it's well combined into a fragrant, savoury butter.
- Butter the Chicken: Now for the fun part. Gently lift the skin on each chicken thigh, creating a small pocket. I find that using my fingers is the easiest way to do this. Spoon or push about a teaspoon of the garlic butter mixture under the skin of each thigh. Rub the remaining butter all over the outside of the skin.
- Sear for Colour and Crispiness: Heat the olive oil in a large, oven-safe skillet or frying pan over a medium-high heat. Place the chicken thighs skin-side down in the hot pan. Let them sear, without moving them, for 4-5 minutes until the skin is a beautiful golden brown. This initial sear is what locks in the juices and starts the crisping process.
- Deglaze the Pan (Optional): Flip the chicken thighs over. If you're using white wine or chicken stock, pour it into the pan now. It will bubble up and lift all those delicious brown bits from the bottom of the pan – this is pure flavour! Let it simmer for about a minute.
- Roast in the Oven: Transfer the entire skillet to the preheated oven. Roast for 25-30 minutes. The chicken is cooked when the juices run clear and an internal thermometer inserted into the thickest part reads at least 74°C, as recommended by the Food Standards Agency. The skin should be deeply golden and crisp.
- Baste and Rest: About halfway through roasting, I like to pull the pan out and spoon some of the garlic butter pan juices over the chicken. This little step adds an extra layer of flavour. Once cooked, remove the pan from the oven and let the chicken rest in the skillet for 5-10 minutes before serving. This allows the juices to redistribute, ensuring every bite is succulent.
- Serve: Serve the chicken thighs hot, spooning any of the remaining garlic butter sauce from the pan over the top. Garnish with a few fresh thyme sprigs if you like.
Notes
I really hope you give these Garlic Butter Roasted Chicken Thighs a try. It’s one of those recipes that has become a true staple in our home because it delivers so much flavour for relatively little work. It’s satisfying, smells incredible, and always gets compliments. Let me know how you get on in the comments below – I’d love to hear about it!
Happy cooking,
Marcus