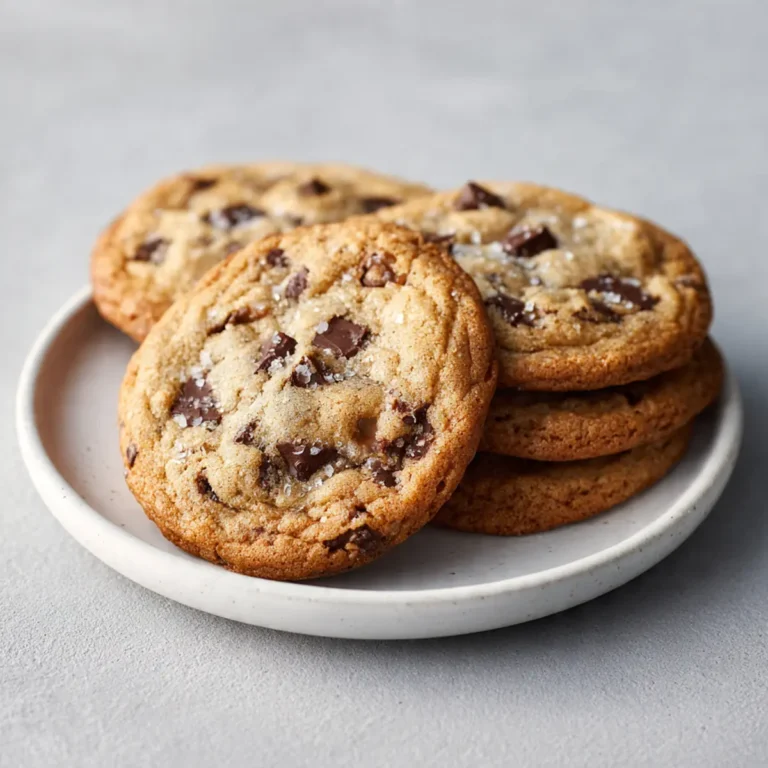
Homemade Crumbl-Style Chocolate Chip Cookies
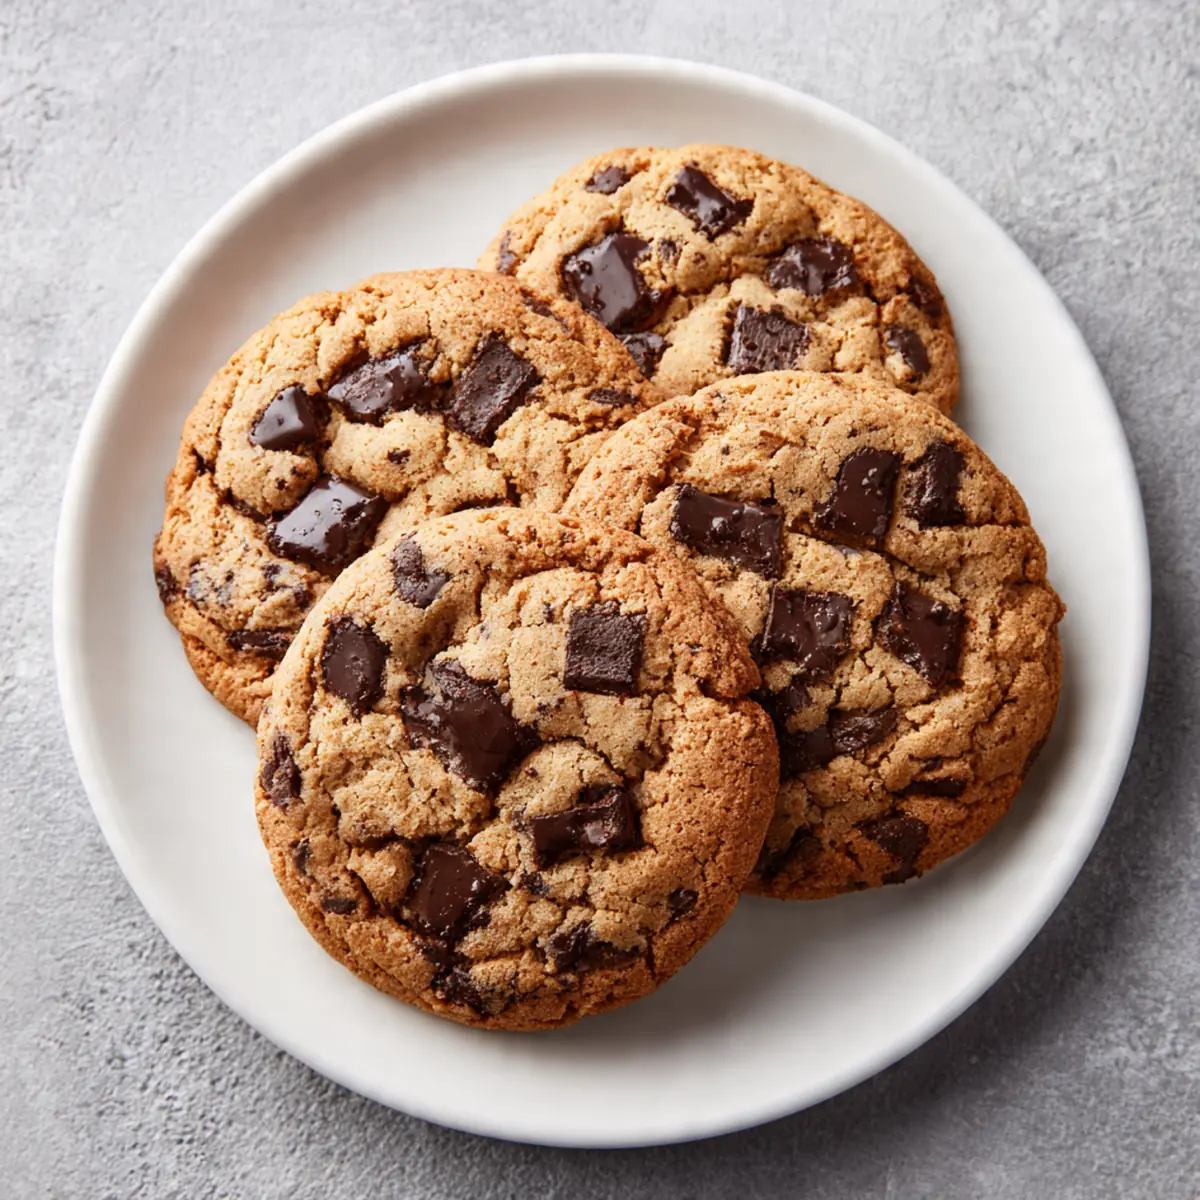
Hello, lovely bakers! Today, we’re diving headfirst into a recipe that has truly captured my heart – and my children’s appetites! We’re talking about making Homemade Crumbl-Style Chocolate Chip Cookies right in your own kitchen. Forget the queues and the price tag; these colossal, chewy-yet-soft wonders, studded with generous chocolate chunks, are surprisingly achievable at home, and I promise you, they taste even better when they’re fresh from your oven. After testing this recipe five times, I finally got it just right, ensuring that perfect balance of crisp edge and gooey centre, just like the real deal.
There’s something uniquely satisfying about recreating a beloved treat, especially one as iconic as the Crumbl chocolate chip cookie. For me, it started as a challenge. Could I achieve that specific texture – that slightly underbaked look, that rich, buttery flavour, and that impressive size – without needing a secret menu or a special ingredient? After countless batches, tweaking temperatures, ingredient ratios, and chilling times, I cracked the code. This recipe isn’t just about baking; it’s about bringing that moment of pure cookie bliss into your home, whenever the craving strikes.
So, whether you’re looking for a show-stopping dessert for your next family gathering, a comforting treat for a quiet evening, or simply want to impress yourself with your baking prowess, this recipe is for you (perhaps even after enjoying some Garlic Butter Shrimp & Rice One-Pan Dinner, Grilled Fish Tacos With Cabbage Slaw, a light Watermelon Feta Salad With Mint & Lime, a delicious Grilled Steak Salad With Chimichurri, or a fun Homemade Dirty Soda (Coconut Lime)), or as a sweet ending like Air Fryer Cinnamon Sugar Apple Fritters .cuisinebite.com/watermelon-feta-salad-with-mint-lime/”>Watermelon Fetacuisinebite.com/grilled-steak-salad-with-chimichurri/”>Grilled Steak Salad With Chimichurri), or as a sweet ending like Air Fryer Cinnamon Sugar Apple Fritters .cuisinebite.com/watermelon-feta-salad-with-mint-lime/”>Watermelon Feta Salad With Mint & Lime), or as a sweet ending like Air Fryer Cinnamon Sugar Apple Fritters .cuisinebite.com/air-fryer-cinnamon-sugar-apple-fritters/”>Air Fryer Cinnamon Sugar Apple Fritters .cuisinebite.com/sheet-pan-pepperoni-pizza-with-crispy-crust/”>Sheet Pacuisinebite.com/garlic-butter-shrimp-rice-one-pan-dinner/”>Garlic Butter Shrimp & Rice One-Pan Dinner or Grilled Fish Tacos With Cabbage Slaw), or as a sweet ending like Air Fryer Cinnamon Sugar Apple Fritters .cuisinebite.com/air-fryer-cinnamon-sugar-apple-fritters/”>Air Fryer Cinnamon Sugar Apple Fritters.cuisinebite.com/sheet-pan-pepperoni-pizza-with-crispy-crust/”>Sheet Pan Pepperoni Pizza With Crispy Crust).cuisinebite.com/chocolate-caramel-toffee-poke-cake/”>Chocolate Caramel Toffee Poke Cake ), this recipe is for you.cuisinebite.com/grilled-fish-tacos-with-cabbage-slaw/”>Grilled Fish Tacos With Cabbage Slaw).cuisinebite.com/chocolate-caramel-toffee-poke-cake/”>Chocolate Caramel Toffee Poke Cake), this recipe is for you. We’ll walk through every step, from selecting the right ingredients to mastering the bake, so you can confidently create these magnificent cookies. My kids absolutely devour this every time I make it, and honestly, so do I! Let’s get baking and fill your home with the irresistible aroma of warm, homemade chocolate chip cookies.
Recipe Overview
- Prep time: 20 minutes
- Chill time: 30 minutes
- Cook time: 14-18 minutes
- Total time: 1 hour 8 minutes
- Servings: 8 large cookies
- Difficulty: Moderate
Why You’ll Love This Homemade Crumbl-Style Chocolate Chip Cookies
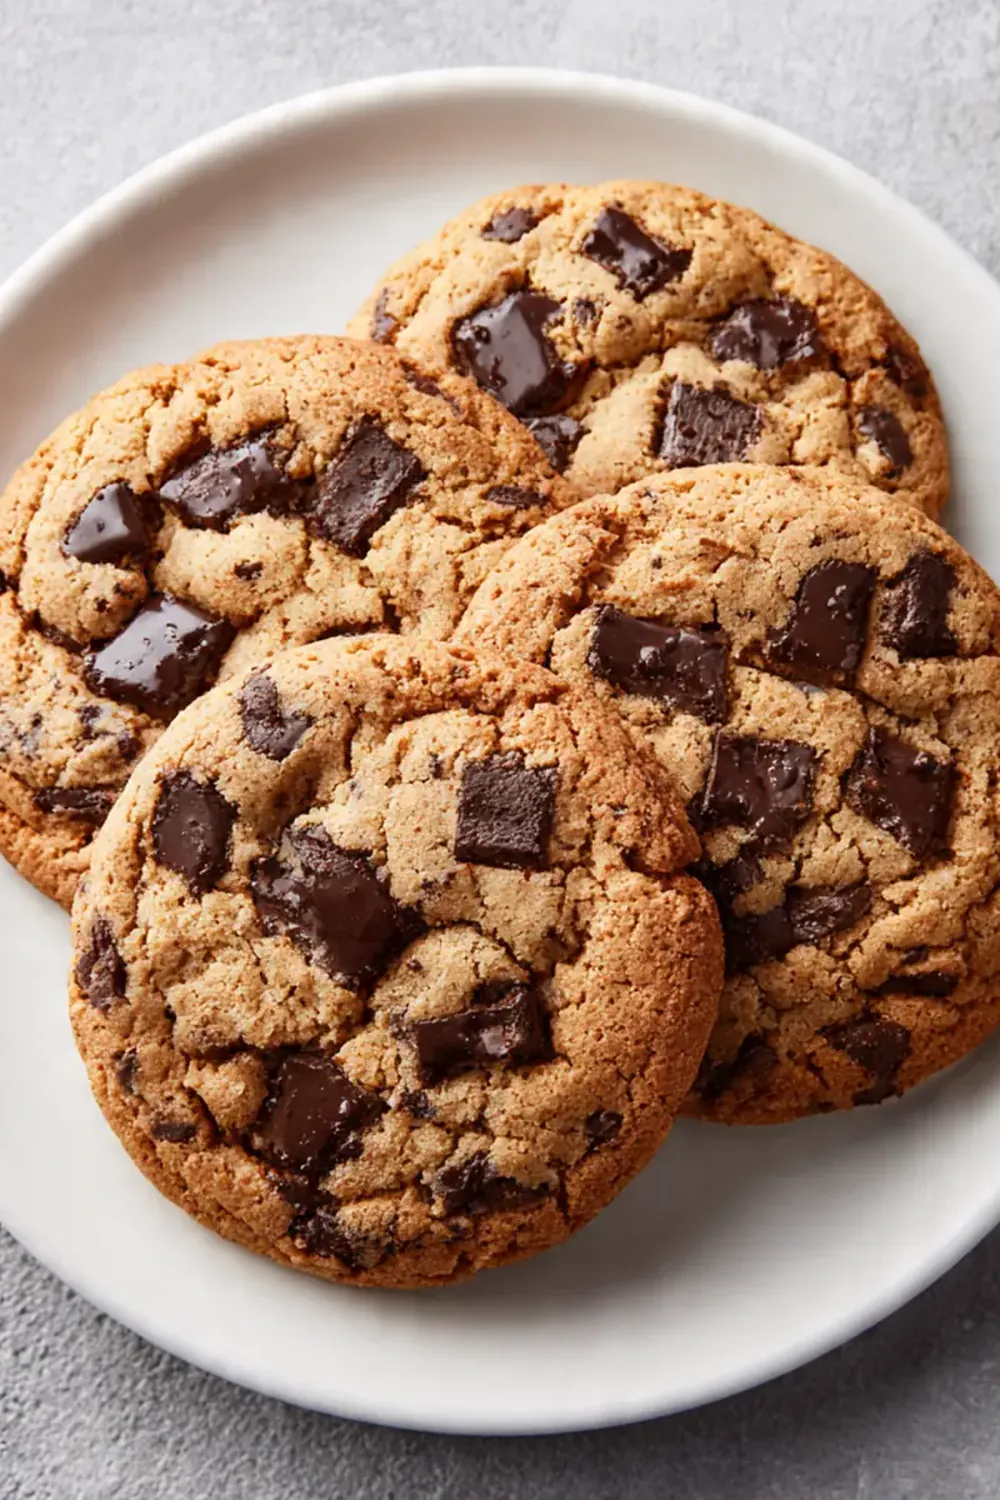
- Irresistible Texture: Achieve that signature chewy centre, soft interior, and slightly crisp edge that makes these cookies legendary.
- Generous Size: These aren’t your average cookies; they’re impressively large, making each one a truly satisfying treat.
- Rich, Deep Flavour: A careful balance of sugars and a hint of salt enhances the buttery, vanilla notes and the intense chocolate.
- Fresh from Your Oven: Enjoy the unparalleled taste and aroma of warm, freshly baked cookies without leaving your home.
- Perfect for Sharing (or Not!): Ideal for impressing guests, gifting, or simply indulging yourself in a truly special homemade dessert.
Ingredients You’ll Need
- 225g unsalted butter, softened
- 200g light brown sugar, packed
- 100g granulated sugar
- 2 large eggs, at room temperature
- 1 tablespoon alcohol-free vanilla extract
- 350g plain flour
- 1 teaspoon bicarbonate of soda (baking soda)
- ½ teaspoon fine sea salt
- 300g milk chocolate chunks or chips
- 100g dark chocolate chunks or chips (at least 60% cocoa)
- Extra sea salt flakes for sprinkling (optional)
Tip: Using a combination of milk and dark chocolate creates a more complex flavour profile and a wonderful melty texture in your cookies. Don’t be shy with the chocolate; this is what makes these cookies so indulgent!
Equipment You’ll Need
- Stand mixer or hand mixer
- Large mixing bowl
- Rubber spatula
- Large baking tray
- Parchment paper
- Wire cooling rack
- Large cookie scoop (about 60ml capacity) or ice cream scoop
How to Make Homemade Crumbl-Style Chocolate Chip Cookies
- Cream the Butter and Sugars: In a large mixing bowl, using a stand mixer fitted with the paddle attachment or a hand mixer, cream together the softened unsalted butter, light brown sugar, and granulated sugar on medium speed. Beat for 3-4 minutes until the mixture is light in colour and wonderfully fluffy in texture. You’ll notice a distinct change in the butter’s appearance, becoming pale and aerated.
- Add Eggs and Vanilla: Scrape down the sides of the bowl. Add the eggs one at a time, beating well after each addition until fully incorporated. The mixture will look glossy and smooth. Stir in the alcohol-free vanilla extract until its sweet aroma is evenly distributed throughout.
- Combine Dry Ingredients: In a separate medium bowl, whisk together the plain flour, bicarbonate of soda, and fine sea salt. Ensure there are no lumps and the ingredients are thoroughly combined.
- Gradually Add Dry to Wet: With the mixer on low speed, gradually add the dry ingredient mixture to the wet ingredients, mixing only until just combined. Be careful not to overmix; stop as soon as you no longer see streaks of dry flour. The dough will be thick and shaggy, a pale golden colour.
- Fold in Chocolate Chunks: Remove the bowl from the mixer and, using a rubber spatula, gently fold in the milk chocolate chunks and dark chocolate chunks until evenly distributed throughout the dough. You want to see generous pockets of chocolate peeking through the rich dough.
- Chill the Dough: Cover the bowl with cling film and refrigerate the dough for at least 30 minutes. This chilling time is crucial for developing flavour and preventing the cookies from spreading too much during baking. The dough will firm up and become easier to handle.
- Preheat Oven and Portion Dough: While the dough chills, preheat your oven to 190°C (170°C fan/Gas Mark 5). Line a large baking tray with parchment paper. Using a large cookie scoop (approx. 60ml capacity), scoop out generous portions of dough, about 100-110g each, and place them on the prepared tray, leaving plenty of space between each cookie (I usually bake 4 cookies per standard tray). Gently press a few extra chocolate chunks onto the tops of the scooped dough balls for a beautiful finish.
- Bake the Cookies: Bake for 14-18 minutes, or until the edges are lightly golden and set, but the centres still look wonderfully soft and slightly underbaked. When you open the oven, you’ll be greeted by an incredible, sweet, buttery chocolate aroma. The cookies will be puffed up and golden brown around the edges, but still quite pale and soft in the middle.
- Cool and Serve: Remove the tray from the oven. If desired, sprinkle a few flakes of sea salt over the warm cookies immediately. Allow the cookies to cool on the baking tray for 10-15 minutes – this is essential as they continue to cook and set. They will be too delicate to move before this time. Once slightly cooled, transfer them to a wire cooling rack to cool completely. The cookies will deepen in colour as they cool and firm up to that perfect soft-yet-chewy texture.
Tips From My Kitchen
- Use Room Temperature Ingredients: This applies especially to the butter and eggs. Room temperature butter creams much more smoothly with sugar, creating tiny air pockets that give the cookies their light, fluffy texture. Cold butter won’t emulsify properly and can lead to a dense cookie. Similarly, room temperature eggs incorporate better into the batter, ensuring a uniform mixture.
- Don’t Overmix the Flour: Once you add the flour, mix only until just combined. Overmixing develops the gluten in the flour too much, which can result in tough, dry cookies instead of the soft, chewy texture we’re aiming for. Stop as soon as you no longer see dry streaks of flour.
- The Importance of Chilling the Dough: Chilling isn’t just about preventing spread; it’s a flavour enhancer. As the dough chills, the flour has time to fully hydrate, leading to a more tender crumb. More importantly, the sugars and butter have more time to meld, deepening the overall flavour of the cookie. A chilled dough also spreads less in the oven, resulting in thicker, chewier cookies.
- Use a Combination of Sugars: The recipe calls for both light brown sugar and granulated sugar for a reason. Brown sugar contains molasses, which contributes moisture, chewiness, and a lovely caramel note. Granulated sugar, on the other hand, helps with crispness at the edges and overall structure. Using both gives you the best of all worlds!
- Underbake Slightly for Gooey Centres: For that signature gooey, Crumbl-style texture, it’s crucial to pull the cookies out of the oven when the edges are set and lightly golden, but the centres still look a little pale and underbaked. They will continue to cook and set on the hot baking tray after removal from the oven, achieving that perfect soft chewiness. Overbaking will result in dry, crumbly cookies.
- Don’t Skip the Cooling Time on the Tray: Those first 10-15 minutes of cooling on the baking tray are vital. The cookies are very delicate when they first come out of the oven. Allowing them to cool on the tray lets them firm up enough to be transferred without breaking, and also allows the residual heat from the tray to continue the baking process gently, ensuring a fully cooked but still soft centre.
Common Mistakes to Avoid
- Overcrowding the pan: Placing too many cookies on one baking tray prevents even heat distribution. The cookies will merge together, bake unevenly, and steam rather than bake, leading to a less desirable texture. Always leave ample space, at least 7-10 cm, between each large cookie.
- Wrong temperature: An oven that’s too hot will cause the cookies to brown too quickly on the outside while remaining raw in the middle, or worse, burn. An oven that’s too cool will lead to excessive spreading and flat cookies. Ensure your oven is preheated to 190°C (170°C fan/Gas Mark 5) and consider using an oven thermometer for accuracy.
- Skipping the rest time: While tempting to bake immediately, skipping the 30-minute chill time for the dough is a common error. This resting period allows the fats to solidify, preventing the cookies from spreading too much, and gives the flour time to hydrate, resulting in a more tender and flavourful cookie.
Delicious Variations to Try
- Spicy Version: For a delightful warmth, add ¼ teaspoon of ground cayenne pepper or a pinch of finely ground chilli powder to the dry ingredients. The subtle heat will complement the rich chocolate beautifully without overpowering it, creating an unexpected depth of flavour.
- Vegetarian/Vegan Option: To make these cookies plant-based, substitute the unsalted butter with a good quality plant-based butter (block style, not spread). For the eggs, use two ‘flax eggs’ (2 tablespoons ground flaxseed mixed with 6 tablespoons water, allowed to sit for 5 minutes until gel-like). Ensure your chocolate chunks are dairy-free.
- Nutty Crunch: Introduce a delightful textural contrast by folding in 100g of chopped toasted pecans, walnuts, or hazelnuts along with the chocolate chunks. Toasting the nuts beforehand enhances their flavour and crunch, adding another layer of deliciousness to your cookies.
What to Serve With Homemade Crumbl-Style Chocolate Chip Cookies
- A tall glass of cold milk
- A scoop of vanilla bean ice cream
- A hot cup of tea or coffee
- Drizzled with a little extra melted chocolate or caramel sauce
Frequently Asked Questions
Homemade Crumbl-Style Chocolate Chip Cookies
Ingredients
Method
-
Cream the Butter and Sugars: In a large mixing bowl, using a stand mixer fitted with the paddle attachment or a hand mixer, cream together the softened unsalted butter, light brown sugar, and granulated sugar on medium speed. Beat for 3-4 minutes until the mixture is light in colour and wonderfully fluffy in texture. You’ll notice a distinct change in the butter’s appearance, becoming pale and aerated.
-
Add Eggs and Vanilla: Scrape down the sides of the bowl. Add the eggs one at a time, beating well after each addition until fully incorporated. The mixture will look glossy and smooth. Stir in the alcohol-free vanilla extract until its sweet aroma is evenly distributed throughout.
-
Combine Dry Ingredients: In a separate medium bowl, whisk together the plain flour, bicarbonate of soda, and fine sea salt. Ensure there are no lumps and the ingredients are thoroughly combined.
-
Gradually Add Dry to Wet: With the mixer on low speed, gradually add the dry ingredient mixture to the wet ingredients, mixing only until just combined. Be careful not to overmix; stop as soon as you no longer see streaks of dry flour. The dough will be thick and shaggy, a pale golden colour.
-
Fold in Chocolate Chunks: Remove the bowl from the mixer and, using a rubber spatula, gently fold in the milk chocolate chunks and dark chocolate chunks until evenly distributed throughout the dough. You want to see generous pockets of chocolate peeking through the rich dough.
-
Chill the Dough: Cover the bowl with cling film and refrigerate the dough for at least 30 minutes. This chilling time is crucial for developing flavour and preventing the cookies from spreading too much during baking. The dough will firm up and become easier to handle.
-
Preheat Oven and Portion Dough: While the dough chills, preheat your oven to 190°C (170°C fan/Gas Mark 5). Line a large baking tray with parchment paper. Using a large cookie scoop (approx. 60ml capacity), scoop out generous portions of dough, about 100-110g each, and place them on the prepared tray, leaving plenty of space between each cookie (I usually bake 4 cookies per standard tray). Gently press a few extra chocolate chunks onto the tops of the scooped dough balls for a beautiful finish.
-
Bake the Cookies: Bake for 14-18 minutes, or until the edges are lightly golden and set, but the centres still look wonderfully soft and slightly underbaked. When you open the oven, you’ll be greeted by an incredible, sweet, buttery chocolate aroma. The cookies will be puffed up and golden brown around the edges, but still quite pale and soft in the middle.
-
Cool and Serve: Remove the tray from the oven. If desired, sprinkle a few flakes of sea salt over the warm cookies immediately. Allow the cookies to cool on the baking tray for 10-15 minutes – this is essential as they continue to cook and set. They will be too delicate to move before this time. Once slightly cooled, transfer them to a wire cooling rack to cool completely. The cookies will deepen in colour as they cool and firm up to that perfect soft-yet-chewy texture.
Notes
There you have it, folks! Your very own recipe for incredible, Homemade Crumbl-Style Chocolate Chip Cookies. I truly hope you enjoy making and, more importantly, devouring these delightful treats as much as I do. There’s nothing quite like the satisfaction of pulling a tray of these beauties from the oven, their aroma filling your home with warmth and promise. Do give this recipe a try, and don’t hesitate to leave a comment below with your thoughts or any tweaks you make. Happy baking!