Crispy Parmesan Crusted Chicken Thighs
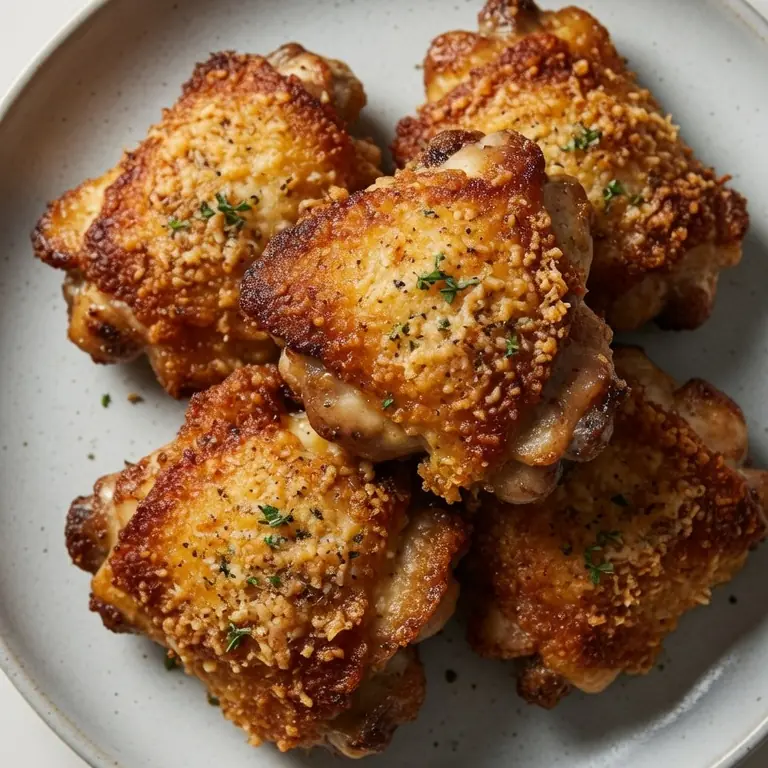
There are some dinners that feel like a bit of a gamble, aren’t there? You want something that tastes indulgent, that feels special, yet you don’t want to be stood over a hot stove for an hour. I stumbled upon this combination by accident while trying to use up the last bits of a parmesan wedge and some panko breadcrumbs, and it’s been a hit ever since. This recipe for Crispy Parmesan Crusted Chicken Thighs delivers a perfectly golden, shatteringly crunchy exterior with a juicy, tender centre every single time. It’s the kind of meal that makes you look like a culinary hero with minimal fuss.
Recipe Overview
- Prep Time: 15 minutes
- Cook Time: 25 minutes
- Total Time: 40 minutes
- Servings: 4
- Difficulty: Easy
Why You’ll Love This Crispy Parmesan Crusted Chicken Thighs
- Unbeatable texture: The combination of panko breadcrumbs and finely grated parmesan creates a crust that is genuinely crunchy, not soggy or dense.
- Juicy meat every time: Chicken thighs are naturally more forgiving than breasts, staying moist and tender even if you cook them a minute or two too long.
- Simple pantry ingredients: You likely have most of these items on hand, making it an ideal last-minute dinner solution.
- Versatile serving options: Whether you serve it with a crisp salad, roasted vegetables, or a bed of buttery mash, it adapts beautifully.
- Family approved: My kids absolutely devour this every time I make it, and I feel good knowing it’s made from scratch without any mystery ingredients.
Ingredients You’ll Need
- 8 boneless, skinless chicken thighs (about 800g)
- 100g fine breadcrumbs (panko work best)
- 60g freshly grated parmesan cheese
- 2 large eggs
- 2 tablespoons plain flour
- 1 teaspoon garlic powder
- 1 teaspoon onion powder
- ½ teaspoon smoked paprika
- ½ teaspoon fine sea salt
- ¼ teaspoon freshly ground black pepper
- 60ml vegetable or sunflower oil, for frying
- Fresh parsley, chopped, for garnish (optional)
- Lemon wedges, to serve
Tip: For the best flavour and crunch, grate your parmesan from a block rather than using the pre-shaken stuff. It melts more evenly and sticks to the chicken far better.
How to Make Crispy Parmesan Crusted Chicken Thighs
- Prepare the chicken: Place the chicken thighs between two sheets of cling film and gently flatten them with a rolling pin or the bottom of a heavy pan until they are about 1.5cm thick. This ensures even cooking. You should feel the meat give slightly under the pressure, and you’ll see the thighs become a uniform, even shape.
- Set up your dredging station: In a shallow bowl, whisk the eggs with a tablespoon of water until they are a pale, uniform yellow and slightly frothy. In a second bowl, mix the flour, garlic powder, onion powder, smoked paprika, salt, and pepper. In a third bowl, combine the panko breadcrumbs with the grated parmesan, mixing them with your fingers so the cheese is well distributed.
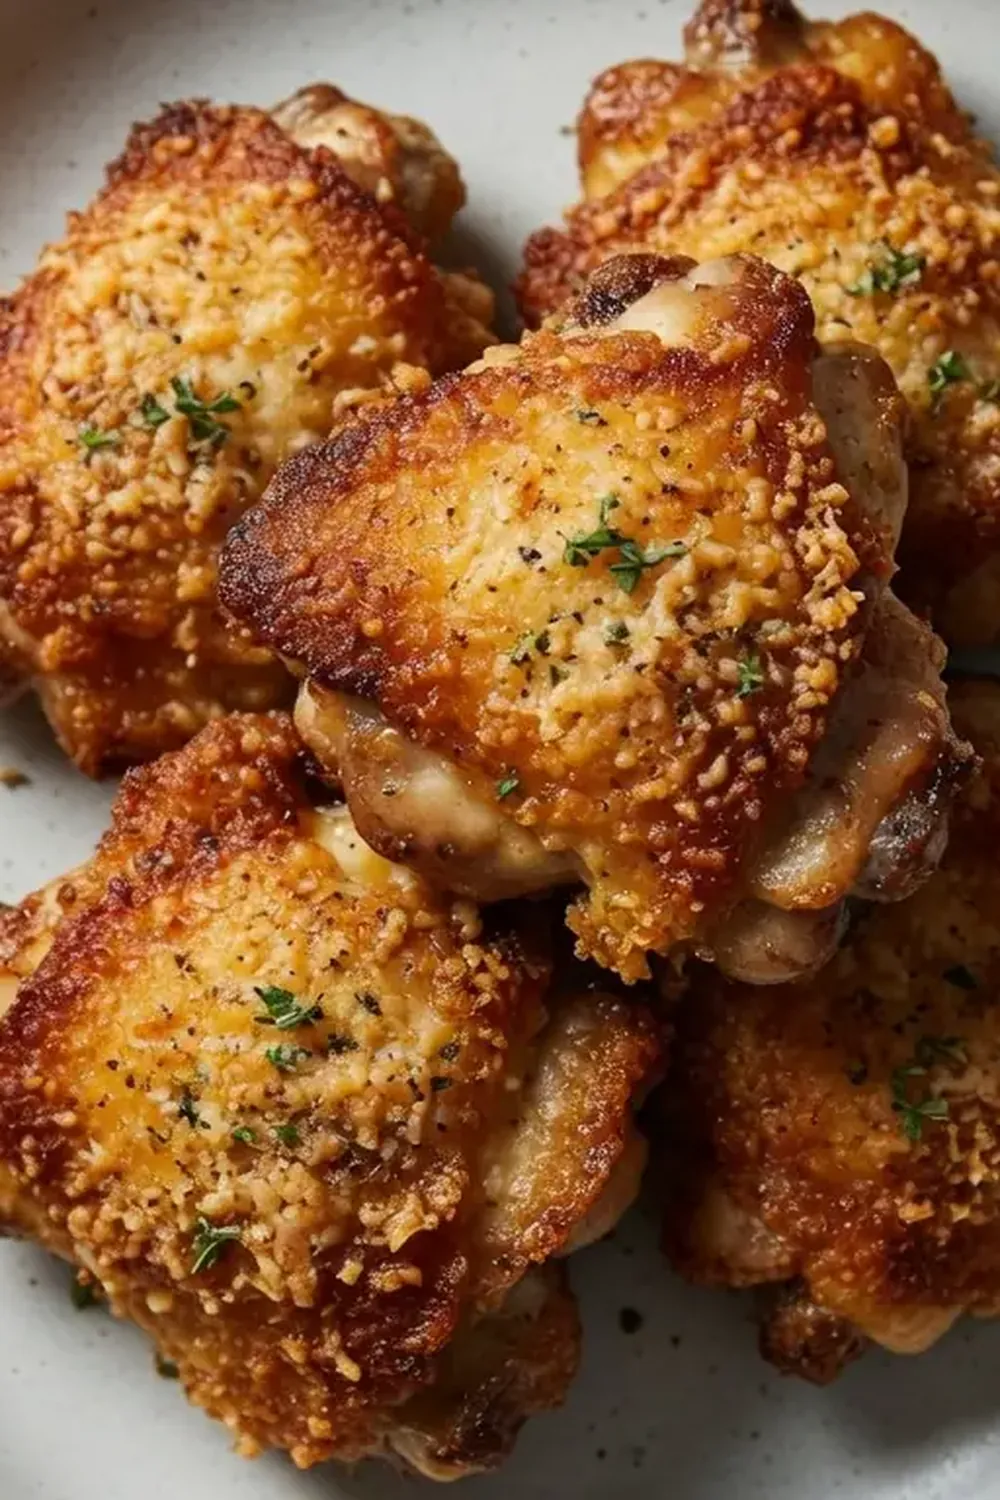
- Coat the chicken: Take one chicken thigh and first dust it in the seasoned flour, shaking off any excess. You’ll see a light, even coating of flour. Next, dip it into the egg mixture, letting any excess drip back into the bowl. Finally, press it firmly into the breadcrumb and parmesan mixture, ensuring every surface is covered. The coating should look thick and textured, with visible bits of cheese.
- Heat the oil: Pour the oil into a large frying pan or skillet over a medium-high heat. Let it heat for about 2 minutes. To test, flick a single breadcrumb into the oil; if it sizzles immediately and turns golden within 30 seconds, the oil is ready. You want a shimmering surface, not smoking.
- Cook the chicken: Carefully place 3-4 chicken thighs into the hot pan, ensuring they are not touching. You should hear a vigorous, steady sizzle as soon as they hit the oil. Cook for 5-6 minutes without moving them. You’ll notice the edges of the crust turning a deep, nutty golden brown, and the smell of frying parmesan will fill your kitchen.
- Flip and finish: Using a spatula, carefully flip each thigh. The cooked side should be a rich, golden brown with a crispy, firm texture. Cook for another 5-6 minutes. The chicken is ready when the internal temperature reaches 74°C, or when the juices run clear when pierced with a knife. The crust should feel hard and crunchy to the touch.
- Rest and serve: Transfer the cooked chicken thighs to a wire rack set over a baking tray. This is crucial for keeping the crust crisp. Let them rest for 5 minutes. You’ll see the steam rising off them as they settle. Garnish with fresh parsley and serve immediately with lemon wedges for squeezing.
Tips From My Kitchen
- Grate your own parmesan: Pre-grated cheese often contains anti-caking agents that stop it from melting properly. Grating it yourself from a wedge ensures it melts into the breadcrumb crust, creating a much more cohesive and crunchy coating. The texture will be noticeably more brittle and crisp.
- Don’t skip the flour: The flour layer acts as a dry base for the egg to cling to. Without it, the egg can slide off the chicken, and your breadcrumb crust will peel away during cooking. You’ll see a much better adhesion when you take this extra step.
- Use a wire rack for resting: Placing the cooked chicken on a wire rack instead of a plate prevents steam from getting trapped underneath. This steam would soften the crust in seconds, turning it from crunchy to chewy. The rack allows air to circulate all around the thigh.
- Check your oil temperature: If the oil is too cold, the chicken will absorb grease and become heavy and soggy. If it’s too hot, the outside will burn before the inside is cooked. A steady medium-high heat is your friend. The sizzle should be active but not violent.
- Flatten for even thickness: Chicken thighs are naturally thicker at one end. Flattening them to a uniform thickness means they cook at the same rate, so you avoid having a perfect crust on one side and an undercooked centre. You’ll feel the difference in texture when you cut into it.
Equipment You’ll Need
- Large frying pan or skillet
- Sharp knife and cutting board
- Mixing bowls
- Wooden spoon or spatula
- Rolling pin or heavy pan (for flattening)
- Cling film
- Wire rack and baking tray
- Meat thermometer (recommended)
Common Mistakes to Avoid
- Overcrowding the pan: If you add too many chicken thighs at once, the temperature of the oil drops dramatically. Instead of frying, the chicken begins to steam. This results in a pale, soft crust instead of a golden, crunchy one. Cook in batches and keep the first batch warm in a low oven (100°C) on the wire rack.
- Wrong temperature: Cooking over too low a heat is the most common error. The fat soaks into the breadcrumb mixture, leaving it greasy. Aim for a steady medium-high heat. If you see the oil smoking, turn it down immediately. A good visual cue is that the oil should shimmer, not smoke.
- Skipping the rest time: Cutting into the chicken straight from the pan releases all the juices onto your plate, leaving the meat dry. Resting for 5 minutes allows the juices to redistribute throughout the thigh, ensuring every bite is moist and tender. You’ll notice the difference in the texture of the meat.
What to Serve With Crispy Parmesan Crusted Chicken Thighs
- A simple rocket and parmesan salad with a lemon vinaigrette
- Buttered green beans or steamed asparagus
- Creamy mashed potatoes or a smooth polenta
- Roasted cherry tomatoes and courgettes
- A side of garlic bread for mopping up any juices
Frequently Asked Questions
Crispy Parmesan Crusted Chicken Thighs
Ingredients
Method
- Prepare the chicken: Place the chicken thighs between two sheets of cling film and gently flatten them with a rolling pin or the bottom of a heavy pan until they are about 1.5cm thick. This ensures even cooking. You should feel the meat give slightly under the pressure, and you'll see the thighs become a uniform, even shape.
- Set up your dredging station: In a shallow bowl, whisk the eggs with a tablespoon of water until they are a pale, uniform yellow and slightly frothy. In a second bowl, mix the flour, garlic powder, onion powder, smoked paprika, salt, and pepper. In a third bowl, combine the panko breadcrumbs with the grated parmesan, mixing them with your fingers so the cheese is well distributed.
- Coat the chicken: Take one chicken thigh and first dust it in the seasoned flour, shaking off any excess. You'll see a light, even coating of flour. Next, dip it into the egg mixture, letting any excess drip back into the bowl. Finally, press it firmly into the breadcrumb and parmesan mixture, ensuring every surface is covered. The coating should look thick and textured, with visible bits of cheese.
- Heat the oil: Pour the oil into a large frying pan or skillet over a medium-high heat. Let it heat for about 2 minutes. To test, flick a single breadcrumb into the oil; if it sizzles immediately and turns golden within 30 seconds, the oil is ready. You want a shimmering surface, not smoking.
- Cook the chicken: Carefully place 3-4 chicken thighs into the hot pan, ensuring they are not touching. You should hear a vigorous, steady sizzle as soon as they hit the oil. Cook for 5-6 minutes without moving them. You'll notice the edges of the crust turning a deep, nutty golden brown, and the smell of frying parmesan will fill your kitchen.
- Flip and finish: Using a spatula, carefully flip each thigh. The cooked side should be a rich, golden brown with a crispy, firm texture. Cook for another 5-6 minutes. The chicken is ready when the internal temperature reaches 74°C, or when the juices run clear when pierced with a knife. The crust should feel hard and crunchy to the touch.
- Rest and serve: Transfer the cooked chicken thighs to a wire rack set over a baking tray. This is crucial for keeping the crust crisp. Let them rest for 5 minutes. You'll see the steam rising off them as they settle. Garnish with fresh parsley and serve immediately with lemon wedges for squeezing.
Notes
I do hope you give these Crispy Parmesan Crusted Chicken Thighs a try. They truly are a staple in my weekly rotation, and I love hearing how recipes work out for others. For another great way to use chicken, you might also enjoy this Sweet And Spicy Thai Chili Chicken Recipe for a different flavour profile. If you’re looking for something indulgent for a party, these French Dip Sliders Recipe Party Appetizer are always a winner. Let me know in the comments below how your chicken turned out – I can’t wait to hear about your crispy success!